
It is best to clean glass with special preparations that are neutral to plastic and rubber parts and do not leave streaks after drying.
Recommendation. Since there may be some differences in the application of glass cleaning products, we strongly recommend that you read the enclosed instructions before starting work. It is better to combine washing the outside of the glass with washing the car body.
In addition to washing the car windows from the outside, it is necessary to periodically wash the windows from the inside, as a film gradually forms on them, which significantly interferes with driving at night and in sunny weather.
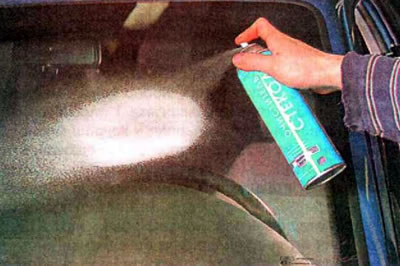
The standard glass cleaning procedure is as follows.
1. Spray a special glass cleaner onto the glass.
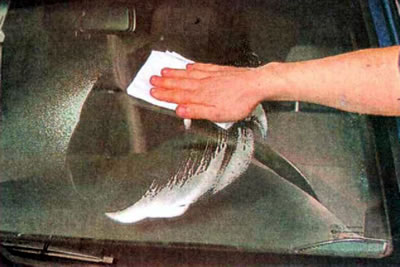
2. Wipe the glass dry with a soft cloth or paper napkin until the streaks disappear.
3. We wash the remaining windows in the same way, outside and inside.
To prevent the glass from fogging up, we coat it with a special agent that repels dirt from the treated surface, makes cleaning easier and has anti-fogging and anti-static properties.
To care for car windows in winter, de-icers, defrosting agents and other types of liquids for glass treatment are produced. These products contain substances that help quickly remove ice and frost from car windows.
Windshield Repair
During vehicle operation, damage to the windshield may occur (chips, cracks). If the damage is significant and is located in the driver's field of vision, the glass must be replaced.
Small chips or cracks (no more than 200 mm long) on the windshield can be repaired using a special set of repair materials. To prevent the damage area from increasing, repairs should be started as quickly as possible. Due to body vibrations that occur when the car is moving, temperature changes, and even a small chip, a crack may appear. If the crack growth is not stopped in time, the windshield will need to be replaced.
The rest of the car's glass undergoes special heat treatment during production, which increases its strength. Thanks to this, they do not chip. But if hit hard, such glass shatters into small pieces and cannot be repaired.
To complete the job you will need a glass repair kit and a blade (from a safety razor), food film.
The windshield repair kit is designed to repair three types of damage.
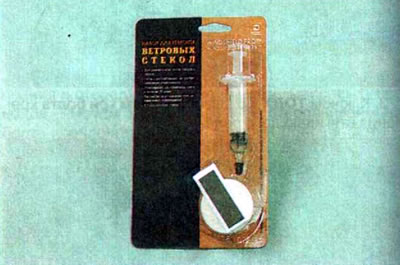
The kit includes a syringe filled with repair compound, an applicator for filling chips, and rings with an adhesive surface for installing the applicator on the glass. The ready-to-use repair compound hardens in sunlight within 20 minutes. It is advisable to carry out the work in the warm season and on a sunny day. On a cloudy day, it will take significantly longer for the repair compound to harden.
Warning: Do not wash the vehicle windshield before performing the work. The glass must be dry.
If you are going to do the work on a hot sunny day, first move the car to the shade and open the doors or roll down the windows to allow the heated windshield to cool down.
Crack repair
We carry out the work in the following order.
1. We prepare the car for maintenance and repair.
2. Wipe the glass with a clean soft cloth.

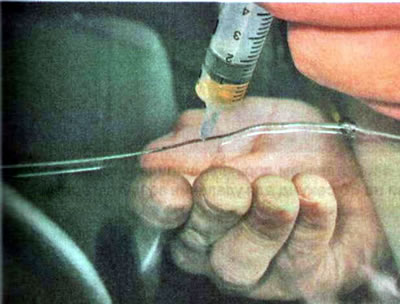
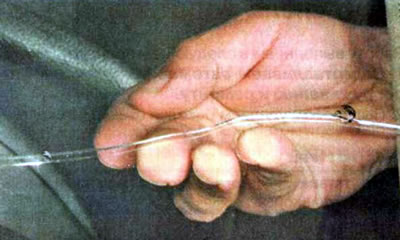
3. Remove the cap from the syringe and press the end of the syringe firmly against the glass at the end of the crack.
4. Slowly and smoothly moving the syringe along the crack, squeeze out the repair compound.
Comment.
- The crack must be filled gradually, from its end to its beginning. If the crack has several branches, you should start with the smallest branch. To better fill the crack and remove air from it, you can gently press on the glass under the crack.
- Do not apply significant force to avoid widening the crack.
5. After filling the crack with resin, put the cap on the syringe.
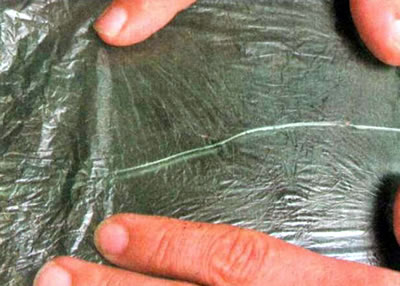
6. Cover the area of glass to be repaired with a piece of cling film.
7. Roll the car out into the sunlight for 20 minutes to allow the repair compound to polymerize.
Recommendation. If the work is carried out on a cloudy day, the polymerization time must be increased by 2-3 times.
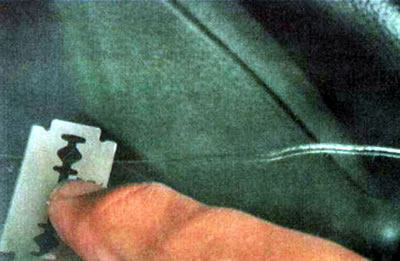
8. Using a safety razor blade, straighten and clean the glass in the repair areas.

9. After completing the repair, remove all dirt from the windshield using special glass cleaning products (see above).
Chip repair
We carry out the work in the following order.
1. We prepare the car for maintenance and repair.
2. Using a vacuum cleaner, remove the glass fragments from the chip.
Note: If you don't have a vacuum cleaner, you can remove the fragments with a needle or pin.
3. Wipe the glass with a clean soft cloth.
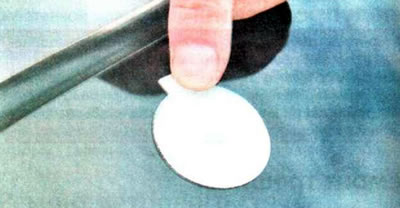
4. Remove the protective film from one side of the ring.
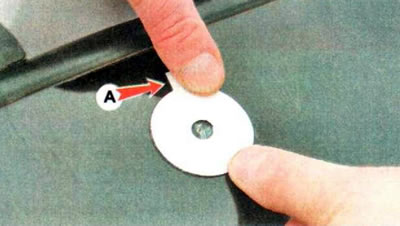
5. Apply the ring to the damaged area of the glass so that the chip is located in the center of the ring and the protrusion A is facing upward.
6. After making sure that the ring is installed correctly, press it firmly against the surface (for secure fixation on glass).
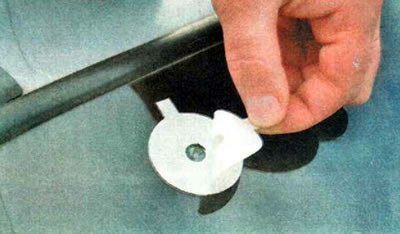
7. Remove the protective film from the other side of the ring.
8. Place the applicator on the ring (aligning its protrusion with the protrusion on the ring) and press firmly.
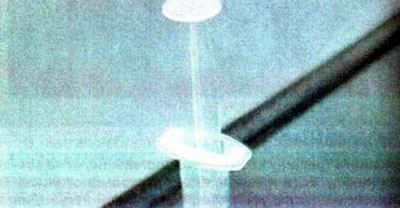
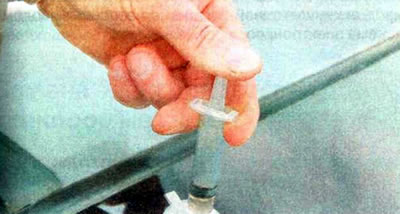
9. Remove the cap from the syringe.
10. Place the syringe into the applicator hole. We pull the syringe plunger back to the mark...
...and turn it to secure it with the stopper.

11. Leave the syringe plunger in this position for 30 seconds to remove air from the chip.
12. Release the piston from the stopper (the piston will then go down).
13. Gently press on the piston until resistance appears.
14. We move the piston back again and fix it on the stopper.
15. After waiting 30 seconds, release the piston and press on it until resistance appears.
16. Repeat the air removal procedure four more times, then release the syringe plunger and leave it in the lower position for 15 minutes.
17. From the inside of the glass, we check that the chip is filled with repair compound.
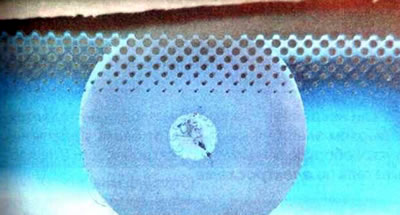
18. If there are visible voids in the chip that are not filled with resin, repeat the air removal procedure.
19. After the chip is filled with repair compound, remove the syringe from the applicator and put the cap on it.
Recommendation. Save the syringe with the remaining resin for later use.
20. Using a safety razor blade, remove the applicator and the remains of the ring.
21. Cover the area to be repaired with cling film.
22. Roll the car out into the sunlight for 20 minutes to allow the resin to polymerize.
Recommendation. If the work is carried out on a cloudy day, the polymerization time must be increased 2-3 times.
23. Using a safety razor blade, remove excess repair compound from the glass and level the surface of the glass at the repair site.
After completing the repair, remove all dirt from the windshield using special glass cleaning products (see above).