


Adjusting the light of the headlights
You can pre-check the direction of the headlights by placing the car opposite a vertical, flat wall at a distance of two to three meters. We turn on the low beam, which should have clear upper boundaries for both headlights, and at the same time their horizontal sections should be at the same level.
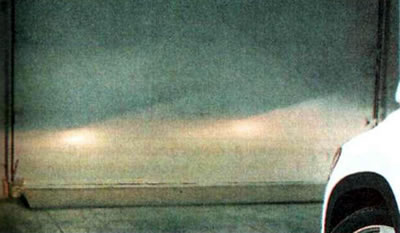
Recommendation. It is advisable to carry out the check at night.
Note: Precise adjustment of the headlight beams is only possible with the use of a special optical device, but if necessary, the headlight beams can be adjusted quite accurately by yourself.
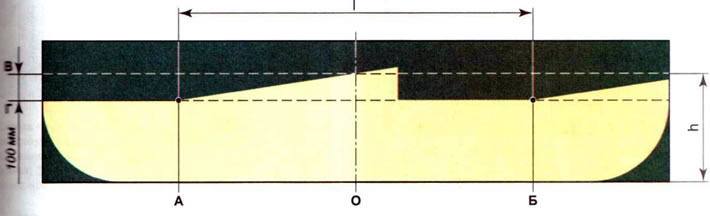
Screen layout diagram for headlight adjustment: A - vertical line indicating the location of the low beam lamp of the left headlight; B - vertical line indicating the location of the low beam lamp of the right headlight; B - horizontal line indicating the location of the low beam lamp centers; G - line indicating the height of the horizontal boundary of the low beam; O - the center line of the car; l — distance between low beam lamps; h — distance from the surface of the platform on which the vehicle is installed to the centers of the low beam lamps
To perform the work, you will need a horizontal platform next to a flat vertical surface (for example, near the wall of a house). If there is no suitable wall, you can use a sheet of plywood or thick cardboard measuring about 1x2 m, in addition you will need a tape measure 10 m long and a small sheet of cardboard to cover one headlight. We do the work with an assistant, otherwise you will need a load weighing about 75 kg.
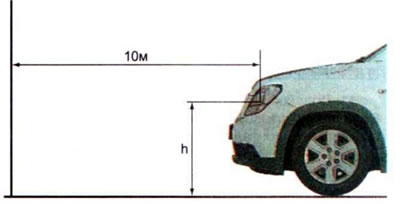
1. We install a fully charged and equipped (spare tire, tools and jack) the car on a flat horizontal surface perpendicular to the selected vertical surface so that the distance from it to the center of the headlight is 10 m.
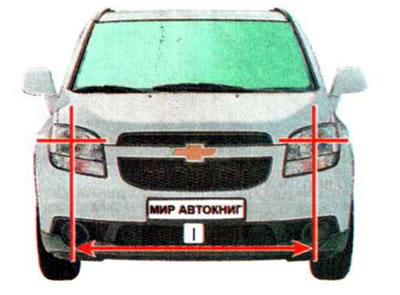
2. Measure the distance between the centers of the low/high beam lamps.
3. Check the tire pressure and, if necessary, bring it up to normal.
4. Set the headlight range control knob to position 0.
5. Place the assistant in the driver's seat (or we lay down the load).
6. Vigorously rock the car to adjust the suspension.
7. Measure the distance h from the surface of the platform to the centers of the low/high beam lamps.
8. Mark the screen. We draw lines A B C and D taking into account the dimensions l and h.
9. Turn on the low beam.
10. Cover the right headlight with a sheet of cardboard.
Note: Do not cover the switched-on headlights with a rag or other objects that impede air access for more than two or three minutes, as the plastic from which the diffusers are made may overheat and deform.
11. Rotate the controls with a 6 mm Allen key or a Phillips screwdriver to move the light border horizontally...
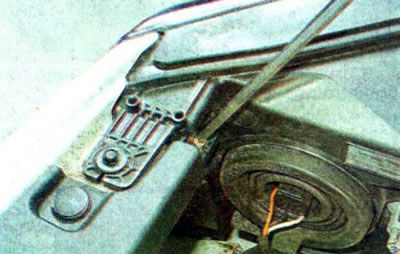
...and vertically...
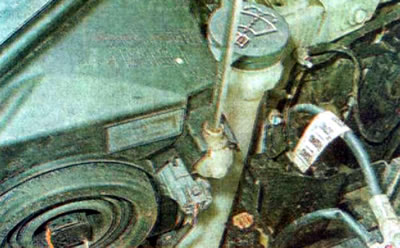
...aligning the bend of the light boundary with the intersection of lines A and G.
12. Close the left headlight and similarly adjust the low beam on the right. In this case, align the bend of the light border with the intersection of lines B and G.
If the light border is unclear, then the low beam lamp may be faulty or the headlight diffuser may be damaged. The clouded plastic of the diffuser can be restored to transparency by polishing the headlights.