
ChevyMan.ru
Mazda Mitsubishi Toyota Land Rover Honda Kia Nissan
English Русский
Български
Беларускі
Український
Српски
Hrvatski
Română
Polski
Slovenský
Magyar
|
Articles | Sitemap | Contacts |


Home   Aveo   Captiva   Cruze   Lacetti   Lanos   Niva   Tahoe   Others  
Orlando 1 (2010-2018) Trailblazer 1 (2001-2008, petrol) Lumina 1 (1989-1994)
  • Home
  • Chevrolet
  • Orlando 1
  • Electrical equipment
  • Equipment and devices
  • Parking radar

Parking radar (Chevrolet Orlando 1)

            0

When parking in tight urban conditions, reversing is the most difficult. This is due to a worse sense of size (because the rear bumper is further from the driver than the front one, which distorts the perception of distances), and also with poor visibility, usually caused by the high position of the lower edge of its glass. In such a situation, parking radar can be very useful. On many vehicles, parking radars are installed at the factory at the customer's request. However, if the manufacturer has not provided such an option or you have bought a used car, on which installing a standard radar is unreasonable, a universal parking radar installation kit will help you. Such kits are produced by many companies, but the cost of similar kits from different manufacturers is approximately the same.

The kits differ from each other in the type of display (conventional, LED, LCD, built-in rearview mirror or freestanding, etc.), number of sensors (two, four or more), the ability of the radar to monitor only the rear part of the car or also the front, etc. The price of the kit also depends on other parameters. The difference in cost between the simplest and most complex kits can be several times. Therefore, when buying, decide for yourself what you really need and how much you are willing to pay for it.

In this section we will consider the installation of the most popular kit with an LED display and four sensors, which monitors only the rear of the car.
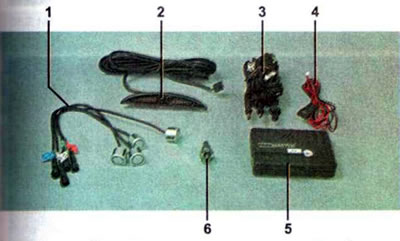
Parking radar installation kit: 1 - ultrasonic sensors; 2 - indicator display with wiring harness;…

Parking radar installation kit: 1 - ultrasonic sensors; 2 - indicator display with wiring harness; 3 - wire harnesses for connecting sensors; 4 - wires for supplying power voltage; 5 — radar control unit; 6 - special drill with cutter


To complete the work you will need a tape measure, a drill, and a drill bit with a diameter equal to the sensor mounting diameter (usually included in the delivery package), plastic ties and a puller for upholstery holders, a drill with a diameter of 10-15 mm. You may need a round file or a needle file.

1. We prepare the car for maintenance and repair.

2. Mark the places for installing the sensors on the rear bumper (depending on the number of sensors included in the delivery set). The sensors must be located symmetrically relative to the vertical axis of the vehicle and at a distance of 0.5–0.6 m from the ground.
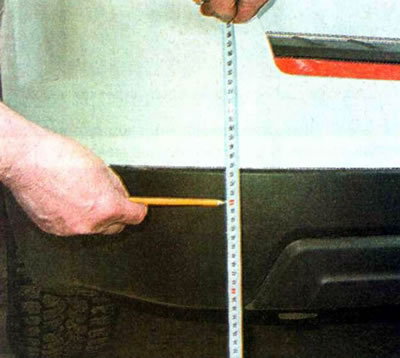
2. Mark the places for installing the sensors on the rear bumper (depending on the number of…


3. Using a special drill with a cutter (usually included in the parking radar installation kit)...
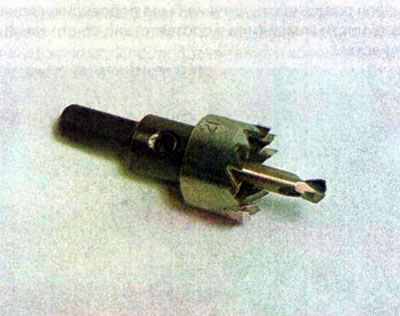
3. Using a special drill with a cutter (usually included in the parking radar installation kit)...


... we make holes in previously marked places.
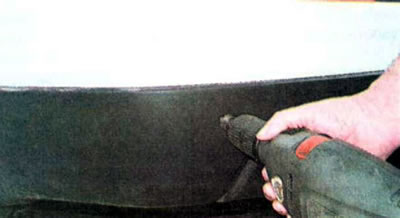


... we make holes in previously marked places.


Comment.
  • Sensors (on the back side) may be marked to ensure their correct orientation.
  • Sensors (on the back side) may be marked to ensure their correct orientation.
  • These sensors should be installed with the arrow pointing upwards.
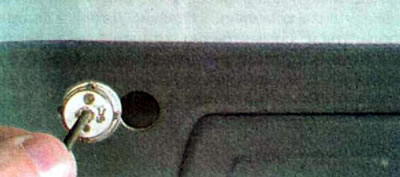

4. We pass the sensor wire through the hole under the bumper.
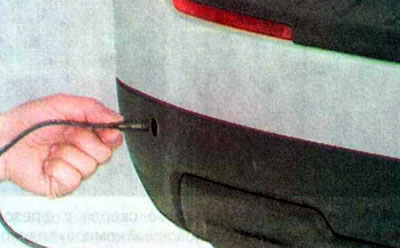
4. We pass the sensor wire through the hole under the bumper.


5. Install the sensor in the hole so that the front surface of the sensor is perpendicular to the surface of the ground (or in accordance with the arrow, if any).
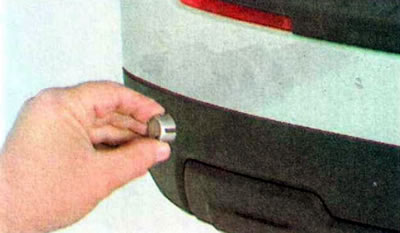


5. Install the sensor in the hole so that the front surface of the sensor is perpendicular to the…


6. Press on the sensor until it is fixed in the bumper.
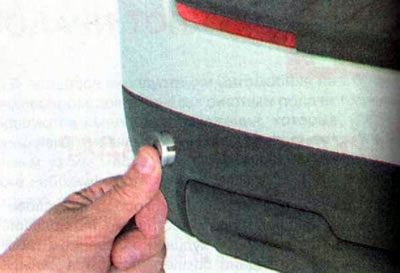
6. Press on the sensor until it is fixed in the bumper.


Note: The wiring harness and sensors are marked with Latin letters. When installing, it is necessary that when looking at the car from behind, the wiring harness pads and sensors are located in alphabetical order from left to right (if the display is installed on the instrument panel or rearview mirror) either from right to left (if the display is installed on the rear shelf).


7. Install the remaining sensors in the same way.

8. To lay the wiring harness to the sensors, remove the tool box. To do this, lift the lid and remove the tool.
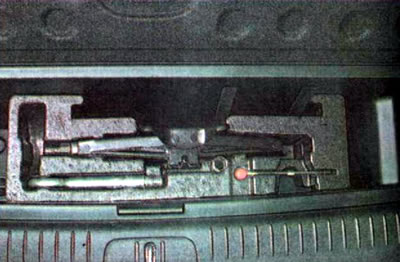
8. To lay the wiring harness to the sensors, remove the tool box. To do this, lift the lid and…


9. Using a 10 mm socket wrench, unscrew the two mounting bolts.
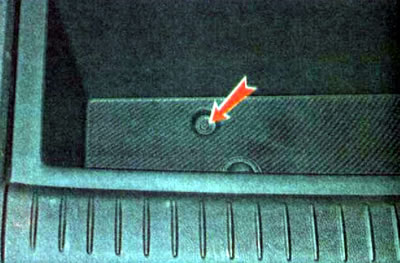


9. Using a 10 mm socket wrench, unscrew the two mounting bolts.


10. Remove the plug and pull it up...
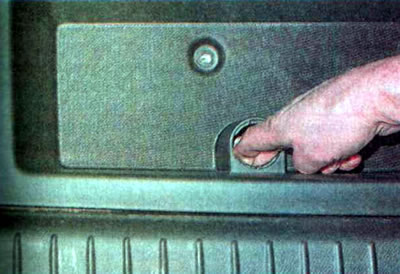
10. Remove the plug and pull it up...


... we remove the box.
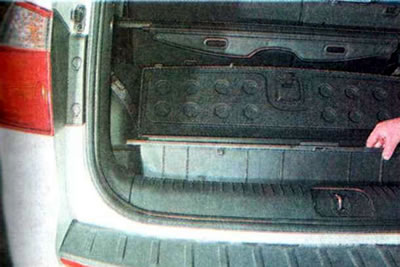
... we remove the box.


11. We lay the wiring harness through the hole in the rear wall of the luggage compartment...
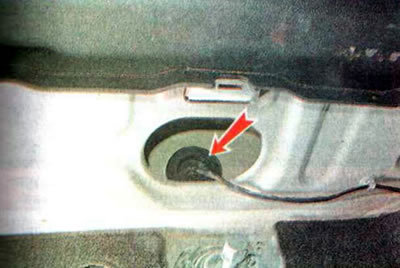
11. We lay the wiring harness through the hole in the rear wall of the luggage compartment...


12. Under the rear bumper, connect the sensor wires to the wiring harness in accordance with the connector designations.
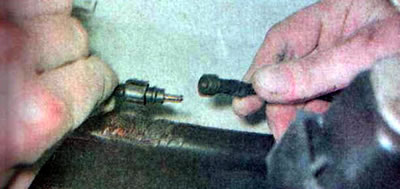


12. Under the rear bumper, connect the sensor wires to the wiring harness in accordance with the…


Note: The display is attached using a special sticker with an adhesive layer.


13. Install the parking radar display in a convenient location for the driver (for example, on the dashboard, on the rear view mirror or on the rear shelf) and we lay the wiring harness from the indicator to the rear left wing. In the process of laying the wiring harness, we dismantle the necessary interior parts.

14. Wipe with a clean cloth and degrease with white spirit a small area on the inside of the rear wall.
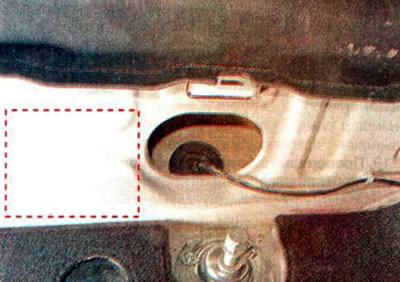
14. Wipe with a clean cloth and degrease with white spirit a small area on the inside of the rear…


15. Separate the holder from the radar control unit, remove the protective film from the adhesive base and glue it to the degreased area of the rear wing.
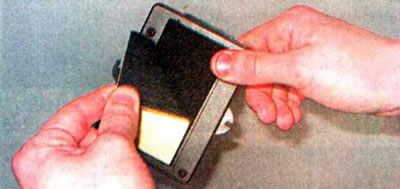
15. Separate the holder from the radar control unit, remove the protective film from the adhesive…


16. Connect the pads 1 of the sensor wire harnesses to the control unit (the markings on the harnesses must match the markings on the connectors on the unit), connector 2 of the power supply wires and connector 3 of the display wire harness.
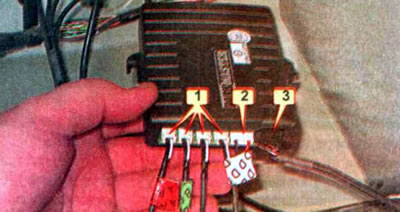
16. Connect the pads 1 of the sensor wire harnesses to the control unit (the markings on the…


17. Install the control unit on the holder glued to the wing.

18. Connect the +12 V power wire of the control unit (for the kit shown it is the red wire) to the green-white wire of the wiring harness 1. The second wire of the power supply of the unit (black wire) we connect it to the black wire of harness 2.
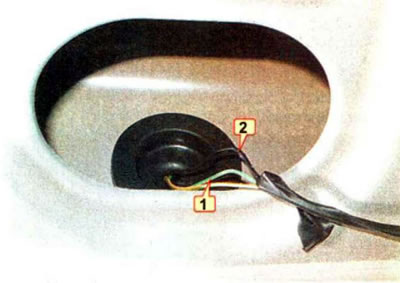
18. Connect the +12 V power wire of the control unit (for the kit shown it is the red wire) to the…


19. We check the operation of the parking radar by placing various objects in front of the rear bumper at different distances. If necessary, we reinstall the sensors, changing their orientation.

Note: The radar operates when the ignition is on and the automatic transmission selector lever is in position R or reverse gear is engaged in the manual transmission.


20. Secure all hanging wiring harnesses of the parking radar. We install the luggage compartment upholstery and other removed interior parts.

(The original material is located on the website «CHEVYMAN.RU»)

The article was checked: Vladimir Romannikov
This article is available at russian, bulgarian, belarusian, ukrainian, serbian, croatian, romanian, polish, slovak, hungarian

Share information:

Previous articles
Orlando 1: Equipment and devices
Next articles

Rear window heating
A multimeter is a combined electrical measuring instrument
Lamps used in the car
Sound signal
Rear light
Interior and luggage compartment lighting lamps
Steering column switches
Headlight adjustment
Relays — General information and performance testing
License plate light


See similar articles on the topic of Chevrolet cars:
Checking the parking brake Chevrolet Aveo T300 (2012-2018)
Car parking Chevrolet Captiva 1 (2006-2018)
Checking the parking brake Chevrolet Cruze 1 (2008-2016)
Adjusting the parking brake Chevrolet Lacetti 1 (2002-2009)
Adjusting the parking brake Chevrolet Lanos T150 (2002-2009)
Braking and parking Chevrolet Niva 1 (2002-2016)
Parking brake — adjustment Chevrolet Tahoe 1 (1992-2000)
Link in different formats to this page


Visitor comments

No comments yet


How much will 14 + 39 =


Orlando 1 (2010-2018) 
  • General information
  • Introduction to manual
  • User manual
  • Maintenance
  • Troubleshooting
  • Power unit
  • Engine repair
  • Fuel and control system
  • Cooling and lubrication system
  • Ignition system
  • Transmission
  • Clutch
  • Gearbox
  • Drive shafts
  • Chassis
  • Car suspension
  • Steering
  • Brake system
  • Body
  • Exterior (external elements)
  • Doors, locks and windows
  • Electrical equipment
  • Equipment and devices
  • Windscreen wipers
  • Power devices
  • Electrical diagrams


Trailblazer 1 (2001-2008) 
  • General information
  • User manual
  • Troubleshooting
  • Maintenance
  • Power unit
  • Engine in a car
  • Engine overhaul
  • Cooling and heating
  • Fuel and exhaust system
  • Engine electrical equipment
  • Engine control
  • Transmission
  • Automatic gearbox
  • Transfer case
  • Drive shafts and cardan
  • Chassis
  • Brake system
  • Car suspension
  • Steering
  • Body
  • Exterior (external elements)
  • Interior (internal elements)
  • Doors, locks and windows
  • Electrical equipment
  • Equipment and devices
  • Electrical circuits


Lumina 1 (1989-1994) 
  • General information
  • Maintenance
  • Power unit
  • Engine 3.1L V6
  • Engine 3.8L V6
  • Engine overhaul
  • Cooling system
  • Power and exhaust system
  • Fuel injection
  • Engine electrical equipment
  • Reduced exhaust gas toxicity
  • Transmission
  • Automatic gearbox
  • Drive shafts
  • Chassis
  • Brake system
  • Car suspension
  • Steering
  • Body
  • Heating and air conditioning
  • Repair of body elements
  • Doors, covers and windows
  • Interior (internal elements)
  • Electrical equipment
  • Equipment and devices
  • Electrical circuits


ChevyMan.ru © 2017-2026 · Mobile version · Feedback · Site search · Interesting to read · Sitemap: EN BG BY UA RS HR RO PL SK HU

Aveo 2003-2008 · Aveo 2006-2011 · Aveo 2012-2018 · Captiva 2006-2018 · Cruze 2008-2016 · Lacetti 2002-2009 · Lanos 2002-2009 · Niva 2002-2016 · Tahoe 1992-2000 · Tahoe 2000-2014 · Lumina 1 1989-1994 · Trailblazer 1 2001-2008 · Orlando 1 2010-2018 ·
🛡️ For your security and to improve our service, this site uses cookies. You can disable them in your browser.