
2. Inspect the terminals at the ends of the wires for cracks, exposed wire, and corrosion. The presence of loose white deposits under the insulation on the wire terminals indicates that the wiring is susceptible to corrosion. In this case, the wires should be replaced. Make sure the battery terminals are not warped or corroded and that all terminal bolts are installed and tightened.
3. When replacing wires, always disconnect the negative battery cable first and reconnect it last. Otherwise, there is a risk of short-circuiting the battery with the tool used to loosen or tighten the terminals. Even if you are replacing only the positive cable, make sure that the negative cable is disconnected from the battery first (chapter 1 provides additional information on wiring maintenance).
4. Disconnect the wires from the battery, then disconnect the opposite ends of the cables. Disconnect the wires from the starter solenoid valve, the distribution block located in the engine compartment, and also (if necessary) from the contacts of the grounding circuit (see illustration). It is necessary to mark the original route of each battery wire.
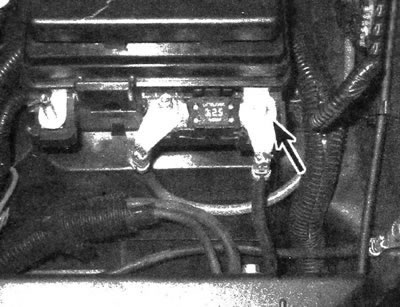
4.4a. One of the positive battery cable leads is connected to the distribution block located in the engine compartment
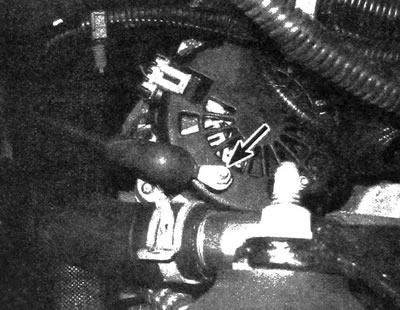
4.4b. Disconnect the wire from the generator
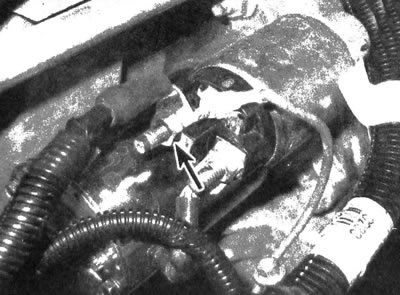
4.4s. Disconnect the wire from the starter
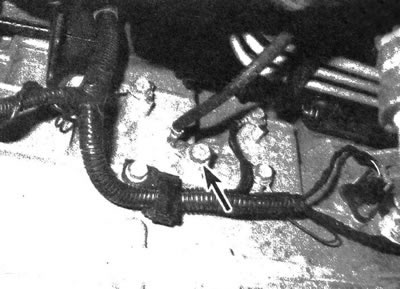
4.4d. The negative battery cable is attached to the engine block
5. If one or both wires are to be replaced, it is recommended that you take them to an automotive store to compare with the new cables. It is extremely important to replace the wires with new cables that have similar length and diameter. The positive wire is highlighted in red and has a larger cross-section than the negative cable, which is usually highlighted in black.
6. Remove any corrosion from the threads of the starter solenoid valve clamp or ground loop connector. using a wire brush. Apply a thin layer of petroleum jelly or rust converter to the threads to prevent further corrosion from forming.
7. Connect the wire to the terminal and tighten the mounting nut/bolt securely.
8. Before connecting the new cable to the battery, make sure the cable reaches the terminal without tension.
The text of the article was obtained from the website: ChevyMan.ru