
ChevyMan.ru
Mazda Mitsubishi Toyota Land Rover Honda Kia Nissan
English Русский
Български
Беларускі
Український
Српски
Hrvatski
Română
Polski
Slovenský
Magyar
|
Articles | Sitemap | Contacts |


Home   Aveo   Captiva   Cruze   Lacetti   Lanos   Niva   Tahoe   Others  
Orlando 1 (2010-2018) Trailblazer 1 (2001-2008, petrol) Lumina 1 (1989-1994)
  • Home
  • Chevrolet
  • Trailblazer 1
  • Power unit
  • Engine overhaul
  • Engine Removal — Methods and Precautions

Engine Removal — Methods and Precautions (Chevrolet Trailblazer 1)

            0

If you plan to remove the engine for major repairs, take precautions.

Choosing the right place to work is extremely important. In addition to space for the car, you will need space to carry out the work. If it is not possible to carry out repairs at a service station or in a garage, then at least a free, level area with asphalt or concrete pavement will be required.

Cleaning the engine bay and engine before beginning the removal procedure will help keep your tools clean (see illustrations 6.1 and 6.2).
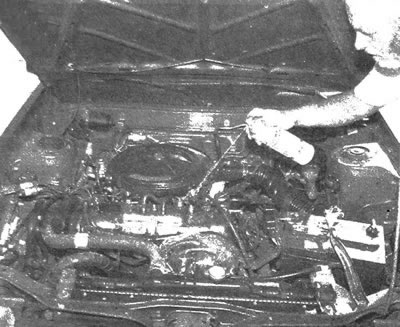
6.1. Insulate the parts that must not be exposed to moisture, then apply a degreaser spray to the…

6.1. Insulate the parts that must not be exposed to moisture, then apply a degreaser spray to the engine surfaces. Particularly generous treatment should be given to oily areas such as the valve cover joint and the lower edge of the cylinder block. If the oily surface dries out after applying the product, treat it again
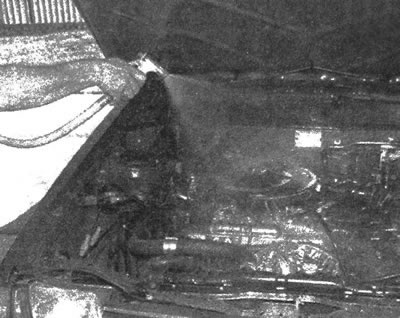

6.2. Wait until the degreaser is absorbed, then rinse it off together with the dissolved dirt with…

6.2. Wait until the degreaser is absorbed, then rinse it off together with the dissolved dirt with water from a hose. Direct the stream of water from the hose to all accessible areas. After this, dry all the elements that should not remain wet with an electric hair dryer or damp paper towels


To remove and then install the engine in the engine compartment, you will need an electric hoist or winch. Make sure that the class and safety factor of the lifting equipment is suitable for the weight of the engine and attachment. When removing an engine from a vehicle, safety is of the utmost importance.

If you are not completely sure that you have sufficient experience to perform the procedures described, it is advisable to involve an assistant in the work. It is very useful to consult with a more experienced mechanic. It is often quite difficult to perform procedures that require removing the engine from the vehicle alone.

Plan your renovations in advance. Before starting work, provide yourself with all the necessary tools and equipment (see illustrations 6.3 and 6.4). In addition to the hoist, you will need the following to remove the engine: a heavy-duty hydraulic jack, the wrench and socket set described at the beginning of this guide, blocks of wood, and enough cloths and solvent to wipe up any spilled oil, coolant, and fuel. If you plan to rent a lift, agree on this in advance and perform all possible operations that can be carried out without it. This will help you save money and time.
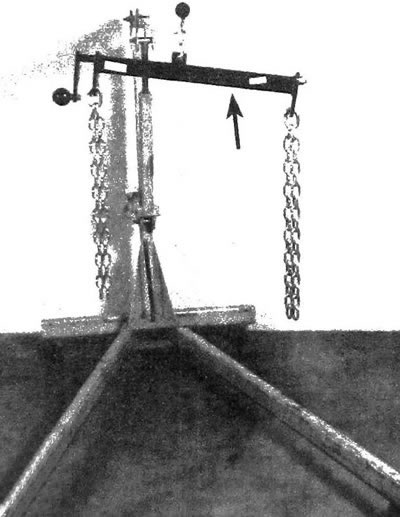
6.3. Select a winch with a lifting capacity that will allow the engine to be extracted and removed…

6.3. Select a winch with a lifting capacity that will allow the engine to be extracted and removed from the engine compartment. To change the engine position angle during removal or installation, it is necessary to use an additional device similar to the one shown in the illustration
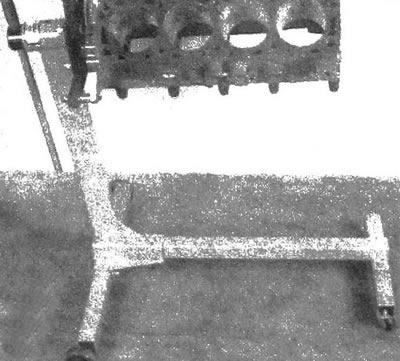


6.4 Before performing work, ensure that the stand on which the engine is mounted is sufficiently…

6.4 Before performing work, ensure that the stand on which the engine is mounted is sufficiently stable. Do not use three-wheeled stands, as they are much more likely to tip over than four-wheeled ones


Plan to not use your car for a certain amount of time. Work that requires the use of special equipment should be entrusted to service station specialists. It is also necessary to take into account the density of the work schedule of such a station and consult with professionals before removing the engine to estimate the time required to restore the elements of the power unit.

When removing and installing the engine, certain safety requirements must be observed - careless actions can result in serious injury. When planning the timing of the work, it is necessary to take into account not only the implementation of basic repair procedures, but also the need to perform many additional operations.

Original version of the article on the website CHEVYMAN.RU

The article was checked: Vladimir Romannikov
This article is available at russian, bulgarian, belarusian, ukrainian, serbian, croatian, romanian, polish, slovak, hungarian

Share information:

Previous articles
Trailblazer 1: Engine overhaul
Next articles

Alternative methods of engine restoration
Position of TDC of the first piston — location
Checking the compression in engine cylinders and diagnostics with vacuum measurement
Checking oil pressure
General information — engine overhaul
Engine — removal and installation
Engine Overhaul — Disassembly Sequence
Pistons and connecting rods — removal and installation
Crankshaft — removal and installation
Engine Overhaul — Assembly Sequence


See similar articles on the topic of Chevrolet cars:
The engine will not start Chevrolet Aveo T300 (2012-2018)
Airbag system — precautions Chevrolet Captiva 1 (2006-2018)
The engine will not start Chevrolet Cruze 1 (2008-2016)
Starting the engine from another car's battery («jump-starting») Chevrolet Lacetti 1 (2002-2009)
Starting the engine from another car's battery (jump-starting) Chevrolet Lanos T150 (2002-2009)
Starting the engine Chevrolet Niva 1 (2002-2016)
Starting a gasoline engine Chevrolet Tahoe 1 (1992-2000)
Link in different formats to this page


Visitor comments

No comments yet


How much will 42 + 38 =


Orlando 1 (2010-2018) 
  • General information
  • Introduction to manual
  • User manual
  • Maintenance
  • Troubleshooting
  • Power unit
  • Engine repair
  • Fuel and control system
  • Cooling and lubrication system
  • Ignition system
  • Transmission
  • Clutch
  • Gearbox
  • Drive shafts
  • Chassis
  • Car suspension
  • Steering
  • Brake system
  • Body
  • Exterior (external elements)
  • Doors, locks and windows
  • Electrical equipment
  • Equipment and devices
  • Windscreen wipers
  • Power devices
  • Electrical diagrams


Trailblazer 1 (2001-2008) 
  • General information
  • User manual
  • Troubleshooting
  • Maintenance
  • Power unit
  • Engine in a car
  • Engine overhaul
  • Cooling and heating
  • Fuel and exhaust system
  • Engine electrical equipment
  • Engine control
  • Transmission
  • Automatic gearbox
  • Transfer case
  • Drive shafts and cardan
  • Chassis
  • Brake system
  • Car suspension
  • Steering
  • Body
  • Exterior (external elements)
  • Interior (internal elements)
  • Doors, locks and windows
  • Electrical equipment
  • Equipment and devices
  • Electrical circuits


Lumina 1 (1989-1994) 
  • General information
  • Maintenance
  • Power unit
  • Engine 3.1L V6
  • Engine 3.8L V6
  • Engine overhaul
  • Cooling system
  • Power and exhaust system
  • Fuel injection
  • Engine electrical equipment
  • Reduced exhaust gas toxicity
  • Transmission
  • Automatic gearbox
  • Drive shafts
  • Chassis
  • Brake system
  • Car suspension
  • Steering
  • Body
  • Heating and air conditioning
  • Repair of body elements
  • Doors, covers and windows
  • Interior (internal elements)
  • Electrical equipment
  • Equipment and devices
  • Electrical circuits


ChevyMan.ru © 2017-2026 · Mobile version · Feedback · Site search · Interesting to read · Sitemap: EN BG BY UA RS HR RO PL SK HU

Aveo 2003-2008 · Aveo 2006-2011 · Aveo 2012-2018 · Captiva 2006-2018 · Cruze 2008-2016 · Lacetti 2002-2009 · Lanos 2002-2009 · Niva 2002-2016 · Tahoe 1992-2000 · Tahoe 2000-2014 · Lumina 1 1989-1994 · Trailblazer 1 2001-2008 · Orlando 1 2010-2018 ·
🛡️ For your security and to improve our service, this site uses cookies. You can disable them in your browser.