


To start a working engine, it is enough to just turn on the starter without touching the accelerator pedal. On a car with a manual transmission, you also need to press the clutch pedal. The engine management system will automatically set the fuel supply and ignition timing parameters necessary for starting.
The crankshaft does not turn with the starter
It happens that the starter "does not respond" to the ignition key or barely turns the engine crankshaft. Sometimes the crankshaft does not turn, but when the starter is turned on, multiple clicks are heard.
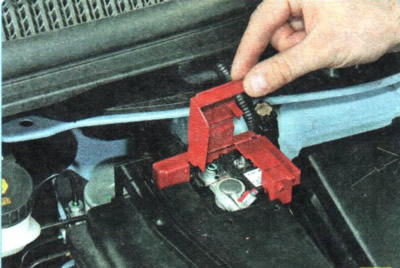
The cause is usually a discharged battery or loosely tightened wire terminals on its terminals. If the wire terminals are tightly tightened and the starter "does not turn", you can try to start the engine using a "donor" battery (see "Starting the engine from external power sources").
TIP: If the battery is completely discharged after the vehicle has just been stopped, check the battery charging system (see "The battery is not recharging").
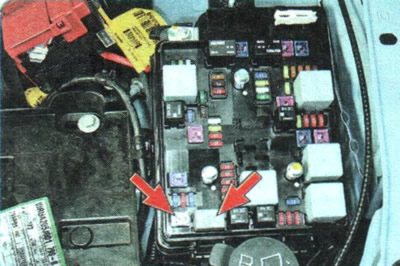
If the starter armature does not start to rotate even though the battery is in good condition, check whether fuse link No.54 has burned out and whether starter relay No.55 is securely fastened in the engine compartment mounting block.
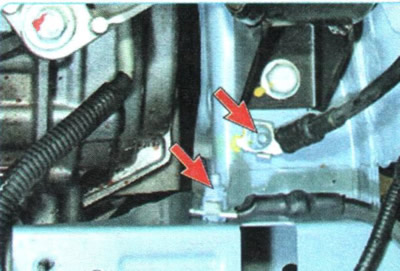
In addition, in road conditions, you can check the fastening of the "mass" wires of the battery and starter to the body. To do this, remove the battery shelf (see "Removal and installation the battery mounting shelf").
To further check the starting system, you will have to call a tow truck, since the car needs to be installed on a lift or inspection pit.
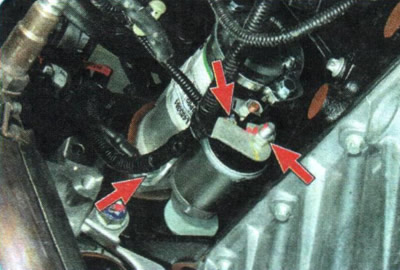
1. Remove the crankcase guard and front engine splash guard (see "Removal and installation mudguards and engine crankcase protection"), check the tightness of the starter contact connections.
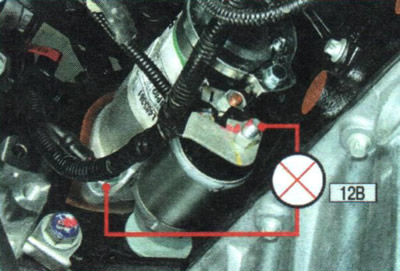
2. Check for voltage at the power contact of the starter solenoid relay. To do this, connect one wire of the 12-volt lamp to the "ground" and the second to the contact bolt. If the lamp lights up, the starter power circuit is OK. Otherwise, check and restore the power circuit (see "Diagnostics of faults of on-board electrical equipment").
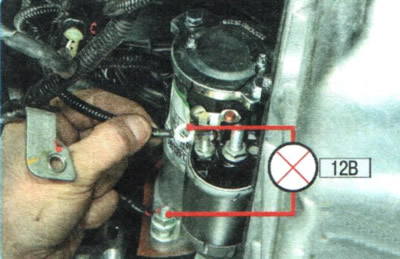
3. If the wire ends are securely tightened, the power circuit is in good condition, and the starter does not work, disconnect the ground (disconnect the wire from the negative terminal of the battery) and disconnect the control wire from the traction relay (see "Removal and installation the starter"). Connect a 12-volt lamp between the tip of the control wire and the "ground". Securely insulate the tip of the power wire disconnected from the traction relay or install it in place to prevent the tip from touching metal parts of the car, then turn on the "ground" (connect the wire to the "minus" terminal of the storage battery). Ask an assistant to turn the ignition key to the "starter" position. If the lamp lights up, remove and repair the starter (see "Starter repair"). If the lamp does not light, check and repair the starter control circuit, see. "Diagnostics of faults of on-board electrical equipment").
NOTE: Sometimes it happens that when you turn the ignition key, the starter engages, its anchor rotates, but the flywheel remains stationary. The reasons may be a loose fastening of the starter to the clutch housing, damage to the teeth of the flywheel or drive gear, slipping of the freewheel clutch of the drive, breakage of the lever, drive ring or buffer spring of the starter drive.
The crankshaft rotates but the engine does not start
If the starter confidently turns the crankshaft, but the engine does not start after three or four attempts, then in this case the fuel system or engine management system is most often faulty (the engine management system also includes the ignition system).
To test the fuel system under road conditions, do the following:.
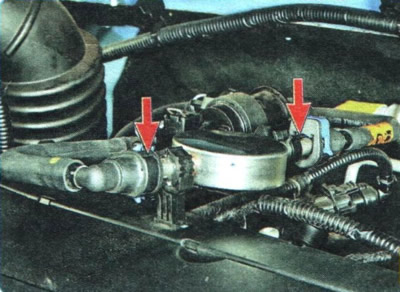
1. Open the hood and check for leaks in the engine fuel system connections. Look under the car to see if there are any leaks in the fuel tank or fuel lines.
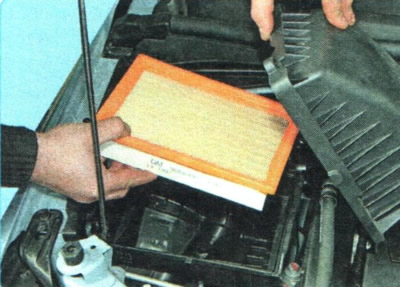
2. Remove the air filter element (see "Replacing the air filter element"), replace the filter cover and try to start the engine. If the engine starts, replace the filter element.
NOTE: Never make even short trips without the air filter element: road dust will immediately damage the engine's cylinder-piston group.
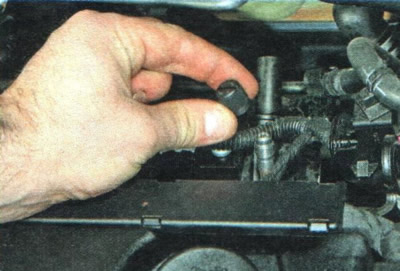
3. If the engine does not start, unscrew the cap of the fitting under the hood to check the fuel pressure in the fuel rail.
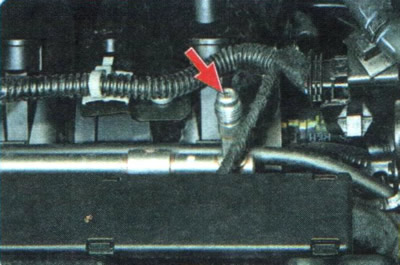
4. To protect against fuel splashes, take a large, highly absorbent rag and place it around the nipple. Carefully press the valve stem with a screwdriver. If fuel splashes out of the nipple, the pressure in the fuel system is sufficient to start the engine. In this case, proceed to check the engine management system (see below).
WARNING: Fuel spills in the engine compartment are a fire hazard, so wipe off any fuel spills thoroughly and ventilate the engine compartment before continuing work.
5. If the test shows that there is no required fuel pressure in the rail, turn on the ignition and listen: within a few seconds you should hear the sound of the electric fuel pump in the area of the fuel tank (under the back seat).
NOTE: Please note that if there is pressure in the fuel rail, the electric fuel pump will not turn on. This is not a malfunction.
6. If the fuel pump hums when the ignition is on, but does not create pressure in the fuel rail, the culprit is a clogged fuel intake screen or filter built into the fuel module, a faulty fuel pump or pressure regulator. In all these cases, it is necessary to replace the non-separable fuel module. This can only be done by installing the car on a lift or inspection pit (see "Removal and installation the fuel module").
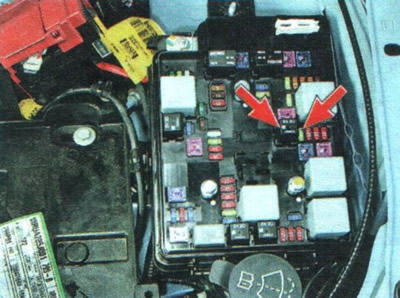
7. If the sound of the fuel pump operation is not heard, it is necessary to check and restore the fuel pump power supply circuit (see "Diagnostics of faults of on-board electrical equipment"), and if it is in good condition, the fuel module with the burnt or jammed pump should be replaced (see "Removal and installation the fuel module"). To do this, you will need to remove the fuel tank (see "Replacing the fuel tank and its filler pipe"). That is why such a check is impossible under road conditions. On the road, you can only check whether fuse #35 has blown and whether fuel pump relay #34 is securely fastened in the engine compartment mounting block.
The engine management system should be checked using special diagnostic tools (see "Engine malfunctions").
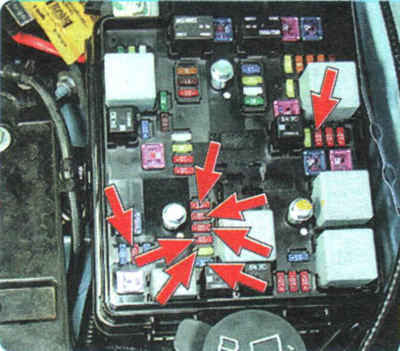
If there is no diagnostic device, the integrity of fuses No.36, 42, 45, 46, 47, 48, 49, 50 in the engine compartment mounting block should be checked on the road...
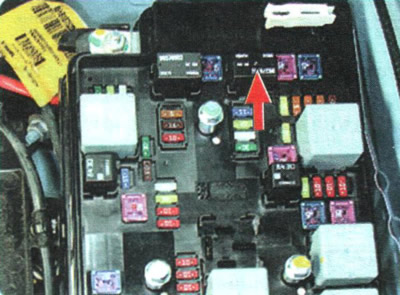
...and the reliability of fastening relay No.3 of the fuel injection system and ignition system in the same mounting block.
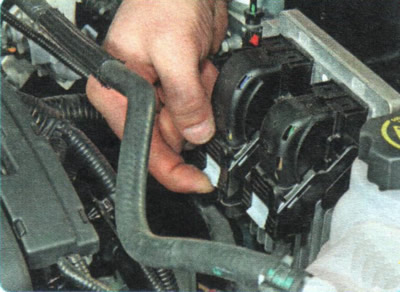
In addition, check the reliability of the connection of all accessible for inspection engine wiring harness pads in the underhood space, paying special attention to the pads of the electronic engine control unit...
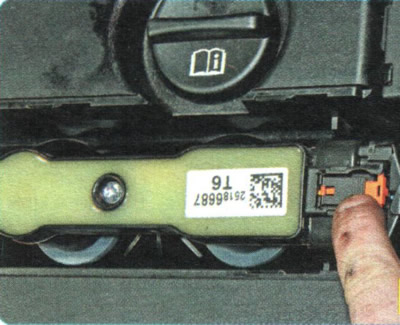
...ignition coil unit (see "Removal and installation the ignition coil unit")...
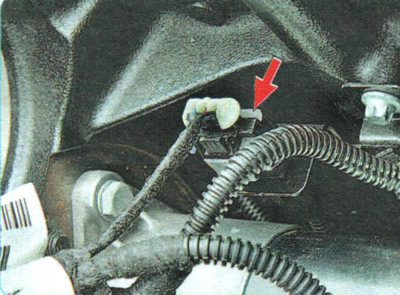
...crankshaft position sensor (the shoe is located at the rear of the engine cylinder block, behind the starter) and other sensors of the engine management system (see "Engine Management System Error Codes").
If the check does not reveal any abnormalities, use the diagnostic tool (see "Engine malfunctions") or contact a car service center.
USEFUL TIPS: If the engine is very worn out, it will start with difficulty in the cold season even with the fuel and engine control systems in good working order.
If the spark plugs are "flooded" during an unsuccessful start attempt, use the cylinder purge mode. To do this, press the accelerator pedal all the way down and, holding it down, turn on the starter. In this mode, there is no fuel supply and excess gasoline is removed from the cylinders by a flow of fresh air, while the spark plugs are dried. After purging, repeat the start attempt in the usual manner.
The article was borrowed from the website «CHEVYMAN.ru»