
ChevyMan.ru
Mazda Mitsubishi Toyota Land Rover Honda Kia Nissan
English Русский
Български
Беларускі
Український
Српски
Hrvatski
Română
Polski
Slovenský
Magyar
|
Articles | Sitemap | Contacts |


Home   Aveo   Captiva   Cruze   Lacetti   Lanos   Niva   Tahoe   Others  
Captiva 1 (2006-2018)
  • Home
  • Captiva
  • 1 (2006-2018)
  • Chassis
  • Brake system
  • Diagnosing Front Brake Faults

Diagnosing Front Brake Faults (Chevrolet Captiva 1)

            0

Contents: Inspection of brake pads ↧ Inspection of the rotor ↧

Inspection of brake pads


1. Raise and secure the vehicle.

2. Remove the front wheels. Follow section 2E, Tires and Wheels.

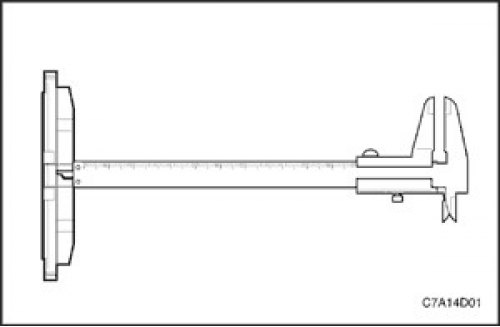
3. Inspect the brake pads and ensure that they are not worn down to the minimum thickness.

4. Measure the thickness of the pads. See the section in this section "General technical characteristics".

5. The brake pads should be changed as a set on both wheels of the axle.

5. The brake pads should be changed as a set on both wheels of the axle.

6. Install the front wheels. Follow section 2E, Tires and Wheels.

7. Lower the car.
7. Lower the car.


Inspection of the rotor


Brake discs are manufactured to tight tolerances for thickness, flatness and axial runout, but during use, pitting corrosion and grooves appear on the discs. Unacceptable deviations in the shape of the disc brake surfaces can lead to ineffective braking and pedal pulsation when braking. The roughness of the disc surface is also important, since its deviation from the required values can lead to the car being pulled to the side when braking and to rapid wear of the linings. If the disc does not meet technical requirements, it must be ground or replaced. Disc grinding should only be done on precision equipment.


The thickness of the brake disc is checked by measuring at least four places around the circumference of the disc. All measurements must be taken at the same distance from the edge of the disc. If the obtained values of the disc thickness differ from each other by more than 1.0 mm (0.04 inches), this may cause brake pedal pulsation and/or vibration of the front end of the vehicle when braking. The thickness can be measured with a standard micrometer and should not be less than 27.4 mm (1.1 in).
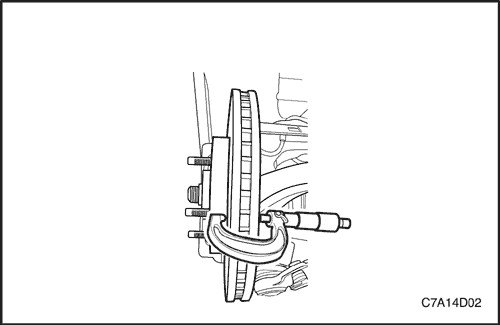
The thickness of the brake disc is checked by measuring at least four places around the…


Minor scuffs on the disc surface, the depth of which does not exceed 0.40 mm (0.016 mm), are allowed. The depth of the scuffs can be measured using a standard brake micrometer.

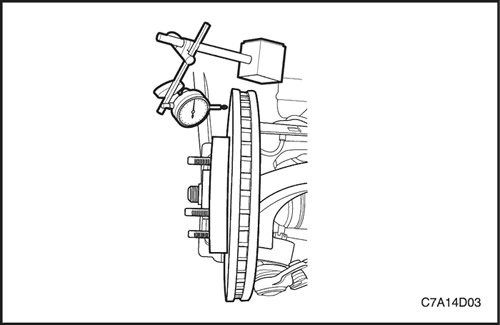
The maximum permissible lateral runout is 0.04 mm (0.001 inches). If the lateral runout is higher than specified, make sure there is no dirt between the disc and the hub, as well as no burrs or scratches on their contact surfaces. Check the axial runout of the disc using a standard indicator in the manner specified below.

1. Place the gear shift lever in neutral (NEUTRAL) and raise the vehicle.

2. To maintain wheel balance, mark the position of the wheel and hub relative to each other. Remove the front wheel.


3. Secure the brake disc to the wheel hub.

4. Install the dial indicator on the caliper.

5. Set the indicator probe at a distance of about 10 mm (0.39 inches) from the outer edge of the disk at a right angle to its surface and with a slight pressure. While rotating the disk, watch the indicator readings.

6. After completing the measurements, remove the indicator and wheel nuts.

7. If necessary, grind the disc on precision equipment. After grinding, it is necessary to measure the runout again. If the runout after grinding exceeds 0.04 mm (0.001 inches), then the brake disc should be replaced.

8. Align the marks that were made before removing the wheel and install the front wheel.

9. Lower the car.
9. Lower the car.


The original source of the article is the website «chevyman»

The article was checked: Vladimir Romannikov
This article is available at russian, bulgarian, belarusian, ukrainian, serbian, croatian, romanian, polish, slovak, hungarian

Share information:

Previous articles
Captiva 1: Brake system
Next articles

Front brake specifications
General description and operation of the front brakes
Vacuum booster assembly
Vacuum hose — removal and installation
General description and operation of the vacuum booster
Front brake pads — removal and installation
Front caliper — removal and installation
Front Caliper Bracket
Front rotor, brake disc
Front mudguard, brake shield


See similar articles on the topic of Chevrolet cars:
Possible faults of front wheel drives, their causes and methods of elimination Chevrolet Aveo T300 (2012-2018)
Possible faults of front wheel drives, their causes and methods of elimination Chevrolet Cruze 1 (2008-2016)
Replacement of protective covers and sealing rings of pistons of brake cylinders of front and rear wheels Chevrolet Lacetti 1 (2002-2009)
Replacing the protective cover and sealing ring of the front wheel brake piston Chevrolet Lanos T150 (2002-2009)
Possible faults of the front wheel drive, their causes and methods of elimination Chevrolet Niva 1 (2002-2016)
Location of front brake assemblies and units Chevrolet Tahoe 1 (1992-2000)
Replacing the front brake pads Chevrolet Orlando 1 (2010-2018)
Link in different formats to this page


Visitor comments

No comments yet


How much will 29 + 43 =


Captiva 1 (2006-2018) 
  • Manual
  • Before leaving
  • Keys, doors and windows
  • Seats, protection systems
  • Instruments and controls
  • Lighting system
  • Information and entertainment
  • Navigation system
  • Climate control
  • Driving a car
  • Car care
  • Maintenance
  • Engine 2.0 l (diesel)
  • Engine device
  • Troubleshooting
  • Engine repair
  • Cooling system
  • Engine electrical equipment
  • Control and power systems
  • Exhaust system
  • Engine FAM II 2.4D
  • Engine device
  • Troubleshooting
  • Engine repair
  • Cooling system
  • Engine electrical equipment
  • Control and power systems
  • Exhaust system
  • Engine HFV6 3.2L
  • Engine device
  • Troubleshooting
  • Engine repair
  • Cooling system
  • Engine electrical equipment
  • Control and power systems
  • Exhaust system
  • Transmission
  • Front drive axle
  • Rear drive axle
  • Automatic gearbox - device
  • Automatic gearbox - service
  • Automatic gearbox - repair
  • Manual gearbox - device
  • Manual gearbox - service and repair
  • Clutch
  • Transfer case
  • Chassis
  • Car suspension
  • Brake system
  • Steering
  • Body
  • Heating and ventilation
  • Air conditioning (manual)
  • Air conditioning (automatic)
  • Seat belts
  • Airbags
  • Car seat
  • Interior (internal elements)
  • Exterior (external elements)
  • Doors and windows
  • Electrical equipment
  • Equipment and devices
  • Lighting and lamps
  • Windshield wipers and washers
  • Electrical circuits


ChevyMan.ru © 2017-2026 · Mobile version · Feedback · Site search · Interesting to read · Sitemap: EN BG BY UA RS HR RO PL SK HU

Aveo 2003-2008 · Aveo 2006-2011 · Aveo 2012-2018 · Captiva 2006-2018 · Cruze 2008-2016 · Lacetti 2002-2009 · Lanos 2002-2009 · Niva 2002-2016 · Tahoe 1992-2000 · Tahoe 2000-2014 · Lumina 1 1989-1994 · Trailblazer 1 2001-2008 · Orlando 1 2010-2018 ·
🛡️ For your security and to improve our service, this site uses cookies. You can disable them in your browser.