ChevyMan.ru
Mazda Mitsubishi Toyota Land Rover Honda Kia Nissan
English Русский
Български
Беларускі
Український
Српски
Hrvatski
Română
Polski
Slovenský
Magyar
|
Articles | Sitemap | Contacts |


Home   Aveo   Captiva   Cruze   Lacetti   Lanos   Niva   Tahoe   Others  
Orlando 1 (2010-2018) Trailblazer 1 (2001-2008, petrol) Lumina 1 (1989-1994)
  • Home
  • Chevrolet
  • Lumina 1
  • Chassis
  • Car suspension
  • Removal and installation the rear hub

Removal and installation the rear hub (Chevrolet Lumina 1)

            0

Contents: Removal ↧ Installation ↧
Note: The rear wheel hub and bearings are a single unit and should be replaced as an assembly.


Removal


1. Loosen the wheel nuts, raise the vehicle and securely support it on struts. Remove the wheel.

2. Pull the brake drum off the hub (refer to chapter 9).

3. Using a Torx N55 head, unscrew the four bolts securing the hub to the trailing arm, which will become accessible by rotating the hub flange so that the bolt appears in the hole (see illustration). Remove the top rear bolt last, as there is a small gap between the bolt and the parking brake pin.
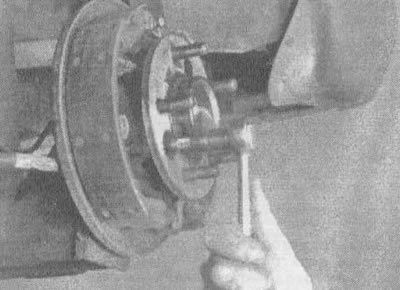
12.3 Using a Torx N55 head, unscrew the four hub bolts

12.3 Using a Torx N55 head, unscrew the four hub bolts


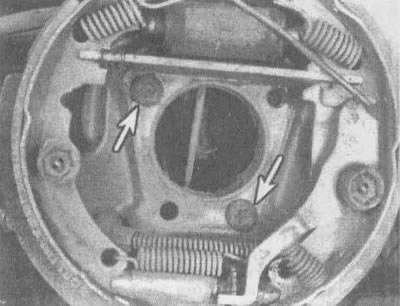
4. Remove the hub from the lever, moving it out of the brake mechanism. Screw the two bolts back into place through the brake shield into the trailing arm of the suspension so that the brake mechanism does not hang on the pipeline (see illustrations).
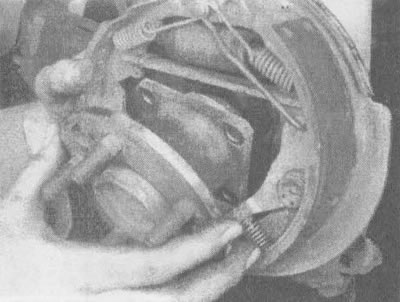
12.4a. Pull out the hub by turning it

12.4a. Pull out the hub by turning it
12.4b. Temporarily tighten the two bolts (indicated by arrows), to attach the brake to the trailing…

12.4b. Temporarily tighten the two bolts (indicated by arrows), to attach the brake to the trailing arm without letting it hang on the hydraulic lines


Installation


5. Position the hub on the trailing arm and align the holes in the brake shield. Insert the bolts starting from the rear top one. A magnet may be useful for guiding the bolts through the hub flange (see illustration). After all four bolts have been inserted, tighten them to the torque specified in the specifications in this chapter.
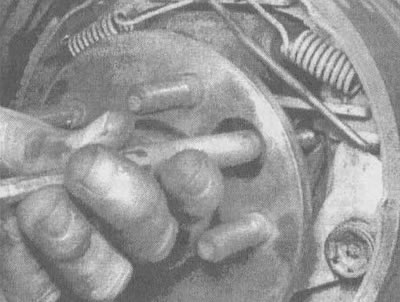
12.5. When screwing in bolts, you can use a magnet

12.5. When screwing in bolts, you can use a magnet


6. Install the brake drum and wheel. Lower the vehicle and tighten the wheel nuts to the torque specified in the specifications chapters 1.

The article was checked: Vladimir Romannikov
This article is available at russian, bulgarian, belarusian, ukrainian, serbian, croatian, romanian, polish, slovak, hungarian

Share information:

Previous articles
Lumina 1: Car suspension
Next articles

Removal, checking and installation rear suspension springs
Removal and installation the transverse jet rod
Removal, checking and installation rear shock absorbers
Checking and replacing the ball joint
Removal and installation the hub and steering knuckle
Removal and installation the rear axle
General information about the electronic level control system
General information on wheels and tires
Wheel alignment — general information


See similar articles on the topic of Chevrolet cars:
Rear view mirrors Chevrolet Aveo T300 (2012-2018)
Rear window heating/windscreen defrost system Chevrolet Captiva 1 (2006-2018)
Rear view mirrors Chevrolet Cruze 1 (2008-2016)
Replacing the rear crankshaft oil seal Chevrolet Lacetti 1 (2002-2009)
Rear view mirrors Chevrolet Lanos T150 (2002-2009)
Rear fog lights on/off control Chevrolet Niva 1 (2002-2016)
Folding the rear seat Chevrolet Tahoe 1 (1992-2000)
Link in different formats to this page


Visitor comments

No comments yet


How much will 14 + 46 =


Orlando 1 (2010-2018) 
  • General information
  • Introduction to manual
  • User manual
  • Maintenance
  • Troubleshooting
  • Power unit
  • Engine repair
  • Fuel and control system
  • Cooling and lubrication system
  • Ignition system
  • Transmission
  • Clutch
  • Gearbox
  • Drive shafts
  • Chassis
  • Car suspension
  • Steering
  • Brake system
  • Body
  • Exterior (external elements)
  • Doors, locks and windows
  • Electrical equipment
  • Equipment and devices
  • Windscreen wipers
  • Power devices
  • Electrical diagrams


Trailblazer 1 (2001-2008) 
  • General information
  • User manual
  • Troubleshooting
  • Maintenance
  • Power unit
  • Engine in a car
  • Engine overhaul
  • Cooling and heating
  • Fuel and exhaust system
  • Engine electrical equipment
  • Engine control
  • Transmission
  • Automatic gearbox
  • Transfer case
  • Drive shafts and cardan
  • Chassis
  • Brake system
  • Car suspension
  • Steering
  • Body
  • Exterior (external elements)
  • Interior (internal elements)
  • Doors, locks and windows
  • Electrical equipment
  • Equipment and devices
  • Electrical circuits


Lumina 1 (1989-1994) 
  • General information
  • Maintenance
  • Power unit
  • Engine 3.1L V6
  • Engine 3.8L V6
  • Engine overhaul
  • Cooling system
  • Power and exhaust system
  • Fuel injection
  • Engine electrical equipment
  • Reduced exhaust gas toxicity
  • Transmission
  • Automatic gearbox
  • Drive shafts
  • Chassis
  • Brake system
  • Car suspension
  • Steering
  • Body
  • Heating and air conditioning
  • Repair of body elements
  • Doors, covers and windows
  • Interior (internal elements)
  • Electrical equipment
  • Equipment and devices
  • Electrical circuits


ChevyMan.ru © 2017-2026 · Mobile version · Feedback · Site search · Interesting to read · Sitemap: EN BG BY UA RS HR RO PL SK HU

Aveo 2003-2008 · Aveo 2006-2011 · Aveo 2012-2018 · Captiva 2006-2018 · Cruze 2008-2016 · Lacetti 2002-2009 · Lanos 2002-2009 · Niva 2002-2016 · Tahoe 1992-2000 · Tahoe 2000-2014 · Lumina 1 1989-1994 · Trailblazer 1 2001-2008 · Orlando 1 2010-2018 ·
🛡️ For your security and to improve our service, this site uses cookies. You can disable them in your browser.