
Contents: Trailing arms ↧ Transverse thrust ↧
Warning: If your vehicle has air suspension, you must release the pressure before starting this procedure (see paragraph 4 of subsection 14).
Trailing arms
Warning: Only one trailing arm can be removed and installed at a time. This will prevent the rear axle housing from sliding off the jack.
1. Loosen the wheel nuts. Raise the rear of the vehicle and place vertical supports under the frame rails. To prevent the vehicle from rolling, place chocks under the front wheels. Remove the wheel.
2. Support the rear axle with a floor jack. It is necessary to disconnect the ride height sensor rod from the upper arm being removed on a vehicle with air suspension. Remove the nuts, washers and bolts located at each end of the trailing arm (see illustrations).
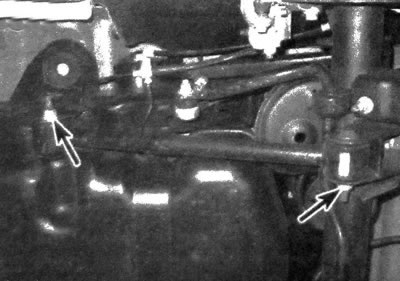
15.2a. Lower trailing arm mounting bolts/nuts
15.2b. Upper trailing arm mounting bolts/nuts
3. Remove the lever. Inspect the bushings inside for cracks, hardened areas, or other signs of damage. If you need to replace them, check with the manufacturer's representative about the availability of such spare parts. If spare parts are available, purchase them and provide a lever to the auto repair shop to press out the old bushings and press in the new ones.
4. Installation is performed in the reverse order of removal. Before tightening the bolts/nuts, it is necessary to lift the rear axle with a jack so that the normal ground clearance of the car is simulated, then tighten the fasteners to the required torques.
Transverse thrust
5. Raise the rear of the vehicle and place vertical supports under the frame rails. To prevent the vehicle from rolling, place chocks under the front wheels.
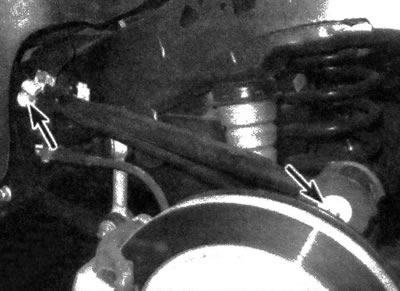
6. Remove the nuts/bolts located at each end of the rod (see illustration).
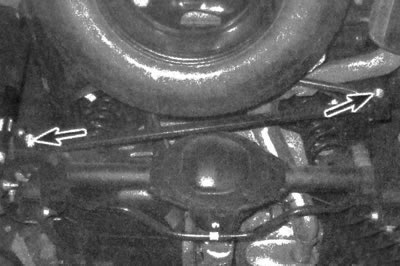
15.6. Cross-rod bolts/nuts
7. Remove the rod. Inspect the bushings inside for cracks, hardened areas, or other signs of damage. If you need to replace them, check with the manufacturer's representative about the availability of such spare parts. If spare parts are available, purchase them and provide a rod to the auto repair shop to press out the old bushings and press in the new ones.
8. Installation is performed in the reverse order of removal. Before tightening the bolts/nuts, it is necessary to lift the rear axle with a jack so that the normal ground clearance of the car is simulated, then tighten the fasteners to the required torques.