
2. Loosen the three screws that secure the air cleaner cover, then remove the filter element and disconnect the tube from the lower part of the casing (the lower part of the casing also serves as a windshield washer reservoir) (see chapter 1).
3. Remove the two air cleaner/washer reservoir housing nuts (see illustration).

9.3. Location of the nuts of the lower component of the air cleaner/washer reservoir housing
4. Disconnect all electrical connectors.
5. Grasp the air cleaner housing/tank and remove it from the studs by pulling it straight up. Remove the element from the engine compartment.
6. To remove the resonator, disconnect the intake air temperature sensor connector, loosen the clamps that secure the resonator to the intake duct and throttle body, then disconnect the duct (see illustration).
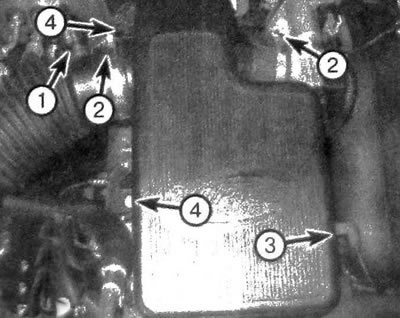
9.6. Elements of the intake air duct resonator: 1. Supply air temperature sensor plug; 2. Hose clamps; 3. Fuel pressure regulator vacuum line; 4. Mounting bolts
7. Disconnect the fuel pressure regulator vacuum line from the resonator.
8. Unscrew the resonator mounting bolts.
9. Lift the resonator and disconnect the crankcase ventilation hose from the valve cover (see illustration).
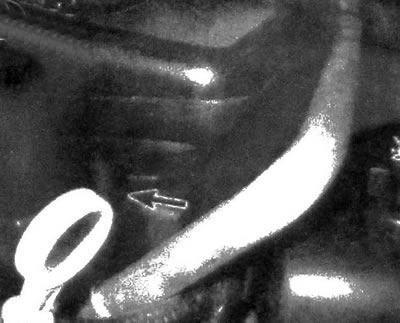
9.9. When removing the intake air duct resonator, it is necessary to disconnect the crankcase ventilation hose from the valve cover
10. Installation is carried out in the reverse order of removal.