
2. On all the vehicles described, the filter element is located in a black plastic box, which serves as a casing, located on the right side of the engine compartment. On some models, a plastic sensor is connected to the air intake duct, which records the intensity of the air flow through the air cleaner and also signals the need to replace the filter element. When operating the vehicle in dusty areas, the sensor may send signals indicating the need to replace the element before the recommended service interval has passed.
3. Loosen the three non-removable screws and pull the housing cover upward, then remove the filter element (see illustrations). Wipe the inside of the air cleaner housing and the top of the windshield washer reservoir with a clean cloth.
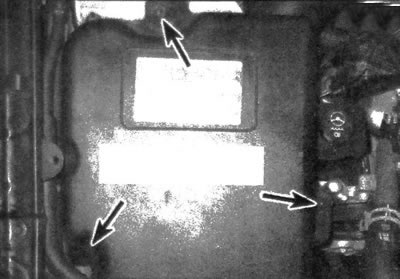
23.3a. Loosen the screws and lift the air cleaner housing cover
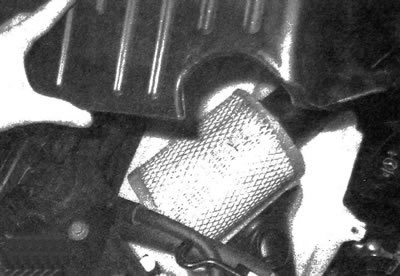
23.3b. While holding the cover up, pull the filter element out of the air intake duct
4. Do not allow foreign objects to fall into the air cleaner housing when the cover is removed.
5. Push the new filter element into the air intake duct. Make sure it is securely positioned in the recess provided on top of the washer reservoir.
6. Installation is carried out in the reverse order of removal. After replacing the element, it is necessary to press the filter indicator to reinstall it.
The original material is located on the website: chevyman