
Warning: Certain precautions must be observed when performing preventive inspection and maintenance on fuel system components. Work in well-ventilated areas and do not allow open flames or unshielded light bulbs in the work area. Avoid contact with gasoline on your skin. Work with rubber gloves. If gasoline gets on your skin, wash it off with running water and soap. Wipe up spilled fuel immediately and store the absorbent cloth where it cannot be ignited. Before acting on the elements, release the pressure in the system (see chapter 4). Have a class B fire extinguisher on hand and wear eye protection when working with the system.
1. If you smell fuel while driving or when the vehicle is exposed to sunlight, immediately inspect the fuel system.
2. Remove the fuel filler cap and inspect it for signs of damage or corrosion. A clear imprint of the sealing surface should be visible on the cover gasket. If the gasket surface shows signs of wear or corrosion, replace the cover.
3. Inspect the fuel supply and return lines for cracks. Make sure that the metal fuel lines are securely connected to the injectors.
Warning: The vehicle has a forced fuel injection system. Before servicing the fuel equipment, it is necessary to relieve the system pressure. IN chapter 4 the corresponding procedure is described.
4. On 4.2L engines the fuel injectors are not visible. Signs of a leak include the presence of fuel impurities in the engine oil or a long engine start time, which is accompanied by the appearance of black smoke from the exhaust pipe.
5. Since some system components, such as the fuel tank and significant sections of the forward and return fuel lines, are located on the underside of the vehicle, it is recommended to raise the vehicle with a lift to provide improved visibility during inspection. If it is not possible to use a lift, raise the vehicle using a jack and install vertical supports.
6. After raising the vehicle and ensuring its stability, inspect the fuel tank and filler neck for cracks, holes and other damage. The connection between the filler neck and the fuel tank requires the most careful attention. Sometimes the rubber neck starts leaking due to loose clamps or wear of the material. Make sure that the tank is securely attached to the car body by inspecting its brackets
Warning: Do not attempt to repair the fuel tank yourself (only replacement of rubber parts is allowed). Exposure to an open flame from a welding torch may cause fuel vapors in the tank to explode.
7. Carefully inspect the metal and rubber sections of the fuel lines connected to the fuel tank (see illustration). Inspect for loose connections, worn hoses, pinched fuel lines and other problems. Make the necessary replacement as described in chapter 4.
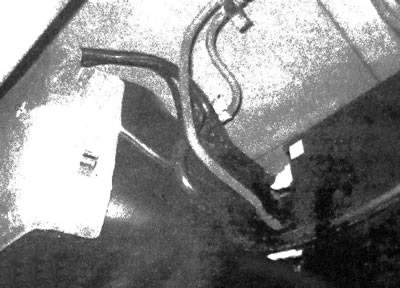
18.7 Inspect the fuel tank mounting straps, as well as all fuel and vent lines
8. Fuel odor may also come from connections and components of the fuel vapor recovery system. This system is designed to accumulate vapors in a carbon adsorber and then direct them into the intake tract, from where the vapors, mixed with air, enter the combustion chambers.
9. The most common sign of a problem with the fuel vapor recovery system is a persistent smell of fuel coming from the canister. If there is a smell of fuel, after ruling out that its source is located in the areas inspected above, it is necessary to inspect the adsorber and its connections to the hoses (see chapter 6).
Information taken from the official website: ChevyMan