


Necessary equipment
J-25070 Jet Dryer
Disassembly procedure
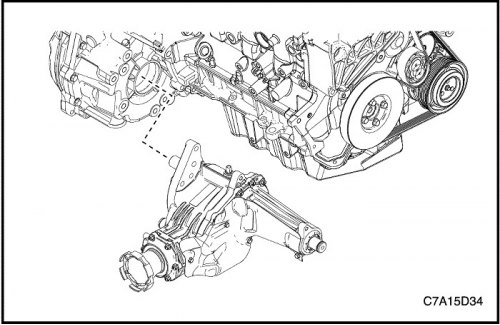
1. Remove the transfer case from the vehicle. See "Transfer case" in this section.
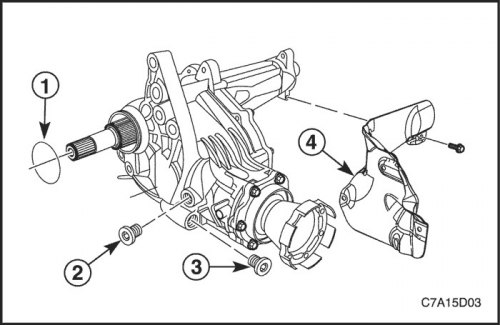
2. Remove the transfer case O-ring (1).
3. Unscrew the plug (2) of the transfer case filler hole and the plug (3) of the transfer case drain hole.
4. Remove the transfer case heat shield mounting bolts and the heat shield (4).
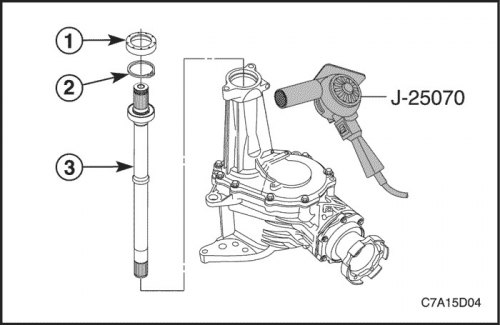
5. Using a suitable puller, remove the front wheel drive shaft shield (1).
6. Remove the front wheel drive retainer (2).
7. Heat the end of the transfer case housing with a J-25070 jet dryer to facilitate removal of the front wheel drive intermediate shaft.
8. Remove the intermediate shaft (3) of the front wheel drive from the transfer case.
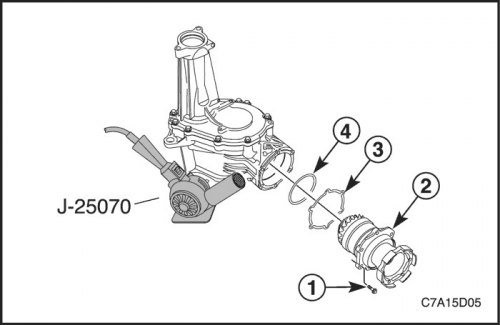
9. Heat the drive case flange area with the J-25070 Jet Dryer to facilitate removal of the transfer case rear output drive shaft housing.
Important: Place 2 screwdrivers or two pry bars in the area of the drive housing flange to facilitate removal.
10. Remove the bolts (1) of the transfer case rear output drive shaft housing and the housing (2) from the transfer case.
11. Remove the adjusting shim (3) of the rear secondary shaft of the transfer case.
12. Remove the sealing ring (4) from the transfer case rear output shaft housing and discard it.
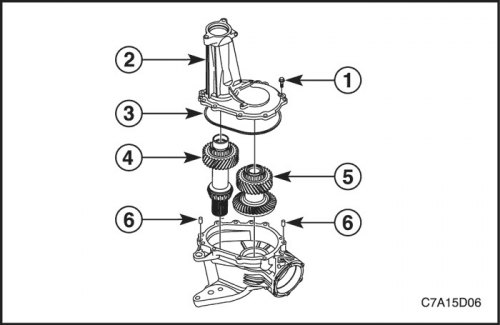
13. Remove 11 bolts (1) securing the transfer case halves and the right side of the transfer case (2).
14. Remove the transfer case seal (3) from the transfer case (2).
15. Remove the primary shaft (4) of the transfer case and the shaft (5) of the rear output drive of the transfer case from the left side of the transfer case.
Important: Replace the mounting pins (6) of the transfer case halves only if damaged. Check the case for similar damage.
[The original source of the article is the website «chevyman.ru»]