
2. Raise the vehicle and support it securely on stands.
3. Drain the engine oil and replace the oil filter (see chapter 1, section 12).
4. Loosen the oil pan mounting bolts (see illustration) and carefully separate the crankcase from the block. To avoid damage to the sealing surface on the flange and, as a result, oil leakage from the engine, do not insert a lever between the mating surfaces of the crankcase and block. To separate the crankcase, tap it with a soft-faced hammer.
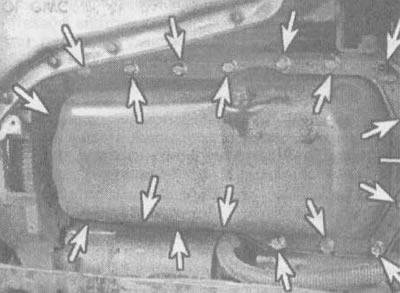
17.4. Oil pan mounting bolts (shown by arrows) located along the perimeter (bottom view)
5. Clean the oil pan with solvent and remove any remaining old gasket and sealant material from the mating surfaces, check the cleanliness of the bolt holes in the cylinder block. Check the oil pan flange for warpage, especially around the bolt holes. If necessary, support the crankcase on a wooden block and use a hammer to level the gasket surface.
6. When installing the oil pan, be sure to replace the old gasket with a new one (see illustration).
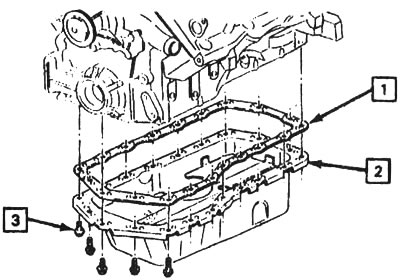
17.6. Oil pan: 1 - gasket, 2 - crankcase, 3 - bolts
7. Install the oil pan onto the cylinder block and tighten the bolts.
8. Tighten the bolts to the torque specified in the specifications given in this chapter. The final tightening is done in three steps, starting from the center, crosswise.
9. The remaining operations are performed in reverse order.
10. Fill the engine with oil (see chapter 1, section 12), start it, let it warm up to normal operating temperature and check for leaks.
[The original article is on the website ChevyMan.ru]