
ChevyMan.ru
Mazda Mitsubishi Toyota Land Rover Honda Kia Nissan
English Русский
Български
Беларускі
Український
Српски
Hrvatski
Română
Polski
Slovenský
Magyar
|
Articles | Sitemap | Contacts |


Home   Aveo   Captiva   Cruze   Lacetti   Lanos   Niva   Tahoe   Others  
Orlando 1 (2010-2018) Trailblazer 1 (2001-2008, petrol) Lumina 1 (1989-1994)
  • Home
  • Chevrolet
  • Lumina 1
  • Power unit
  • Engine 3.8L V6
  • Replacing the front crankshaft oil seal

Replacing the front crankshaft oil seal (Chevrolet Lumina 1)

            0

1. Remove the anti-vibrator (see section 11). If there is a groove on the surface of the anti-vibrator, then there are also cuffs that go into the groove, restoring the tightness. Such cuffs are sometimes included in the seal repair kit.

2. Remove the old cuff with a special puller or screwdriver (see illustration). Be careful not to damage the crankshaft during this procedure.
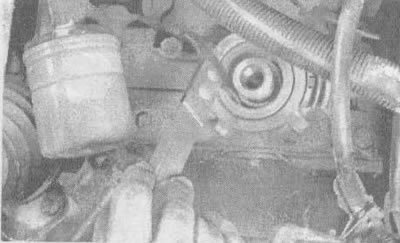
12.2. Press out the old cuff using a special tool (shown here) or with a screwdriver

12.2. Press out the old cuff using a special tool (shown here) or with a screwdriver


3. Apply a thin layer of room temperature sealant to the outer edge of the new seal. Lubricate the lips of the seal with general-purpose grease or clean motor oil.

4. Position the seal evenly in place in the bore and press down with special tool J-35354 or similar. Make sure that the cuff enters the hole without distortion and stop pressing when the face of the cuff reaches the required depth.

5. If there is no special tool, carefully push the cuff into place using a large socket head and a hammer (see illustration). The outside diameter of the socket or tube must be the same size as the outside diameter of the cuff.
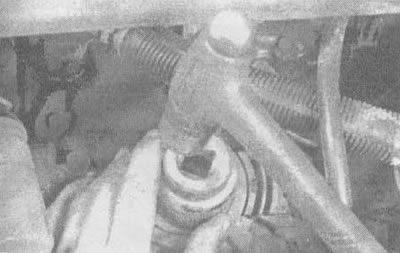
12.5 Using a hammer and a large socket head, carefully tap the new seal into place

12.5 Using a hammer and a large socket head, carefully tap the new seal into place


6. Install an anti-vibrator (see section 11).

7. Install the remaining parts in reverse order.

8. Start the engine and check for leaks.

[The article was borrowed from the website «chevyman.ru»]

The article was checked: Vladimir Romannikov
This article is available at russian, bulgarian, belarusian, ukrainian, serbian, croatian, romanian, polish, slovak, hungarian

Share information:

Previous articles
Lumina 1: Engine 3.8L V6
Next articles

Removal and installation the anti-vibrator
Removal and installation the cylinder head
Removal and installation of exhaust manifolds
Removal, checking and installation valve lifters
Removal and installation the intake manifold
Removal and installation the timing chain cover
Removal and installation the oil filter flange and pressure regulator valve
Removal and installation the oil pump
Removal and installation the camshaft drive chain and sprockets
Removal and installation the oil pan


See similar articles on the topic of Chevrolet cars:
Replacing the upper support of the front suspension shock absorber strut Chevrolet Aveo T300 (2012-2018)
Replacing the intermediate shaft seal of the front drive axle Chevrolet Captiva 1 (2006-2018)
Replacing the upper support of the front suspension shock absorber strut Chevrolet Cruze 1 (2008-2016)
Replacing the front crankshaft oil seal Chevrolet Lacetti 1 (2002-2009)
Replacing the front crankshaft oil seal Chevrolet Lanos T150 (2002-2009)
Replacing grease in front wheel hub bearings Chevrolet Niva 1 (2002-2016)
Front crankshaft oil seal Chevrolet Tahoe 2 and 3 (2000-2014)
Link in different formats to this page


Visitor comments

No comments yet


How much will 37 + 20 =


Orlando 1 (2010-2018) 
  • General information
  • Introduction to manual
  • User manual
  • Maintenance
  • Troubleshooting
  • Power unit
  • Engine repair
  • Fuel and control system
  • Cooling and lubrication system
  • Ignition system
  • Transmission
  • Clutch
  • Gearbox
  • Drive shafts
  • Chassis
  • Car suspension
  • Steering
  • Brake system
  • Body
  • Exterior (external elements)
  • Doors, locks and windows
  • Electrical equipment
  • Equipment and devices
  • Windscreen wipers
  • Power devices
  • Electrical diagrams


Trailblazer 1 (2001-2008) 
  • General information
  • User manual
  • Troubleshooting
  • Maintenance
  • Power unit
  • Engine in a car
  • Engine overhaul
  • Cooling and heating
  • Fuel and exhaust system
  • Engine electrical equipment
  • Engine control
  • Transmission
  • Automatic gearbox
  • Transfer case
  • Drive shafts and cardan
  • Chassis
  • Brake system
  • Car suspension
  • Steering
  • Body
  • Exterior (external elements)
  • Interior (internal elements)
  • Doors, locks and windows
  • Electrical equipment
  • Equipment and devices
  • Electrical circuits


Lumina 1 (1989-1994) 
  • General information
  • Maintenance
  • Power unit
  • Engine 3.1L V6
  • Engine 3.8L V6
  • Engine overhaul
  • Cooling system
  • Power and exhaust system
  • Fuel injection
  • Engine electrical equipment
  • Reduced exhaust gas toxicity
  • Transmission
  • Automatic gearbox
  • Drive shafts
  • Chassis
  • Brake system
  • Car suspension
  • Steering
  • Body
  • Heating and air conditioning
  • Repair of body elements
  • Doors, covers and windows
  • Interior (internal elements)
  • Electrical equipment
  • Equipment and devices
  • Electrical circuits


ChevyMan.ru © 2017-2026 · Mobile version · Feedback · Site search · Interesting to read · Sitemap: EN BG BY UA RS HR RO PL SK HU

Aveo 2003-2008 · Aveo 2006-2011 · Aveo 2012-2018 · Captiva 2006-2018 · Cruze 2008-2016 · Lacetti 2002-2009 · Lanos 2002-2009 · Niva 2002-2016 · Tahoe 1992-2000 · Tahoe 2000-2014 · Lumina 1 1989-1994 · Trailblazer 1 2001-2008 · Orlando 1 2010-2018 ·
🛡️ For your security and to improve our service, this site uses cookies. You can disable them in your browser.