
Removal
1. Remove the oil filter (see chapter 1, section 12).
2. Loosen the oil filter flange mounting bolts, remove the pressure regulator valve and spring (see section 14).
3. Remove the camshaft chain cover (see section 13).
4. Loosen the bolts securing the oil pump cover and the timing cover (see illustration).
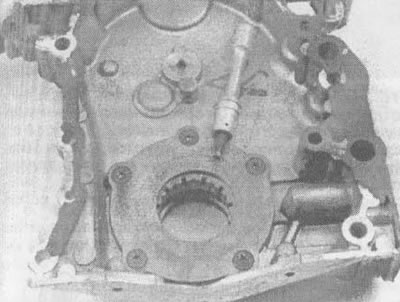
15.4. The oil pump cover is attached to the inside of the timing cover. A Torx T-30 key is required to remove the screws
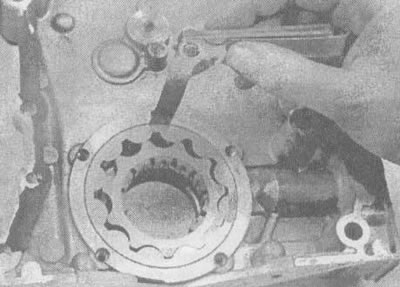
5. Remove the oil pump cover and gears as an assembly (see illustration). Pay attention to how the gears are installed; they should be installed in the same way.
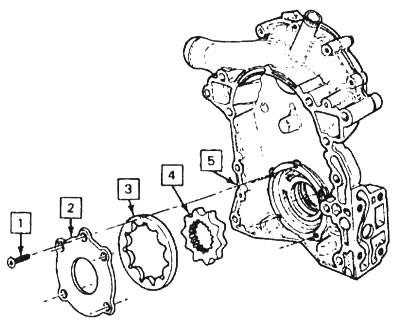
15.5. Oil pump disassembled: 1 - screw, 2 - cover, 3 - external gear, 4 - internal gear, 5 - camshaft chain cover
Examination
6. Clean all parts with solvent and dry with compressed air (if there is appropriate equipment).
Attention! Don't forget to protect your eyes.
7. Check all parts for wear and scratches. Replace worn and damaged parts.
8. Check the bypass valve (see section 14).
9. Replace the gears in the timing cover.
10. Measure the gap between the outer gear and the housing with a feeler gauge (see illustration).
15.10. Measuring the gap between the outer gear and the housing using a thickness gauge
11. Measure the gap between the outer and inner gears in several places using a feeler gauge (see illustration).
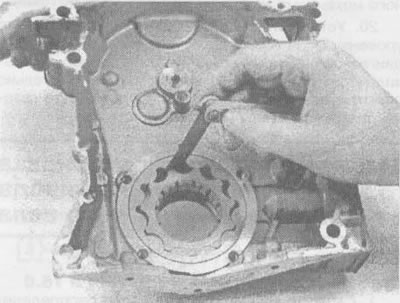
15.11. Measuring the gap between the internal and external gears using a thickness gauge
12. Using a dial indicator or feeler gauge, measure the gear end clearance (distance from gear to cover gasket surface) (see illustration).

15.12. Measuring the end clearance of gears using a special clamp and a dial indicator
13. Check for warpage of the pump cover by placing a precision straightedge across the cover and trying to insert a feeler gauge between the cover and the straightedge.
14. Compare the measurements with the technical data in this chapter. Replace all worn or damaged parts with new ones.
Installation
15. Remove all gears and fill the pump cavity with consistent grease.
16. Insert the gears. Check that the grease is squeezed into each cavity. Failure to do so may result in damage to the pump due to lack of oil pressure when first started.
17. Install the pump cover using only a new GM gasket; the thickness of this gasket is important to maintain the correct gap size.
18. Install the pressure regulator valve and spring.
19. Install the timing cover.
20. Install the oil filter and check the oil level (see chapter 1, section 12). Start the engine, let it run and check if the oil pressure is correct, then carefully inspect for oil leakage at the timing cover.
The article is based on data from the website: ChevyMan.ru