ChevyMan.ru
Mazda Mitsubishi Toyota Land Rover Honda Kia Nissan
English Русский
Български
Беларускі
Український
Српски
Hrvatski
Română
Polski
Slovenský
Magyar
|
Articles | Sitemap | Contacts |


Home   Aveo   Captiva   Cruze   Lacetti   Lanos   Niva   Tahoe   Others  
Aveo T300 (2012-2018) Aveo T250 (2006-2011) Aveo T200 (2003-2008)
  • Home
  • Aveo
  • T300 (2012-2018)
  • Power unit
  • Lubrication system
  • Removal and installation the oil pump

Removal and installation the oil pump (Chevrolet Aveo T300)

            0

You will need: all the tools necessary to remove the accessory and timing belts, as well as the right support of the powertrain suspension, a TORX T30 key, and a TORX E12 socket head.

The oil pump is removed for replacement when its supply decreases, causing a constant drop in oil pressure in the engine lubrication system, as well as when oil leaks through the seal of the mating surfaces of the pump body and cylinder block. Only the pump assembly is supplied as spare parts, therefore this section describes only the removal and installation of the pump.

To repair the oil pump, you need a set of new spare parts, which are not available separately at retail. Therefore, if the pump fails, replace it as a whole or contact a specialized service for repair.

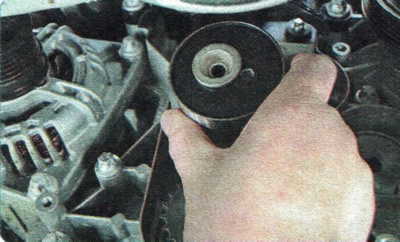
1. Disconnect the wire from the negative terminal of the battery.
1. Disconnect the wire from the negative terminal of the battery.


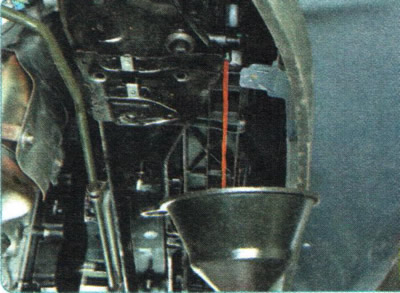
2. Drain the cooling system (see "Replacing the coolant").
2. Drain the cooling system (see «Replacing the coolant»).


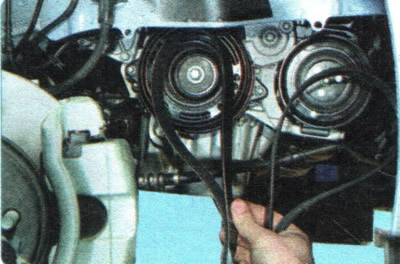
3. Remove the accessory drive belts (see "Replacement of auxiliary drive belts").


3. Remove the accessory drive belts (see «Replacement of auxiliary drive belts»).


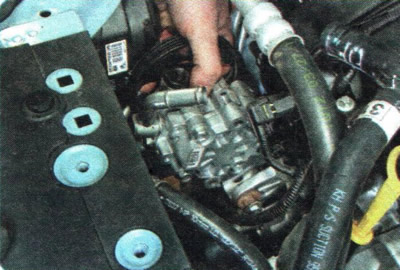
4. Remove the power steering pump (see "Removal and installation the power steering pump").
4. Remove the power steering pump (see «Removal and installation the power steering pump»).


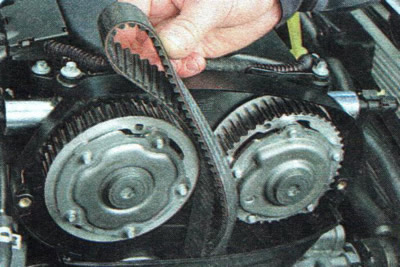
5. Remove the timing belt...

5. Remove the timing belt...


6. ...and the tension roller (see "Replacing the timing belt").

WARNING: After removing the timing belt, do not turn the crankshaft or camshafts, as the pistons may damage the valves.


WARNING: After removing the timing belt, do not turn the crankshaft or camshafts, as the pistons…


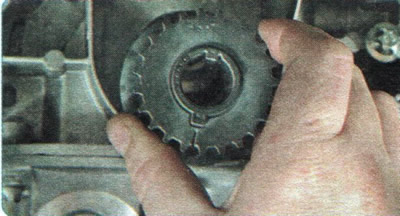
7. Remove the toothed pulley from the crankshaft end.
7. Remove the toothed pulley from the crankshaft end.


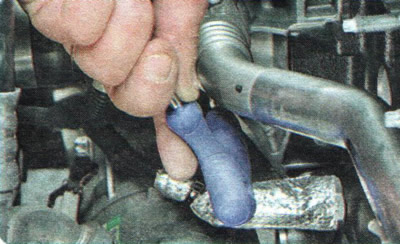
8. Remove the two bolts securing the water distribution pipe to the water pump.

NOTE: For clarity, the exhaust manifold has been removed.

NOTE: For clarity, the exhaust manifold has been removed.


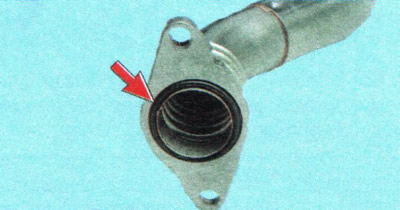
WARNING: The water distribution pipe flange is sealed with a rubber ring. Replace this ring each time the connection is disassembled.
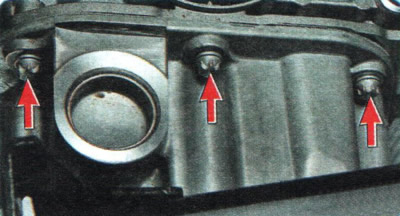


WARNING: The water distribution pipe flange is sealed with a rubber ring. Replace this ring each…


9. Remove the three bolts securing the oil pan to the oil pump...
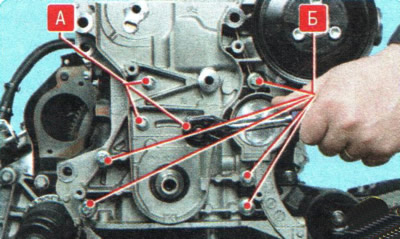
9. Remove the three bolts securing the oil pan to the oil pump...


10. ...nine bolts securing the oil pump to the engine cylinder block...

NOTES: Please note that the oil pump mounting bolts vary in length (bolts A are short, bolts B are long). For clarity, shown on a removed engine.

NOTES: Please note that the oil pump mounting bolts vary in length (bolts A are short, bolts B are…


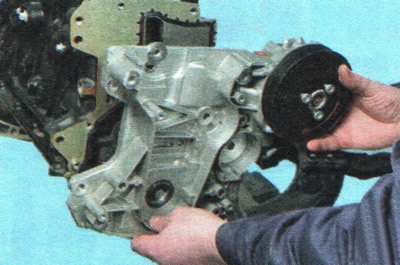
11. ...and remove the oil pump assembly with the water pump.


NOTE: Shown with engine removed for clarity.

NOTE: Shown with engine removed for clarity.


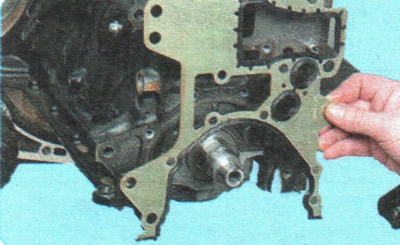
12. Remove the sealing gasket installed under the oil pump housing flange.
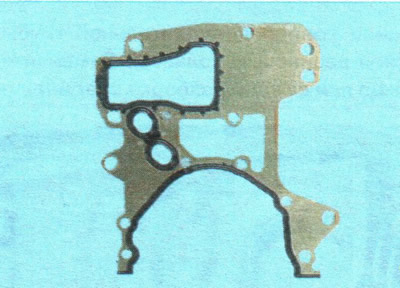
12. Remove the sealing gasket installed under the oil pump housing flange.


NOTE: Replace the oil pump gasket with a new one each time the joint is disassembled, as the old gasket may not provide a tight seal when reinstalled.


HELPFUL TIP: Replace the front crankshaft oil seal whenever the pump is removed. See "Replacing crankshaft seals").


13. Install the pump in the reverse order of removal and tighten its mounting bolts evenly crosswise to a torque of 20 N·m.

14. Install all previously removed parts and fill with coolant, see. "Replacing the coolant").

HELPFUL TIP: When installing a new oil pump, we recommend replacing the oil filter element.


(The article is based on data from the website: «ChevyMan»)

The article was checked: Vladimir Romannikov
This article is available at russian, bulgarian, belarusian, ukrainian, serbian, croatian, romanian, polish, slovak, hungarian

Share information:

Previous articles
Aveo T300: Lubrication system
Next articles

Changing engine oil and oil filter
Design features of the engine lubrication system
Removal and installation the oil filter housing
Cleaning the crankcase ventilation system


See similar articles on the topic of Chevrolet cars:
Oil pump Chevrolet Captiva 1 (2006-2018)
Removal and installation the oil pump Chevrolet Cruze 1 (2008-2016)
Removal the coolant pump Chevrolet Lacetti 1 (2002-2009)
Checking the fuel pump activation circuit Chevrolet Lanos T150 (2002-2009)
Adjusting the tension of the water pump drive belt and the power steering pump drive belt Chevrolet Niva 1 (2002-2016)
Oil pump — removal and installation Chevrolet Tahoe 1 (1992-2000)
Removal and installation the oil pump Chevrolet Lumina 1 (1989-1994)
Link in different formats to this page


Visitor comments

No comments yet


How much will 21 + 45 =


Aveo T300 (2012-2018) 
  • General information
  • Vehicle device
  • User manual
  • Main malfunctions
  • Maintenance
  • Power unit
  • Engine
  • Lubrication system
  • Cooling system
  • Supply system
  • Exhaust system
  • Transmission
  • Clutch
  • Manual gearbox
  • Automatic gearbox
  • Front wheel drives
  • Chassis
  • Front suspension
  • Rear suspension
  • Steering
  • Brake system
  • Body
  • Exterior
  • Interior
  • Doors and trunk
  • Security systems
  • Electrical equipment
  • Engine electrics
  • Equipment and devices
  • Heating and air conditioning
  • Electrical circuits


Aveo T250 (2006-2011) 
  • Manual
  • Driver's workplace
  • Salon equipment
  • Vehicle characteristics
  • Maintenance
  • Engine 1.5 SOHC
  • Engine repair
  • Fuel supply system
  • Control system
  • Cooling system
  • Engine 1.6 DOHC
  • Engine repair
  • Control system
  • Transmission
  • Clutch
  • Manual gearbox
  • Automatic gearbox
  • Wheel drive
  • Chassis
  • Wheel suspension
  • Steering
  • Brake system
  • Body
  • Exterior
  • Interior


Aveo T200 (2003-2008) 
  • General information
  • User manual
  • Power unit
  • Engine repair 1.5L SOHC
  • Fuel system
  • Control system
  • Cooling system
  • Transmission
  • Clutch
  • Manual gearbox
  • Automatic gearbox
  • Drive shafts
  • Chassis
  • Front suspension
  • Rear suspension
  • Steering
  • Brake system
  • Body
  • Exterior (external elements)
  • Interior (internal elements)
  • Electrical equipment
  • Equipment and devices
  • Electrical circuits


ChevyMan.ru © 2017-2026 · Mobile version · Feedback · Site search · Interesting to read · Sitemap: EN BG BY UA RS HR RO PL SK HU

Aveo 2003-2008 · Aveo 2006-2011 · Aveo 2012-2018 · Captiva 2006-2018 · Cruze 2008-2016 · Lacetti 2002-2009 · Lanos 2002-2009 · Niva 2002-2016 · Tahoe 1992-2000 · Tahoe 2000-2014 · Lumina 1 1989-1994 · Trailblazer 1 2001-2008 · Orlando 1 2010-2018 ·
🛡️ For your security and to improve our service, this site uses cookies. You can disable them in your browser.