
Warning!
- If you need to add brake fluid while performing work, use only new fluid recommended by the manufacturer. Avoid spilling brake fluid or allowing it to come into contact with vehicle parts, especially the paintwork. To avoid accidentally spilling liquid, add it to the tank through a clean funnel.
- Avoid contact of brake fluid with mucous membranes of the eyes. If this happens, the affected area should be immediately washed with plenty of running water and a doctor should be consulted!
We carry out the work in the following order:
1. We prepare the car for maintenance and repair.
2. Check the brake fluid level, which should be between the MAX and MIN marks located on the side wall of the master brake cylinder reservoir.
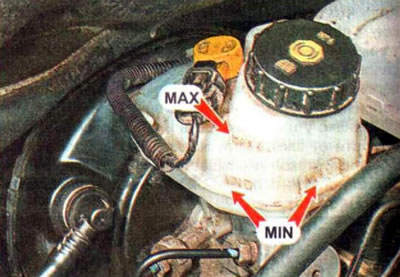
Note: The car must be parked on a level, horizontal surface. With new brake pads and discs, the brake fluid level should be at the MAX mark. If the fluid level in the reservoir has dropped, it is necessary to check the tightness of the brake system and the clutch release hydraulic drive. You should also check the condition of the brake pads and brake discs, as their wear leads to a decrease in the brake fluid level.
3. If the level is below the MIN mark, you need to add brake fluid.
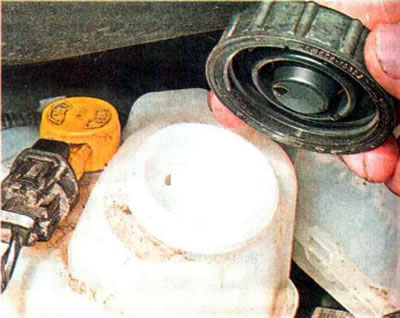
4. To prevent dust and dirt from getting into the brake hydraulic drive, carefully wipe the cover of the master brake cylinder reservoir with a clean rag. We unscrew and remove the lid.
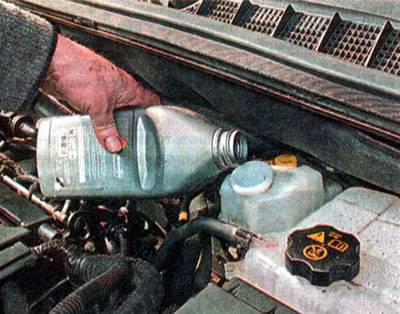
5. Add brake fluid to the reservoir up to the MAX mark.
Warning! It is essential to determine the cause of the drop in brake fluid level and eliminate the malfunction.
6. Screw the cap onto the neck of the tank and tighten it by hand.