
ChevyMan.ru
Mazda Mitsubishi Toyota Land Rover Honda Kia Nissan
English Русский
Български
Беларускі
Український
Српски
Hrvatski
Română
Polski
Slovenský
Magyar
|
Articles | Sitemap | Contacts |


Home   Aveo   Captiva   Cruze   Lacetti   Lanos   Niva   Tahoe   Others  
Orlando 1 (2010-2018) Trailblazer 1 (2001-2008, petrol) Lumina 1 (1989-1994)
  • Home
  • Chevrolet
  • Trailblazer 1
  • Chassis
  • Brake system
  • Disc Brake Caliper — Removal and Installation

Disc Brake Caliper — Removal and Installation (Chevrolet Trailblazer 1)

            0

Contents: Removal ↧ Installation ↧
Warning: Dust generated by wear of the pads is hazardous to health. Do not blow it off with compressed air or inhale dust. When servicing the brake system, it is recommended to wear a protective mask or respirator. Do not use gasoline or solvents for cleaning. Use only a special product for cleaning brake system components.


Removal


1. Loosen the front or rear wheel nuts, jack up the front or rear of the vehicle and install supports. Place wedges under the wheels of the opposite axle. Remove the rear or front wheel.

2. Remove the brake feed hose connector bolt and disconnect the hose from the caliper. The removed sealing washer can be discarded (see illustration). Plug the hose immediately to prevent clogging of the system and excessive loss of brake fluid.
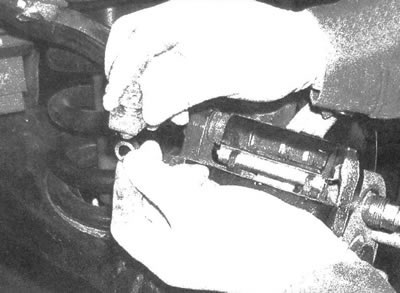
4.2. There are sealing washers on both sides of the brake supply hose nipple; when connecting the…

4.2. There are sealing washers on both sides of the brake supply hose nipple; when connecting the hose, it is necessary to replace the washers


Note: If the caliper is removed to gain access to other components, do not disconnect the brake hose from the caliper. Hang the caliper on a piece of wire, taking care not to put tension on the brake hose (see illustration 5.2).


3. Unscrew the mounting bolts and detach the caliper from the bracket. When removing the rear caliper, in order to unscrew the mounting bolts, it is necessary to secure the guide pins with an open-end wrench (see illustration 3.5e).

Installation


4. Installation is carried out in the reverse order of removal. Place new sealing washers on each side of the brake feed hose nipple. Tighten the fitting bolt and the caliper mounting bolts to the required torques.

5. Bleed the brake system (see subsection 8).

Note: If the brake hose has not been disconnected, do not bleed the hydraulic system.


Make sure the hose connections are tight. Before you begin normal operation of your vehicle, make sure that its braking system is in good working order.

The article was reprinted from the website «CHEVYMAN.RU»

The article was checked: Vladimir Romannikov
This article is available at russian, bulgarian, belarusian, ukrainian, serbian, croatian, romanian, polish, slovak, hungarian

Share information:

Previous articles
Trailblazer 1: Brake system
Next articles

Disc brake pads — replacement
Anti-lock braking system — general information
General information
Specification — Brake System
Brake disc — inspection, removal and installation
Master Cylinder — Removal, Installation and Replacement of Tank O-Ring
Brake Hoses and Tubes — Inspection and Replacement
Hydraulic brake system — bleeding
Vacuum brake booster — checking functionality, removal and installation


See similar articles on the topic of Chevrolet cars:
Removal and installation the front disc brake caliper Chevrolet Aveo T200 (2003-2008)
Front rotor, brake disc Chevrolet Captiva 1 (2006-2018)
Replacing the front wheel brake caliper assembly Chevrolet Cruze 1 (2008-2016)
Removal the front wheel brake disc Chevrolet Lacetti 1 (2002-2009)
Replacing the front wheel brake disc Chevrolet Lanos T150 (2002-2009)
Checking the thickness of the front brake disc Chevrolet Niva 1 (2002-2016)
Disc brake pads — replacement Chevrolet Tahoe 1 (1992-2000)
Link in different formats to this page


Visitor comments

No comments yet


How much will 35 + 23 =


Orlando 1 (2010-2018) 
  • General information
  • Introduction to manual
  • User manual
  • Maintenance
  • Troubleshooting
  • Power unit
  • Engine repair
  • Fuel and control system
  • Cooling and lubrication system
  • Ignition system
  • Transmission
  • Clutch
  • Gearbox
  • Drive shafts
  • Chassis
  • Car suspension
  • Steering
  • Brake system
  • Body
  • Exterior (external elements)
  • Doors, locks and windows
  • Electrical equipment
  • Equipment and devices
  • Windscreen wipers
  • Power devices
  • Electrical diagrams


Trailblazer 1 (2001-2008) 
  • General information
  • User manual
  • Troubleshooting
  • Maintenance
  • Power unit
  • Engine in a car
  • Engine overhaul
  • Cooling and heating
  • Fuel and exhaust system
  • Engine electrical equipment
  • Engine control
  • Transmission
  • Automatic gearbox
  • Transfer case
  • Drive shafts and cardan
  • Chassis
  • Brake system
  • Car suspension
  • Steering
  • Body
  • Exterior (external elements)
  • Interior (internal elements)
  • Doors, locks and windows
  • Electrical equipment
  • Equipment and devices
  • Electrical circuits


Lumina 1 (1989-1994) 
  • General information
  • Maintenance
  • Power unit
  • Engine 3.1L V6
  • Engine 3.8L V6
  • Engine overhaul
  • Cooling system
  • Power and exhaust system
  • Fuel injection
  • Engine electrical equipment
  • Reduced exhaust gas toxicity
  • Transmission
  • Automatic gearbox
  • Drive shafts
  • Chassis
  • Brake system
  • Car suspension
  • Steering
  • Body
  • Heating and air conditioning
  • Repair of body elements
  • Doors, covers and windows
  • Interior (internal elements)
  • Electrical equipment
  • Equipment and devices
  • Electrical circuits


ChevyMan.ru © 2017-2026 · Mobile version · Feedback · Site search · Interesting to read · Sitemap: EN BG BY UA RS HR RO PL SK HU

Aveo 2003-2008 · Aveo 2006-2011 · Aveo 2012-2018 · Captiva 2006-2018 · Cruze 2008-2016 · Lacetti 2002-2009 · Lanos 2002-2009 · Niva 2002-2016 · Tahoe 1992-2000 · Tahoe 2000-2014 · Lumina 1 1989-1994 · Trailblazer 1 2001-2008 · Orlando 1 2010-2018 ·
🛡️ For your security and to improve our service, this site uses cookies. You can disable them in your browser.