
ChevyMan.ru
Mazda Mitsubishi Toyota Land Rover Honda Kia Nissan
English Русский
Български
Беларускі
Український
Српски
Hrvatski
Română
Polski
Slovenský
Magyar
|
Articles | Sitemap | Contacts |


Home   Aveo   Captiva   Cruze   Lacetti   Lanos   Niva   Tahoe   Others  
Orlando 1 (2010-2018) Trailblazer 1 (2001-2008, petrol) Lumina 1 (1989-1994)
  • Home
  • Chevrolet
  • Trailblazer 1
  • Electrical equipment
  • Equipment and devices
  • Fuses and links — general information

Fuses and links — general information (Chevrolet Trailblazer 1)

            0

Contents: Fuses ↧ Fusible links ↧

Fuses


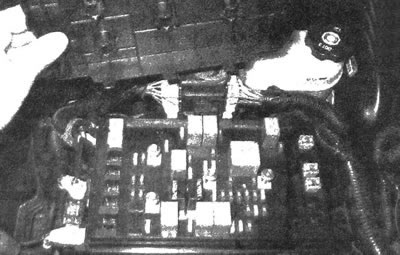
The electrical circuits of the car are protected by fuses, circuit breakers (reverse current relay) and fusible links. The main fuse/relay box is located in the engine compartment; the design also provides for the presence of an additional unit, which is located in the passenger compartment under the left rear seat and (see illustrations).
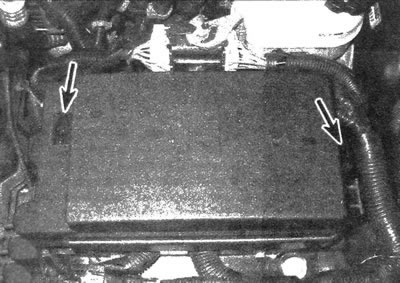
3.1a. The main fuse/relay box is located in the engine compartment on the bulkhead; disconnect the…

3.1a. The main fuse/relay box is located in the engine compartment on the bulkhead; disconnect the retaining tabs and remove the outer cover
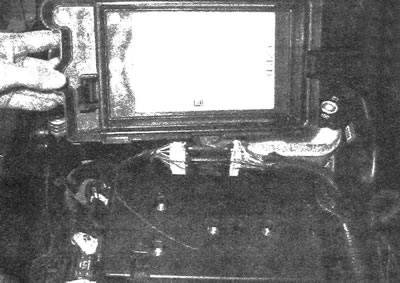

3.1b....which contains a diagram of electrical circuits, fuses...
3.1b....which contains a diagram of electrical circuits, fuses...


3.1s....and also the inner cover, under which the fuses and relays are located
3.1s....and also the inner cover, under which the fuses and relays are located


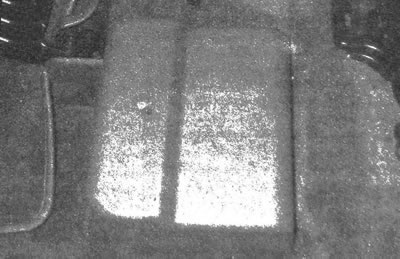
3.1d. Interior fuse/relay box, located under the left rear seat; remove the outer cover (which…

3.1d. Interior fuse/relay box, located under the left rear seat; remove the outer cover (which shows the diagram of the electrical circuits of the fuses)
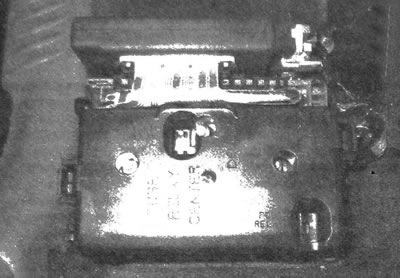

3.1e....and also the outer cover...
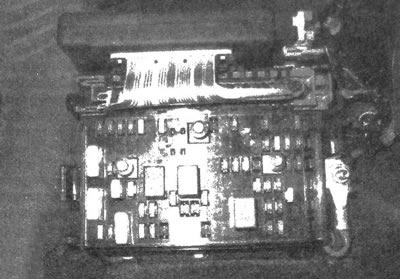
3.1e....and also the outer cover...


3.1f.... under which the fuses and relays are located

3.1f.... under which the fuses and relays are located


Each fuse is included in a specific circuit. The diagram of the correspondence of fuses and circuits is shown on the block.


The blocks contain fuses of several sizes: miniature, medium and large. Fuses of all sizes have a similar design. Medium and large fuses are removed by grasping them with your fingers. Miniature fuses must be removed using pliers or special plastic tweezers, which are included with most units.

If any electrical device does not work, first check the condition of the corresponding fuse. The best way to check a fuse is to test it with a test light. Make sure there is voltage on the protruding contact terminals (see illustration). If voltage is present only at one contact terminal, a conclusion should be made about the unsuitability of the fuse. A blown fuse can also be detected by visual inspection (see illustration).
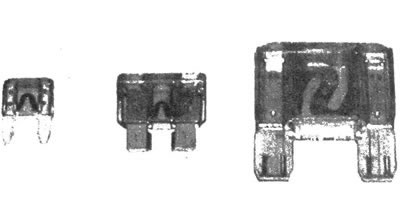
3.3a. All the proposals presented have a single rated current of 10A, but differ in size: on the…

3.3a. All the proposals presented have a single rated current of 10A, but differ in size: on the left is a miniature fuse, in the center is a medium fuse, and on the right is a large fuse. When purchasing replacement fuses, match them to the elements being replaced in size and amperage
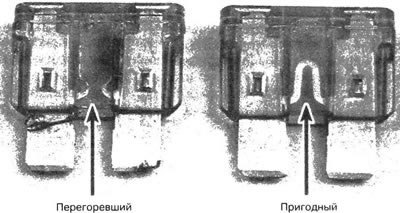

3.3b. When a fuse blows, the conductive element between the contact terminals is destroyed; on the…

3.3b. When a fuse blows, the conductive element between the contact terminals is destroyed; on the left is a blown fuse, and on the right is a usable one


The new fuse must have the same current rating as the blown one. Although fuses of different amperage ratings are physically interchangeable, only fuses of the specified amperage rating should be installed when replacing them. Replacing a blown fuse with a fuse of a different rated current is highly discouraged.

Each electrical circuit requires protection by a fuse of a certain rated current. The calculated current value is indicated on the fuse body.

If a fuse blows immediately after replacement, determine and eliminate the cause of the blown fuse before replacing it again. In most cases, the cause is a short circuit in the electrical wiring, caused by a broken or exposed wire.

Fusible links


Some circuits are protected by fuse links. Typically, such circuits are usually in an open state, such as the ignition switch circuit.

The generator circuit fuse is located in the wire connecting this element to the battery; it is easy to detect (see illustration)
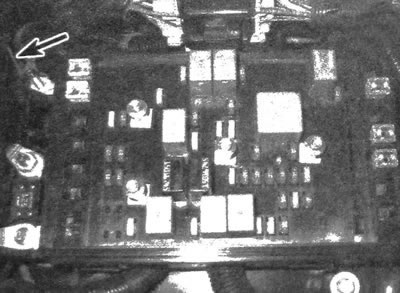
3.7. The fuse link is the connector of the wire going from the battery to the generator

3.7. The fuse link is the connector of the wire going from the battery to the generator


The insert is a short piece of large-section wire with markings on its sheath "fusible link".


Before replacing the fuse, disconnect the negative cable from the battery.

Warning: On models with the anti-theft system, the anti-theft device must be turned off before disconnecting the battery cables (see the beginning of this guide).


It seems that the fuse link has a larger cross-section than the wire of the protected circuit. In fact, this is explained by the fact that the insert has thick insulation, but at the same time consists of several wires, the cross-section of which is smaller than the cross-section of the circuit wire. The inserts cannot be restored - if necessary, they are replaced with an element with similar characteristics. The procedure for replacing the fuse link is described below.
  • a) Making a cut just behind the connector, cut the replacement insert out of the wire.
  • b) Cut approximately 25 mm of insulation from the wire.
  • c) Join the bare wires and push them into each other, then twist the connection (see illustration).
  • d) Solder the twist using rosin solder.
  • e) Completely insulate exposed wires with adhesive tape.
  • f) Connect the negative battery cable. Make sure the restored circuit is working properly.
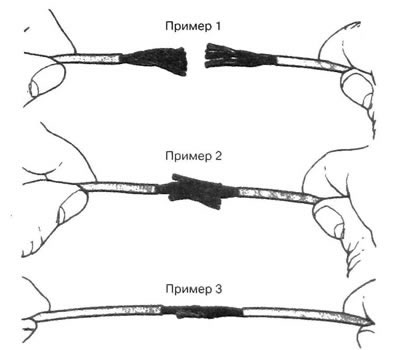

3.9 To replace a fuse link, cut out the damaged section, then connect the new link to the circuit…

3.9 To replace a fuse link, cut out the damaged section, then connect the new link to the circuit by connecting and twisting the wires as shown in this illustration. After connecting the wires, solder the twists and wrap them with insulating tape


The article is reprinted from the website: CHEVYMAN.ru

The article was checked: Vladimir Romannikov
This article is available at russian, bulgarian, belarusian, ukrainian, serbian, croatian, romanian, polish, slovak, hungarian

Share information:

Previous articles
Trailblazer 1: Equipment and devices
Next articles

Determining the Causes of Electrical Circuit Faults — General Information
Car electrical equipment — general information
Circuit breakers — general information and performance testing
Relays — General information and performance testing
Turn Signal/Hazard Warning Light Circuit Breaker — Functional Test and Replacement
Multifunction Switch Located on Steering Column — Replacement
Electronic Parking Mode Lock Switch — Replacement


See similar articles on the topic of Chevrolet cars:
Location of fuses, fuse links and their replacement Chevrolet Aveo T300 (2012-2018)
Fuses and fuses Chevrolet Captiva 1 (2006-2018)
Location of fuses, fuse links, relays and their replacement Chevrolet Cruze 1 (2008-2016)
Replacing fuses and relays Chevrolet Lacetti 1 (2002-2009)
Replacing fuses and relays Chevrolet Lanos T150 (2002-2009)
Replacing fuses Chevrolet Niva 1 (2002-2016)
Fuses — General Information Chevrolet Tahoe 1 (1992-2000)
Link in different formats to this page


Visitor comments

No comments yet


How much will 26 + 48 =


Orlando 1 (2010-2018) 
  • General information
  • Introduction to manual
  • User manual
  • Maintenance
  • Troubleshooting
  • Power unit
  • Engine repair
  • Fuel and control system
  • Cooling and lubrication system
  • Ignition system
  • Transmission
  • Clutch
  • Gearbox
  • Drive shafts
  • Chassis
  • Car suspension
  • Steering
  • Brake system
  • Body
  • Exterior (external elements)
  • Doors, locks and windows
  • Electrical equipment
  • Equipment and devices
  • Windscreen wipers
  • Power devices
  • Electrical diagrams


Trailblazer 1 (2001-2008) 
  • General information
  • User manual
  • Troubleshooting
  • Maintenance
  • Power unit
  • Engine in a car
  • Engine overhaul
  • Cooling and heating
  • Fuel and exhaust system
  • Engine electrical equipment
  • Engine control
  • Transmission
  • Automatic gearbox
  • Transfer case
  • Drive shafts and cardan
  • Chassis
  • Brake system
  • Car suspension
  • Steering
  • Body
  • Exterior (external elements)
  • Interior (internal elements)
  • Doors, locks and windows
  • Electrical equipment
  • Equipment and devices
  • Electrical circuits


Lumina 1 (1989-1994) 
  • General information
  • Maintenance
  • Power unit
  • Engine 3.1L V6
  • Engine 3.8L V6
  • Engine overhaul
  • Cooling system
  • Power and exhaust system
  • Fuel injection
  • Engine electrical equipment
  • Reduced exhaust gas toxicity
  • Transmission
  • Automatic gearbox
  • Drive shafts
  • Chassis
  • Brake system
  • Car suspension
  • Steering
  • Body
  • Heating and air conditioning
  • Repair of body elements
  • Doors, covers and windows
  • Interior (internal elements)
  • Electrical equipment
  • Equipment and devices
  • Electrical circuits


ChevyMan.ru © 2017-2026 · Mobile version · Feedback · Site search · Interesting to read · Sitemap: EN BG BY UA RS HR RO PL SK HU

Aveo 2003-2008 · Aveo 2006-2011 · Aveo 2012-2018 · Captiva 2006-2018 · Cruze 2008-2016 · Lacetti 2002-2009 · Lanos 2002-2009 · Niva 2002-2016 · Tahoe 1992-2000 · Tahoe 2000-2014 · Lumina 1 1989-1994 · Trailblazer 1 2001-2008 · Orlando 1 2010-2018 ·
🛡️ For your security and to improve our service, this site uses cookies. You can disable them in your browser.