
Maintenance methods
There are several basic principles of vehicle maintenance and repair that are constantly mentioned throughout this manual. Following them allows the car enthusiast to perform various repair procedures rationally and efficiently, as well as to carry out maintenance effectively.
Threaded connections
Threaded fasteners include nuts, bolts, studs and screws that fasten two or more parts together. When handling such elements, some features of this group of parts should be taken into account. Almost always, connections are provided with a locking device of some type: a spring washer, a lock nut or a pin. Sometimes a bonding compound is applied to the threads to secure the connection. All fasteners of the connection must be pre-cleaned and inspected for compliance with the standard of their geometric shape. The threads must not show any signs of damage or wear, and the hexagonal edges for the wrench must not be rounded. Get into the habit of replacing damaged threaded parts with new elements during assembly. Locknuts with plastic bushings can only be used once for their intended purpose. When loosened, the lock nuts lose their ability to perform their functions, and it becomes necessary to replace them.
Threaded connections are extremely susceptible to corrosion. If the threaded fastener does not come off, apply penetrating oil, kerosene or other agent to it and wait until the liquid is absorbed. You can try using a pneumatic or electric impact wrench. If the above methods prove ineffective, you can try to gently heat the connection. If this does not lead to the desired result, then you will have to resort to using a hacksaw or chisel.
Flat and spring washers on connections should always be replaced during assembly. Do not place spring washers between soft metal parts (for example, from aluminum alloys), thin sheet steel or plastic.
Dimensions of threaded connections
For a number of reasons, vehicle manufacturers widely use fasteners with metric threads. It is important to differentiate between SAE standard fasteners (operating in the USA) and metric connectors, since these groups of parts are not interchangeable.
The designation of bolts of all standards determines the diameter, as well as the pitch and length of the thread. For example, the SAE standard designation 1/2-13x1 means the bolt thread diameter is 1/2 inch, the pitch is 13 threads per inch of length, which is 1 inch. The designation of the metric bolt M12 -1.75 x 25 means: thread diameter - 12 mm, thread pitch - 1.75 mm (distance between threads), and the length of the threaded part of the bolt is 25 mm. The bolts described above are visually almost indistinguishable. They are easily confused, but they are not interchangeable.
SAE bolts and metric bolts differ not only in diameter, thread pitch and length, but also in head height, which is given in inches for SAE bolts and in millimeters for metric bolts.
The above differences apply equally to nuts.
Therefore, wrenches of different standards must be used on the corresponding nuts and bolts. In addition, most SAE standard bolts have grooves on the head surface, the number of which determines the class and permissible tightening force. The permissible tightening force of such bolts is directly proportional to the number of slots on the head. Cars typically use bolts from class zero to class five. The class of metric bolts is indicated in their designation and does not depend on the presence and number of grooves on the surface of the head. The permissible load on metric bolts is directly proportional to their class. Vehicles typically use metric bolts of classes 8.8, 9.8 and 10.9.
Sometimes nuts of both standards are marked accordingly, which determines the permissible load on the threaded connection. Typically, SAE nuts have dots stamped on one side, while metric nuts are marked with numbers. The permissible load on the nut is directly proportional to the number of applied dots or the value of the specified number.
Metric studs are also marked depending on their class. The class of large diameter studs is indicated in their designation (as well as metric bolts), while small diameter studs are marked with geometric shapes to indicate their class.
It should be noted that most threaded fasteners do not have a class marking, especially if we are talking about a class from 0 to 2. In the absence of markings on a fastener, the only way to determine its standard is to measure the thread pitch or compare the given part with a similar part of a known standard.
When talking about SAE standard threaded parts, the name of the standard "BAE" is often mentioned directly. However, it should be noted that the name "BAE" refers only to high-precision connectors. Low grade threaded parts are commonly referred to as USS standard parts.
Considering that fasteners of similar dimensions may have different load-bearing classes (both SAE and metric), when assembling, they should be installed in their respective original locations. In addition, when replacing fasteners, it is necessary to ensure that the class of the fastener being installed is not lower than the class of the part being replaced.
Sequence and method of tightening threaded connections
Most threaded connections should be tightened to a specified torque (tightening torque - the torque that must be applied to a nut or bolt to loosen it). Exceeding the specified tightening force will result in the destruction of the fasteners, while insufficient force will eventually result in the fasteners loosening and separating spontaneously. Depending on the thread diameter and the material of manufacture, bolts, screws and studs have certain tightening forces, which in most cases are indicated at the beginning of the relevant chapters. When tightening connections, follow certain rules.
Connectors for which the tightening torque is not specified are tightened in accordance with the recommendations given in the table.
Data shown is for unlubricated steel or cast iron fasteners (made from non-aluminum alloys). As defined above, the permissible load on a threaded connection is determined by the material from which the fasteners are made and the thread diameter. The values below are averages for class 2 and 3 connectors. As the class of parts increases, higher tightening torque values are permitted.
Threaded fasteners such as cylinder head bolts, oil pan bolts, differential housing bolts, etc., should be tightened and loosened in specific sequences to prevent deformation of the fastened elements. These sequences are usually given in the relevant chapters. In the absence of a specific tightening sequence, the following principles must be followed to prevent possible deformation of the fastened parts.
At the initial stage, tighten the bolts/nuts manually. They should then be tightened one full turn in a criss-cross or diagonal pattern. After completing one full turn of tightening, return to the first fastener and tighten the connectors one half turn in the same sequence.
Finally, before tightening to the specified torque, tighten each connector a quarter turn. When loosening the tightening force and unscrewing the connectors, perform the above procedure in reverse order.
Disassembling the elements
Disassembly of the elements should be carried out carefully, taking measures during this procedure to facilitate subsequent assembly and installation.
Always mark the sequence of removal of parts. It is also necessary to mark the initial position in a notebook or with paint directly on parts that can be installed in different positions, for example, the initial position of a corrugated thrust washer on a shaft. It is recommended to lay out the removed parts on a clean surface in the order of removal. It is also recommended to make sketches or photographs of the elements in their original positions.
When removing threaded connectors, always mark their original position. Sometimes temporarily screwing the bolts back into their original positions can prevent possible confusion later, as can temporarily screwing the nuts and washers onto the appropriate studs. If it is not possible to do the above, fasteners should be stored in labeled boxes or in compartments of one large box. A plastic candy box with compartments is ideal for this purpose, as each of them can hold bolts and nuts removed from their respective original positions (for example, bolts and nuts for fastening the oil pan, valve cover, engine mounts, etc.).
The tray of such a box is indispensable when working with small-sized elements, such as a carburetor, generator, valve mechanism elements or internal panels and trim.
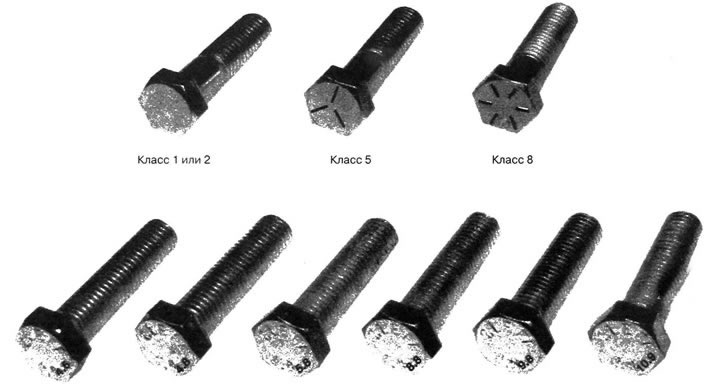
Marking of bolts depending on permissible load (SAE, USS standards; bottom row - metric bolts)
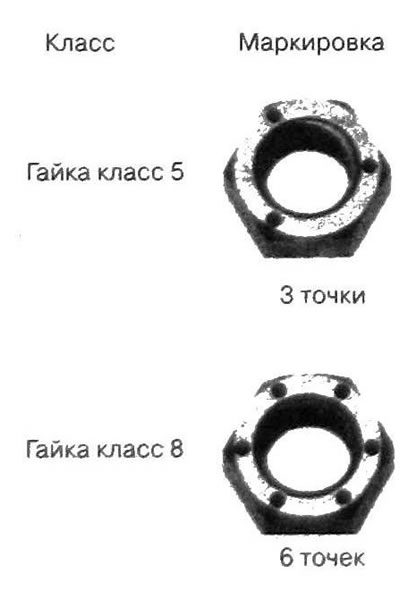
Markings according to permissible load on SAE standard nuts
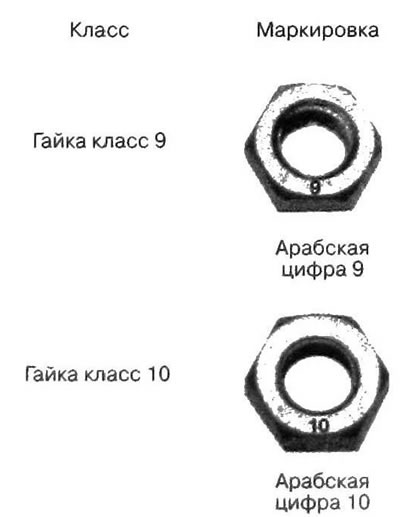
Markings according to permissible load on metric nuts
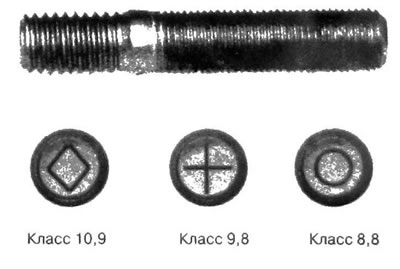
Marking according to permissible load on metric studs
The box compartments can be marked with paint or colored labels to identify fasteners according to their original positions.
When disconnecting harnesses, screens and wiring connectors, it is advisable to identify open wires by labeling them with the appropriate numbers, thus ensuring quick and correct subsequent connection during subsequent assembly.
Mating surfaces and gaskets
Gaskets are widely used in vehicle design to seal mating surfaces, preventing joint depressurization or oil/liquid leakage. Gaskets are often treated with grease or sealant during assembly. Over time, and under the influence of high temperature and pressure, the mating surfaces can become quite strongly bonded to each other.
When separating mating parts, do not insert screwdrivers or similar tools between them. This may cause serious damage which will result in oil leakage, coolant leakage, etc. after assembly.
Separation is usually accomplished by tapping along the mating surfaces with a hammer made of soft material. The goal is to move or destroy the gasket. However, it should be noted that this method is not suitable for disassembling pin connections.
If a gasket is required between the mating surfaces of two parts, it should always be replaced during assembly; install a dry gasket unless otherwise specified in the assembly manual.
Before installation, make sure that the mating surfaces are clean and dry and free of any traces of old sealant. When cleaning mating surfaces, use an appropriate solvent and tool that will not damage the surface if necessary.
Do not use solvents when cleaning mating surfaces of parts made of plastic or other composite material. Remove burrs with a lubricated abrasive block or fine-grit file. It is recommended to use a copper scraper, since this material is usually softer than the material from which the separated parts are made, which eliminates damage to the surfaces during the cleaning process. Make sure all threaded holes are clean and do not allow any sealant to enter them unless otherwise specified in the assembly instructions.
Make sure all holes, channels and tubes are not clogged and blow them out with compressed air if necessary.
| Metric thread | Feet - pounds | Nm |
| M-6 | 6-9 | from 9 to 12 |
| M-8 | 14-21 | from 19 to 28 |
| M-10 | 28-40 | from 38 to 54 |
| M-12 | 50-71 | from 68 to 96 |
| M-14 | 80-140 | from 109 to 154 |
| Inch threads on tubular connections | Feet - pounds | Nm |
| 1/8 | 5-8 | 7-10 |
| 1/4 | 12- 18 | 17-24 |
| 3/8 | 22-33 | 30-44 |
| 1/2 | 25-35 | 34-47 |
| Standard in force in the USA | Feet - pounds | Nm |
| 1/4-20 | 6-9 | 9- 12 |
| 5/16-18 | 12-18 | 17-24 |
| 5/16-24 | 14-20 | 19-27 |
| 3/8-16 | 22-32 | 30-43 |
| 3/8-24 | 27-38 | 37-51 |
| 7/16-14 | 40-55 | 55-74 |
| 7/16-20 | 40-60 | 55-81 |
| 1/2-13 | 55-80 | 75 - 108 |
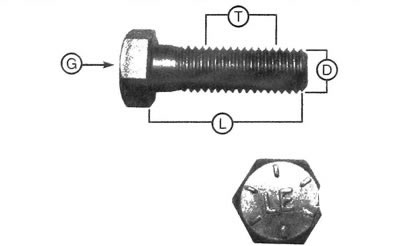
SAE and USS bolt size and class designations: G - Classification Marking (by permissible load); L - length of the working part (in inches); T - Thread pitch (quantity in one inch); D - Nominal thread diameter (in inches)
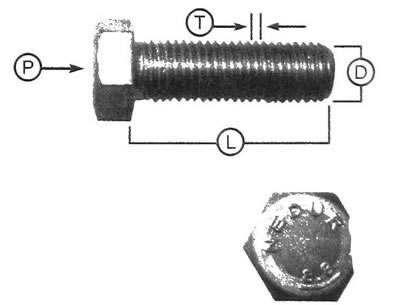
Designation of sizes and class of metric bolts: P - Specified class (by permissible load);L - length of the working part (in millimeters);T - Thread pitch (distance between threads in millimeters);D - Thread diameter
Disconnecting the hoses
Warning: If the vehicle is equipped with an air conditioning system, do not disconnect the system hoses without first discharging the system at a qualified service station.
The precautions taken when disconnecting hoses are similar to those taken when disconnecting mating surfaces with a gasket. Do not allow damage to the connector surface that may result in fluid leakage or subsequent leakage. This phenomenon occurs especially often when the surfaces of the radiator pipes are damaged. Due to various chemical reactions, rubber may stick to the metal end of the hose. Before removing the hose, loosen the clamps. Then, grasping the part of the hose located on the branch pipe with the appropriate device, rotate the hose around the axis of the branch pipe. Repeat the reciprocating rotation until the resistance to removal is reduced, then disconnect the hose. If possible, coat the hose and the outside of the fitting with silicone-based grease or other suitable lubricant to make removal easier. During subsequent installation, apply the same lubricant to the inner surface of the hose and the outer surface of the branch pipe - this will make connection easier.
If there is an urgent need to replace a hose that cannot be removed, as a last resort you can cut it off and then remove the remaining part from the branch pipe. When cutting a section of the hose, be careful not to damage the surface of the nozzle.
If the mounting clamp shows signs of wear or damage, do not reinstall it under any circumstances. Spring clamps loosen over time, so it is recommended to replace them with worm clamps whenever the hose is removed/installed.
Tools
Selecting high-quality tools is the key to successful repairs and efficient maintenance of your vehicle. For motorists who do not have such tools, purchasing a complete set will result in significant expenditure of funds, which can only be partially reduced by making some of the devices yourself. However, if the tools you buy meet safety requirements and are of high quality, they will last for many years and will be an extremely useful purchase.
To help the motorist decide what tools he needs to perform the various jobs described in this manual, the authors have compiled three lists under the following headings: "Service and Minor Repair Tool Kit," "Medium and Major Repair Tool Kit," and "Special Tools and Accessories."
Car owners who do not have sufficient repair experience should start by purchasing a set of tools for maintenance and minor repairs, and limit themselves to simple tasks. Then, as your confidence grows and you gain experience, you can move on to more complex tasks, acquiring additional tools as needed. Thus, over a long period of time and without large one-time costs, it is possible to expand the set of tools for maintenance and minor repairs to a set intended for medium and major repairs. Experienced car enthusiasts can have a set of tools suitable for most repair jobs, and supplement it with tools from the "special" list if they are confident that the cost of purchasing them is justified by frequent use.
Set of tools for maintenance and minor repairs
This list provides a set of tools needed for maintenance and minor repairs. It is recommended to buy combination wrenches (a spanner on one side and an open-end wrench of the same size on the other); these keys are more expensive, but have the advantages of both types.
- Set of wrenches:
Inch - from ¼ to 1 inch
Metric - from 6 to 19 mm inclusive
- Adjustable Wrench - 35mm or 8 inches (approximately)
- Spark plug wrench (with rubber insert)
- Spark plug gap adjustment device
- Set of feeler gauges
- Key for unscrewing the brake system bleeder nipples
- Flat head screwdriver - 100mm length, 6mm diameter (5/16 x 6 inches);
- Phillips head screwdriver - 100mm length, 6mm diameter (2 x 6 inches);
- Pliers
- Hacksaw (small) with a set of blades
- Manometer
- Grease pump
- Butter can
- Fine grit sandpaper on a cloth backing
- Wire brush
- Tool for servicing battery wires and terminals
- Oil filter removal tool
- Funnel (medium size)
- Safety glasses
- Vertical supports for a car raised with a jack (2 pcs.)
- Drain pan
Note: If regular maintenance procedures are to be performed as part of ongoing periodic maintenance, the above list must be supplemented with a strobe flash frequency/breaker contact closure period meter and a strobe light. These tools are included in the special tools list, but are mentioned here because they are necessary for adjusting the ignition system on most vehicles.
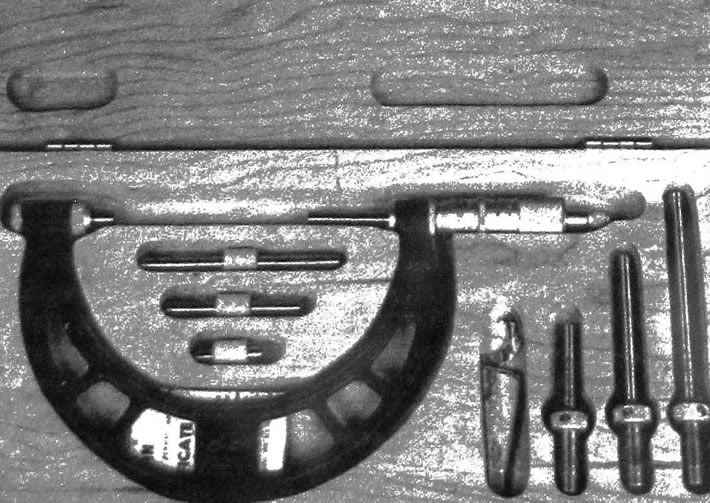
Manometer
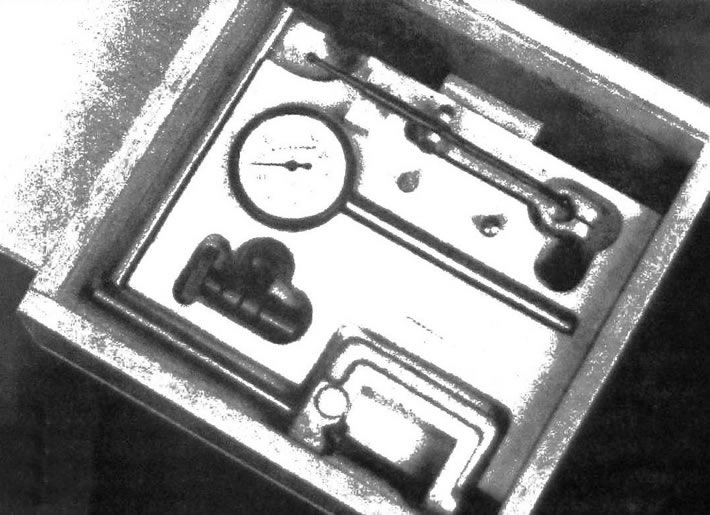
Measuring instrument with pointer indicator
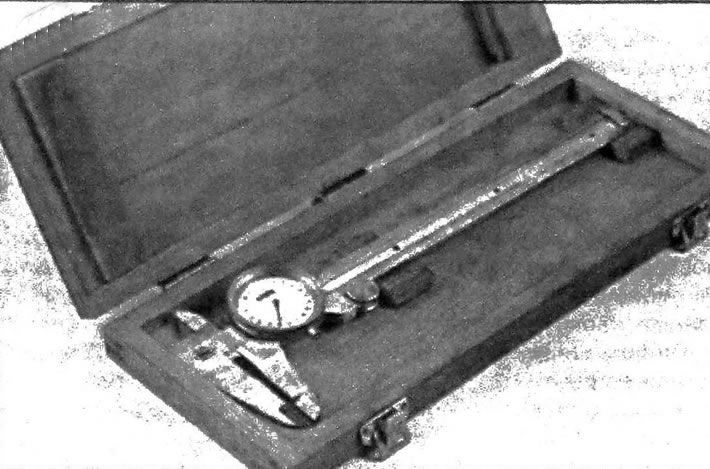
Caliper with pointer indicator
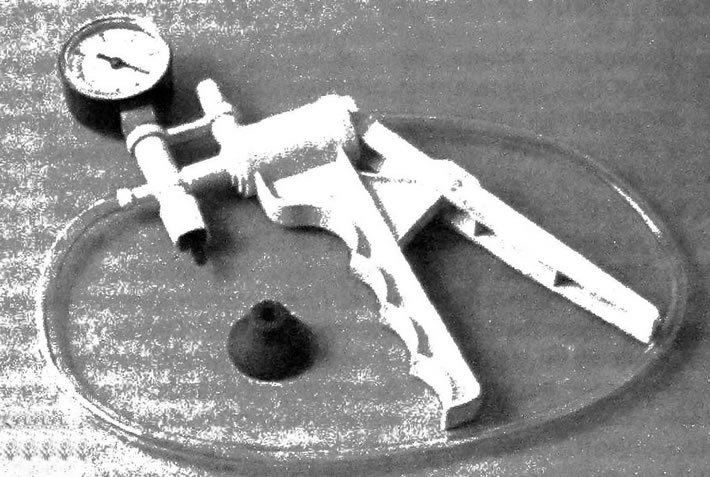
Portable Vacuum Pump
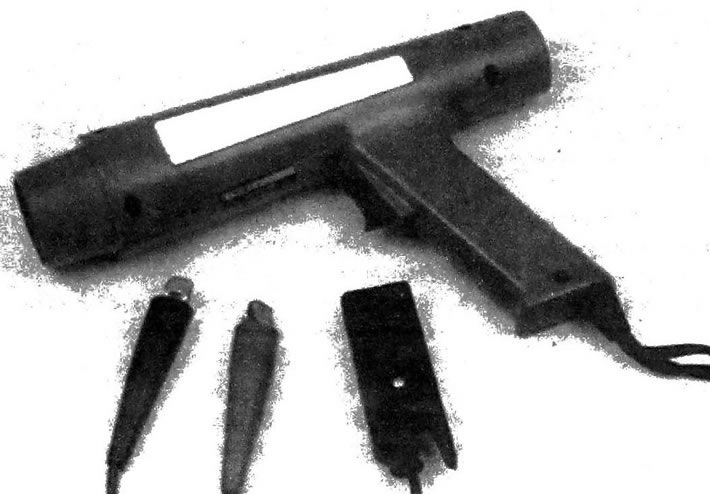
Stroboscope
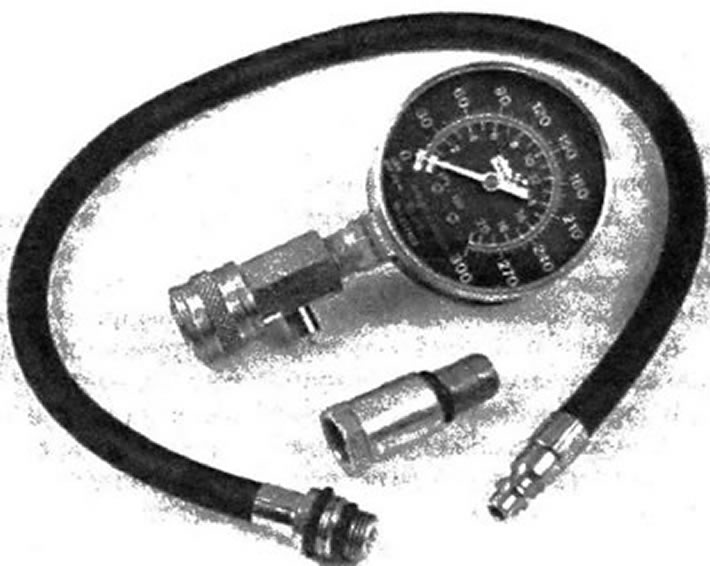
Compression gauge with adapter for spark plug hole
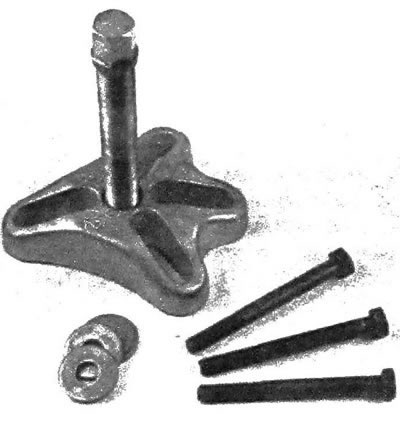
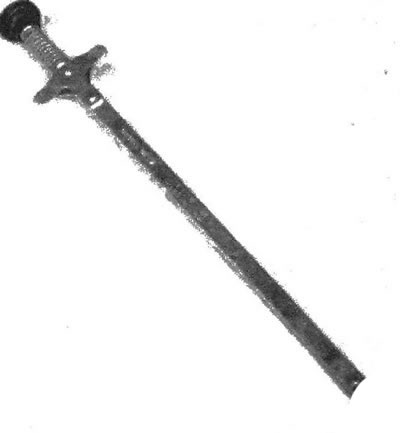
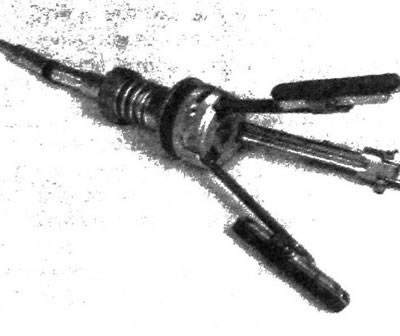
Steering Damper/Steering Wheel Remover
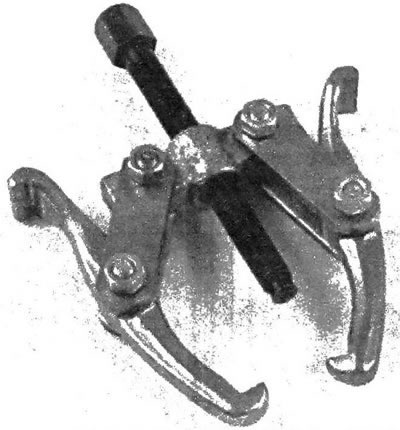
Universal puller
Hydraulic valve lifter puller
Set of tools for medium and major repairs
These tools are required for major repairs, in addition to the list of tools for maintenance and minor repairs. This listing includes a set of socket heads. Although it is expensive, it is absolutely necessary for more or less serious work. It is recommended to purchase a lever with a ratchet mechanism and a socket for 1/2" heads. However, despite the fact that the 3/8" lever has significant dimensions and a relatively high cost, it can be used with many large-diameter heads. It is preferable for the mechanic to have two levers with sockets for socket heads - 1/2" and 3/8".
- Set of socket heads
- Reversible ratchet handle (for use with socket heads)
- Extension 250mm long (for use with socket heads)
- Cardan joint ratchet (for use with socket heads)
- Torque wrench (for use with socket heads)
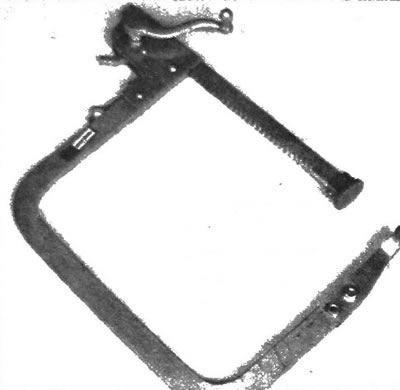
- Impact device for separating ball joints
- Soft-faced hammer (plastic, aluminum or rubber)
- Screwdrivers:
flat-ended - long and strong, short (wide), narrow (for work with electrical system elements);
with a cross-shaped end - long and strong, short (wide)
- Pliers:
with long grips; side cutters (for work with electrical system elements), spring ring pliers - external and internal
- Chisel - 25 mm (½ inch)
- Marker for metal parts
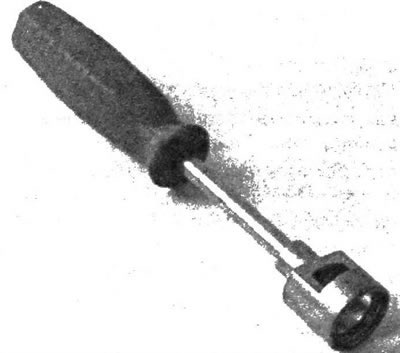
- Scraper made from flattened copper tube
- Kerner
- Punches
- Steel ruler
- Keys Alena (hexagons)
- Set of files
- Wire brush
- Car stands (2 pcs.)
- Hydraulic jack
Note: the list can be expanded to include another very useful tool - an electric drill with a set of drill bits and a chuck designed for a maximum drill diameter of 3/8 inches (M10).
Special tools and devices
The tools and equipment listed in this list are used infrequently, are expensive, or have a limited application. The purchase of many of them will not be justified if complex mechanical work is performed rarely. Maybe it's worth teaming up with some friends (or join a motorist's club), to acquire such tools. You can also rent them from specialists.
The following list includes only those tools and accessories that are commercially available and not those that the vehicle manufacturer produces specifically for dealers and service stations. References to such tools may appear occasionally throughout the text of this guide.
This book usually provides an alternative method of doing the job without using special tools. But sometimes there is no alternative. If this is the case and the appropriate tools cannot be purchased or rented, then the work will have to be entrusted to specialists from the company station.
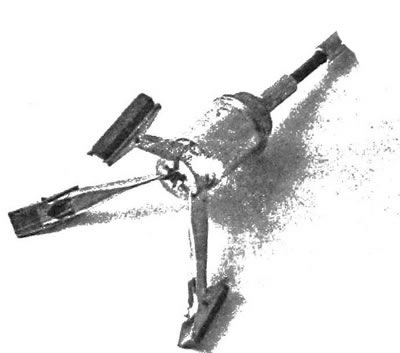
- Valve spring compressor
- Piston Ring Groove Cleaning Tool
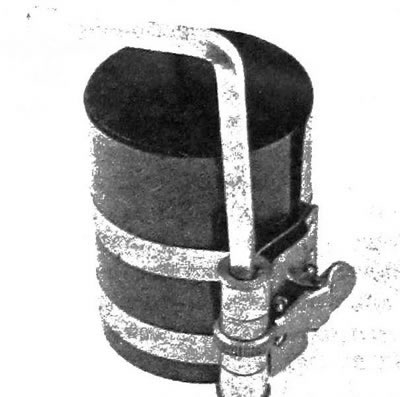
- Piston ring puller
- Piston ring installation tool
- Compression meter
- Cylinder reamer
- Hone for engine cylinder surface treatment
- Engine cylinder bore gauge
- Micrometer and/or caliper with dial indicator
- Hydraulic valve lifter puller
- Hinge Pin Release Tool
- Universal puller
- Pneumatic impact wrench
- Measuring instrument with pointer indicator
- Stroboscope
- Portable vacuum/air pressure pump
- Strobe Flash Frequency/Interrupter Contact Closing Period Meter
- Tachometer
- Multimeter
- Telpher
- Device for removing and installing springs of brake system mechanisms
- Heavy Duty Hydraulic Floor Jack
Valve Spring Removal Tool
Valve spring compressor
Scan
Piston Ring Groove Cleaning Tool
Tool for removing/installing piston rings
Piston ring puller
Hone for machining the working surface of engine cylinders
Brake spring compressor
Hone for processing the surface of the brake cylinder
Clutch Disc Centering Tool
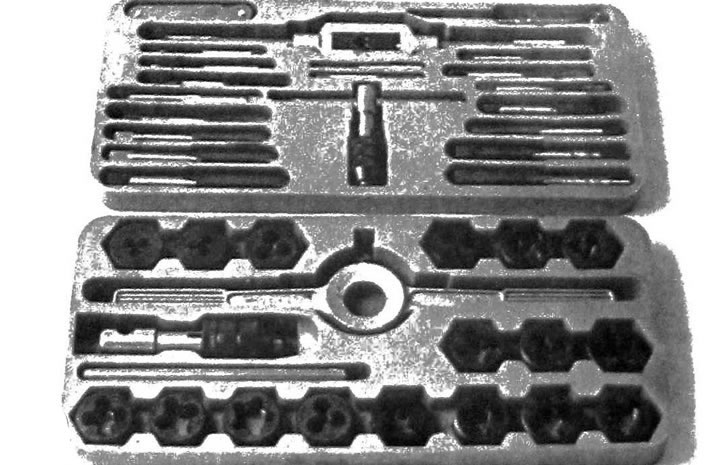
Set of dies and taps
Purchasing tools
For a car enthusiast - a mechanic who independently performs maintenance and repairs of a car, even with relatively little work experience, there are several sources for purchasing tools. If you only plan to perform maintenance and minor repairs, you can limit yourself to purchasing tools that meet this level in a retail network. If you are planning to carry out serious repair work, you should purchase a simple set of tools in one of the brand stores. As a rule, such a set can be purchased at a wholesale price, moreover, special boxes are often supplied with the set. Since additional tools may be needed in the future, it is advisable to purchase a box, thus providing for possible expansion of the set. Purchasing tools in stages allows the mechanic to avoid large one-time expenses and to purchase only those tools that are needed.
Supermarkets and branded parts stores often offer excellent, high-quality tools and accessories at low prices.
Remember that you don't have to buy the most expensive tools, but avoid buying the cheapest ones either. Beware of "bargain" tool purchases offered in parking lots or sold from car trunks at car markets. There are many high quality tools available at reasonable prices, but you should always try to buy products that meet safety requirements. If necessary, you should consult the owner or manager of the store, (www.monolith.in.ua)
Storage and maintenance of proper technical condition of tools
Once you have purchased the necessary set of tools, keep them clean and in good condition. Before storing tools after use, always clean them with a clean, dry cloth to remove dirt, oil and metal particles. Never leave them lying around after work.
After finishing work in the engine compartment, make sure that all tools and equipment are removed from the hood. This will prevent them from being lost during engine testing. For tools such as screwdrivers and pliers, a simple shelf on the wall is very convenient. Store wrenches and socket heads in a metal box. Any measuring instruments, indicators, etc. should be stored in places where they will be protected from damage and corrosion.
When using tools, take some time to maintain them. Sooner or later, the hammer head becomes chipped and the screwdriver blades become dull. With timely processing with sandpaper or a file, the original technical condition of such tools will be quickly restored.
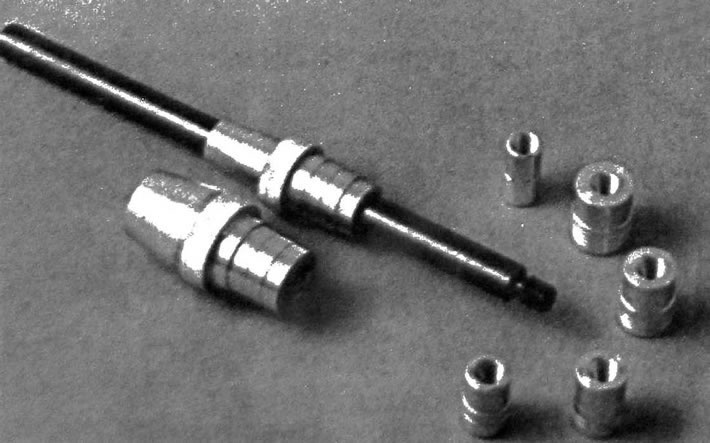
Restoration of damaged and worn threads
Sometimes the thread of a nut or bolt hole is damaged.
As a rule, this occurs due to exceeding the permissible tightening force.
Thread wear and damage is a fairly common occurrence, especially when it comes to threads of parts made from aluminum alloys, since this material is quite soft and wears out quickly due to friction.
Typically, acceptable thread wear is observed. After being run through with a tap or die, it is still capable of fulfilling its intended purpose. One day, each thread will reach its wear limit. There are three ways to restore worn threads:
1) Drill a hole, cut a thread of a larger repair size in it and install a bolt, screw or stud of a larger diameter.
2) Drill a hole and cut a thread in it for the repair sleeve, drill a hole in the sleeve and cut a thread in it for the bolt of the original size. It is also possible to purchase a bushing with an existing threaded hole of the required original size. In this case, all that remains is to drill a hole and cut a thread in it for the bushing, then install the bushing using a bolt and lock nut. After installing the bushing, the lock nut and bolt are removed.
3) The third method of restoration involves the use of a patented repair kit for threads "Heli-Coil" or "Slimsert". With the help of these easy-to-use repair kits, you can restore damaged threads of through and blind holes. They can also be used to cut threads of various diameters. Drill a hole and cut a thread in it using the special tap included in the kit. Installing the repair kit will ensure the presence of a threaded hole of the required diameter and with the specified thread pitch.
Regardless of the method you use, work carefully and consistently. Carelessness in performing these relatively simple procedures can result in a waste of time and money, as well as possible material damage if an expensive part is destroyed.
Workplace
When talking about tools, we should not forget about the workplace. If the work being carried out goes beyond normal maintenance, then the need for a suitable work area is obvious.
Many car enthusiasts, due to circumstances, are forced to remove the engine or similar units from the car in conditions that are not as favorable as those available in a repair shop. Such work should always be carried out indoors or under cover.
Any disassembly should be done on a clean, flat workbench or table of suitable height. Any workbench should be equipped with a vice with a jaw opening of at least 100 mm, which is suitable for most jobs.
As mentioned above, it is necessary to allocate a dry and clean place for storing tools, as well as for all kinds of lubricants, liquids, touch-up paint, etc. You should also get a container for draining used motor oil and operating fluids. Old plastic canisters from antifreeze or coolant are ideal for this purpose. To turn such a canister into a drain pan, simply cut off one of the large edges.
To protect the floor surface from oil and liquids that may leak from the car, place a large sheet of cardboard under the car. Keep an old blanket or special vinyl cover on hand to protect the paintwork and glass of your car.
Last but not least, always keep a certain amount of old newspapers and clean cloth napkins in the workplace that do not leave threads or lint on the surface to be wiped, and keep the workplace clean.