
Warning 1: The vehicles described in this manual are equipped with a Supplemental Restraint System (SRS), also known as an air bag system. Before carrying out work in the area where the elements of this system are located, it is necessary to disconnect its power supply, since accidental deployment of the airbags can result in serious injury (see chapter 12).
Warning 2: The air conditioning system is under high pressure. Do not loosen the couplings or remove components without first discharging the system when contacting an authorized or specialized service station. When disconnecting the air conditioning system couplings, wear protective glasses or a mask.
Warning 3: Allow the engine to cool completely before performing this procedure.
1. Drain the refrigerant from the air conditioning system by contacting a specialized station (see warning above).
2. Disconnect the negative battery cable.
3. Drain the cooling system (see chapter 1), then disconnect the heater hoses and coolant circulation lines from the pipes located on the rear bulkhead of the engine compartment (see illustration). Plug any open holes to prevent coolant from leaking and to avoid clogging the air conditioning system.
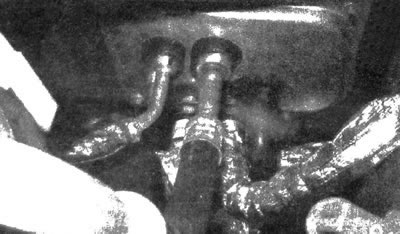
12.3. After discharging the air conditioning system, disconnect the evaporator lines from the pipes located on the rear bulkhead of the engine compartment. Cap the couplings to prevent moisture from entering the system. If necessary, the heater hoses can be cut
4. Remove the instrument panel (see chapter 11).
5. Remove the instrument panel bracket and heater/air conditioner (HVAC unit) (see illustration).
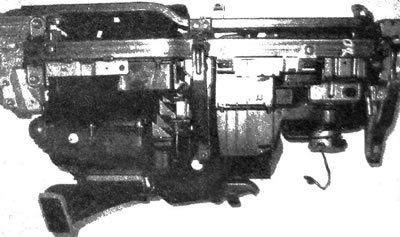
12.5. The HVAC unit is removed together with the instrument panel holder
6. Separate the HVAC unit from the instrument panel bracket.
7. Remove the screws and separate the HVAC housing components. Remove the screws and clips, then carefully remove the heater core (see illustrations).
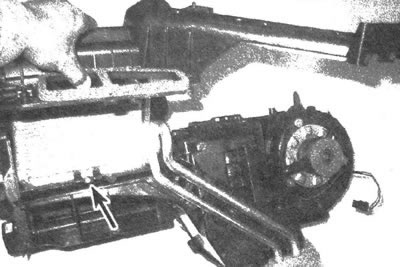
12.7a. Remove cover from HVAC housing, remove screws and clips...
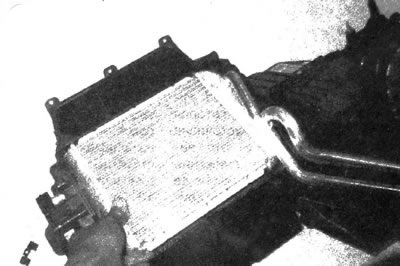
12.7b... and remove the heater heat exchanger
8. The remote control is installed in the reverse order of removal.
Note: When installing the heater heat exchanger, it is necessary to correctly position all removed seals and insulators around it and its tubes.
9. Fill the cooling system (see chapter 1). Contact a specialized station and charge the air conditioning system.
10. Start the engine and check the heater's functionality.