
Warning: Wait until the engine has cooled down completely before proceeding with this procedure.
Note: During this procedure, you must use a special fan clutch wrench (GM# 46406 or equivalent).
1. Remove the bolts and push out the pins that secure the air intake plate to the radiator supports and remove it.
2. Disconnect the transmission cooling lines from the bracket located on the engine and from the fan shroud.
3. Disconnect the electrical viscous coupling connector from the casing.
4. Disconnect the upper hose from the radiator. Be prepared for coolant spillage.
5. Turn counterclockwise and remove the drive coupling sleeve from the coolant pump.
6. Disconnect the casing from the side panels and move the radiator forward together with the condenser. It is convenient to perform this operation with the help of an assistant.
7. Remove the fan assembly with the shroud by lifting the elements vertically while holding the radiator and condenser pushed forward (see illustration).
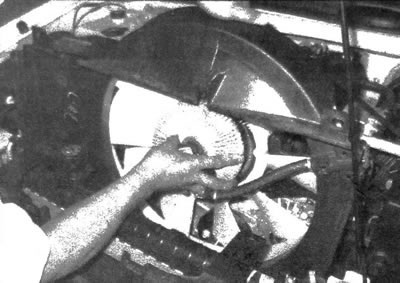
5.7 Lift and remove the fan, shroud and coupling assembly
8. If necessary, unscrew the bolts securing the fan to the coupling. It should be noted that these bolts should be tightened to a specific torque (see the specifications of this chapter).
9. Installation is carried out in the reverse order of removal. Tighten the nut that secures the drive coupling sleeve to the required torque.
10. Check the coolant level and top up if necessary (see chapter 1).