
Contents: Removal ↧ Installation ↧
Removal
Warning: The air conditioning system must be discharged before removing the valve cover. To safely remove the refrigerant from the system, you must contact a specialized station, where the procedure is performed by trained specialists using special equipment.
1. Discharge the air conditioning system.
2. Remove the intake manifold (see subsection 3).
3. Disconnect the refrigerant circulation line from the condenser (see chapter 3). Also disconnect the air conditioning line bracket located on the engine mounting hook and the bracket located on the oil level tube (see illustration).
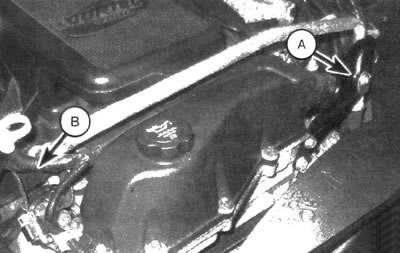
4.3 Connecting the air conditioning line to the bracket on the engine mounting hook (A) and to the bracket on the oil level tube (B)
4. Remove the engine mounting bracket.
5. Disconnect the injector connectors, then carefully disconnect the engine wiring harness from the valve cover (see illustration).
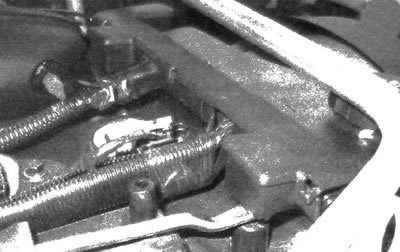
4.5 Carefully pry and disconnect the engine wiring harness from the valve cover
6. Remove the ignition coils (see chapter 5).
7. Unscrew the bolts and remove the valve cover (see illustration).
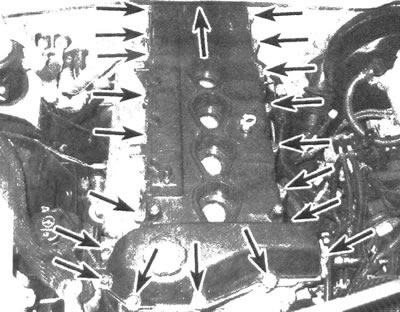
4.7 Location of bolts that secure the valve cover (from this angle some bolts are invisible)
8. Clean and inspect the lid for cracks.
Installation
9. If necessary, install new ignition coil seals (see chapter 5), as well as the valve cover seal.
10. Installation is carried out in the reverse order of removal.
11. Tighten the cover bolts and ignition coil bolts to the specified torque (see specifications of this chapter and chapters 5).
12. To charge the air conditioner, contact the station where the refrigerant was removed.