


Removal procedure
1. Disconnect the negative battery cable.
2. Drain the coolant from the engine cooling system. Follow step "Draining and filling the cooling system" in this section.
3. Remove the decorative engine cover. See Part 1C2, Engine Mechanical - - HFV6 3.2L.
4. Disconnect both cooling fan electrical connectors and the A/C pressure sensor connector.
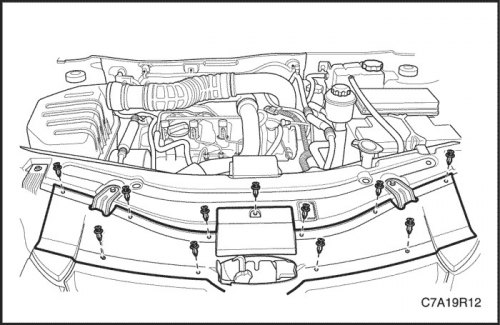
5. Remove the upper radiator grille guide. Follow section 9R, Front End.
6. Remove the upper and lower air conditioner condenser brackets from the radiator. Follow section 7B, Heating, Ventilation, and Air Conditioning Systems Control.
7. To prevent the air conditioner condenser from falling, it must be suspended.
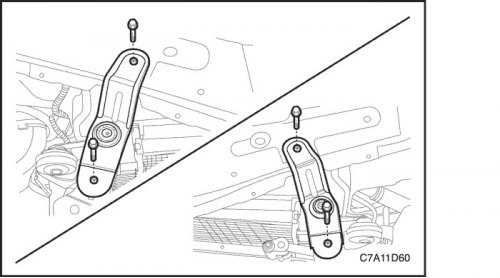
8. Remove the upper radiator bracket retaining screws.
9. Remove the upper radiator brackets.
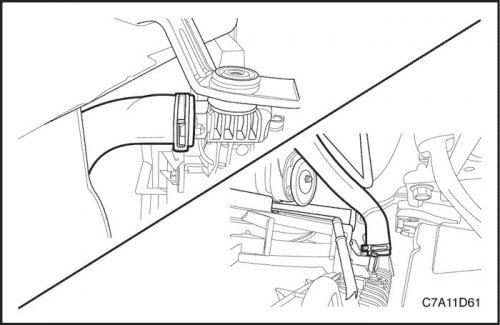
10. Disconnect the transaxle radiator pipes from the lower radiator tank, if equipped.
11. Loosen the upper radiator hose clamp and then disconnect the upper radiator hose from the radiator.
12. Loosen the lower radiator hose clamp and then disconnect the lower radiator hose from the radiator.
13. Loosen the clamp and disconnect the coolant return hose.
14. Raise and support the vehicle properly.
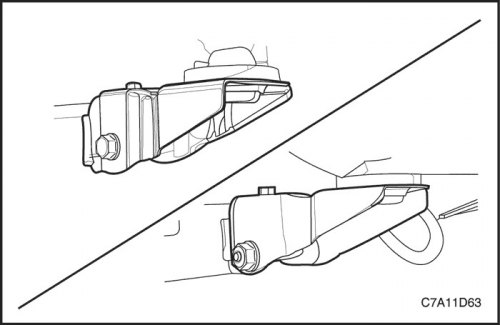
15. Remove the condenser, radiator, and upper cooling fan module (CRFM) support bracket mounting screws.
16. Remove the CRFM assembly support bracket using the screws and nuts.
17. Remove both CRFM assembly support brackets.
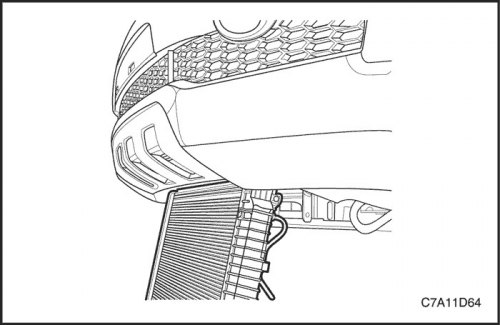
Caution! Do not damage the radiator fins to avoid disrupting the operation of the cooling system.
18. Carefully remove the radiator and fan assembly from the vehicle onto the floor.
19. Remove the radiator.
20. If necessary, the cooling system fan unit is removed from the radiator.
Cleaning
Warning! NEVER spray water on a hot radiator. The resulting steam may cause injury.
Note: The radiator fins are used to ensure proper heat transfer. Do not brush the fins. This may damage the fins and reduce heat transfer.
Important: Remove insects, leaves, dirt and other debris with a jet of compressed air from the engine side of the radiator
In some cases, warm water and a mild detergent may be needed.
- Clean the radiator cooling fins.
- If there are damaged cooling fins, they need to be straightened.

Installation procedure
Caution! Do not damage the radiator fins to avoid disrupting the operation of the cooling system.
1. If necessary, install the assembled cooling system fan.
2. Install the radiator.
3. Carefully lift the radiator back to the position from which it was removed.
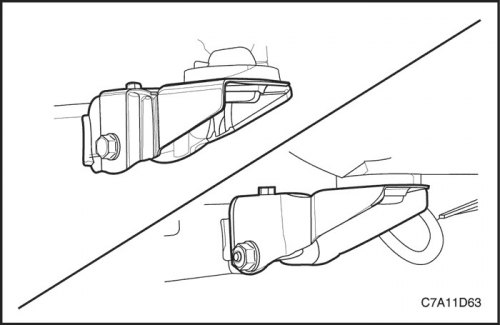
4. Install both CRFM assembly support brackets.
5. Install the CRFM assembly support bracket using screws and nuts.
Tighten
Tighten the CRFM unit support bracket with screws and nuts to 50 N·m (37 ft·lbs).
6. Install the upper CRFM assembly support bracket mounting screws.
Tighten
Tighten the upper CRFM unit support bracket mounting screws to 50 N·m (37 ft·lbs).
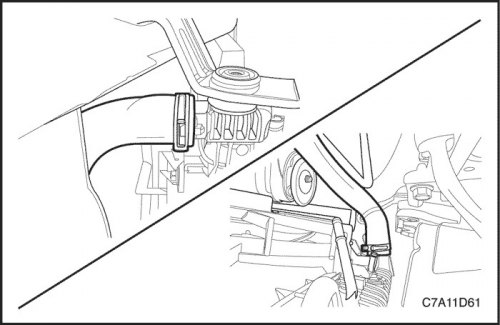
7. Attach the lower radiator hose to the radiator and then secure the clamp.
8. Attach the upper radiator hose to the radiator and then secure the clamp.
9. Connect the transmission radiator pipes to the radiator, if equipped.
10. Connect the coolant return hose.
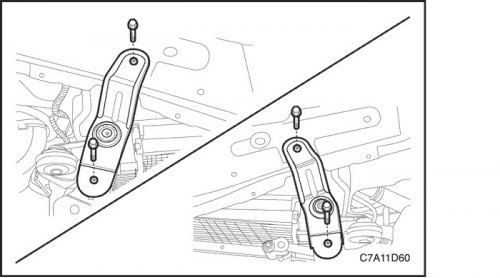
11. Install the air conditioner condenser on the radiator.
12. Install the upper radiator brackets.
Tighten
Tighten the upper radiator bracket locking screws to 20 Nm (15 ft·lbs).
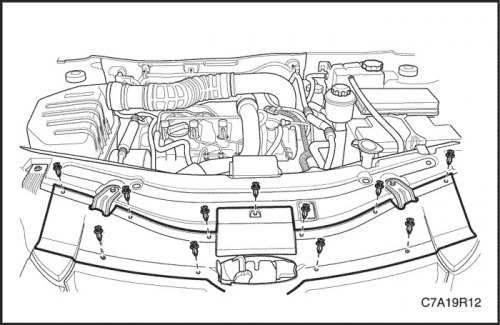
13. Install the upper radiator grille guide. Follow section 9R, Front End.
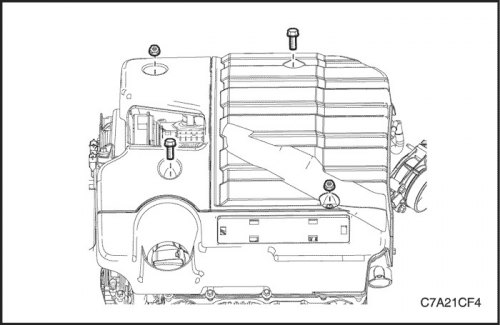
14. Install the engine trim cover. See Part 1C2, Engine Mechanical - - HFV6 3.2L.
15. Fill the engine cooling system. Follow step "Draining and filling the cooling system" in this section.
16. Connect the negative battery cable.
[The article is reprinted from the website «CHEVYMAN.RU»]