
ChevyMan.ru
Mazda Mitsubishi Toyota Land Rover Honda Kia Nissan
English Русский
Български
Беларускі
Український
Српски
Hrvatski
Română
Polski
Slovenský
Magyar
|
Articles | Sitemap | Contacts |


Home   Aveo   Captiva   Cruze   Lacetti   Lanos   Niva   Tahoe   Others  
Captiva 1 (2006-2018)
  • Home
  • Captiva
  • 1 (2006-2018)
  • Engine HFV6 3.2L
  • Cooling system
  • Cooling system fan

Cooling system fan (Chevrolet Captiva 1)

            0

Contents: Removal procedure ↧ Installation procedure ↧

Removal procedure


1. Disconnect the negative battery cable.

2. Remove the decorative engine cover. See Part 1C2, Engine Mechanical - - HFV6 3.2L.

3. Remove the air cleaner assembly. See Part 1C2, Engine Mechanical - - HFV6 3.2L.

4. Disconnect both cooling fan electrical connectors and the A/C pressure sensor connector.
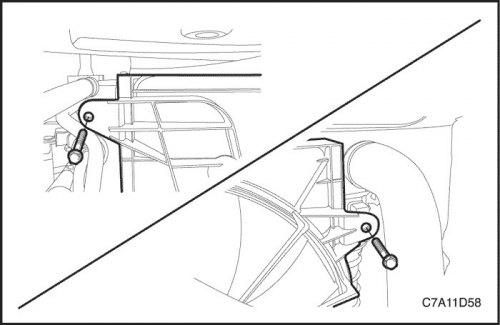
4. Disconnect both cooling fan electrical connectors and the A/C pressure sensor connector.


5. Remove the cooling fan shroud mounting screws.

6. Support the radiator and condenser before removing the condenser, radiator, fan module (CRFM) assembly support bracket.
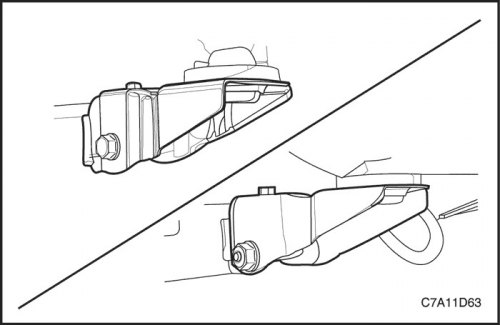
6. Support the radiator and condenser before removing the condenser, radiator, fan module (CRFM)…


7. Remove the upper CRFM assembly support bracket mounting bolt.

8. Remove the through bolt and nut securing the CRFM assembly support bracket.


9. Remove both CRFM assembly support brackets.
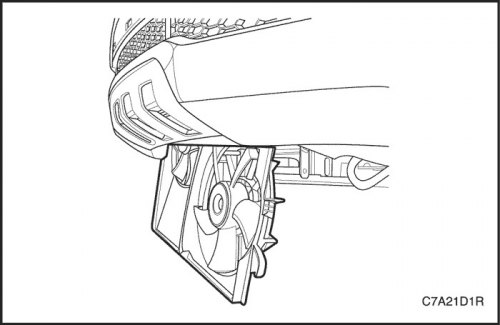
9. Remove both CRFM assembly support brackets.


10. Separate the fan shroud assembly from the radiator and carefully remove the fan shroud assembly from the vehicle onto the floor.

11. Remove both main and auxiliary fan blades from the fan shroud by unscrewing the nut in the center of the fan hubs.

12. Remove both fan motor retaining screws.

13. Remove both fan motors from the shroud.

13. Remove both fan motors from the shroud.


Installation procedure


Warning! If the fan assembly is bent or damaged in any way, do not attempt to repair or reuse the damaged part. A bent or damaged fan must be replaced with a new one. It is very important to maintain proper balance of the fan assembly. A fan that is not properly balanced may break or fly apart during operation, creating an extreme hazard. A broken or bent fan assembly cannot be restored to proper balance.


1. Install the fan motors and fan blades if removed.

Tighten

Tighten the fan motor locking screws to 3.5 N·m (31 lbs.in).

Tighten the fan blade lock nuts to 5.6 N·m (50 lbs.in).

2. Carefully lift the fan shroud assembly back to the position it was removed from.
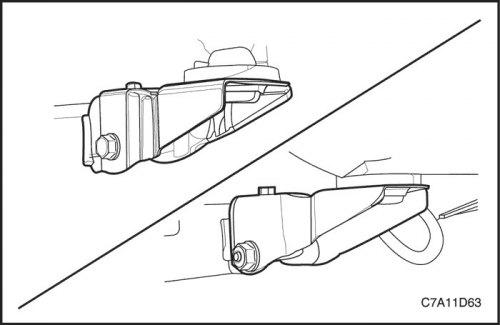
2. Carefully lift the fan shroud assembly back to the position it was removed from.


3. Install the CRFM assembly support bracket through bolt and nut.

Tighten

Tighten the CRFM assembly support bracket through bolt and nut to 50 N·m (37 ft·lbs).

4. Tighten the upper CRFM assembly support bracket mounting bolt to 50 N·m (37 ft·lbs).
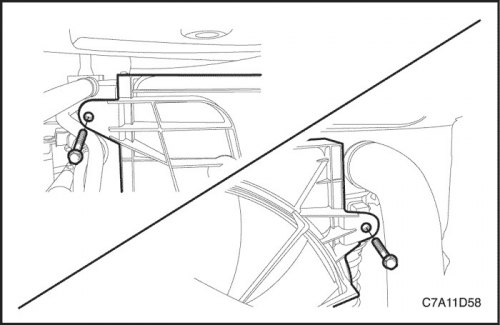
4. Tighten the upper CRFM assembly support bracket mounting bolt to 50 N·m (37  ft·lbs).


5. Install the assembled cooling system fan onto the radiator.

Important: It is imperative that the tab on the bottom edge of the casing be pushed into the retaining clip on the radiator.


6. Secure the assembled cooling fan to the radiator using the mounting screws.


Tighten

Tighten the cooling fan assembly mounting screws to 4 N·m (35 lbs.in).
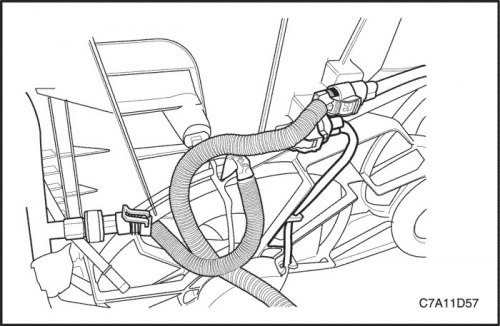
Tighten the cooling fan assembly mounting screws to 4 N·m (35 lbs.in).


7. Connect the electrical connectors of the cooling system fan and the connector of the air conditioner pressure sensor.

8. Install the air cleaner assembly. See Part 1C2, Engine Mechanical - - HFV6 3.2L.

9. Install the engine trim cover. See Part 1C2, Engine Mechanical - - HFV6 3.2L.

10. Connect the negative battery cable.
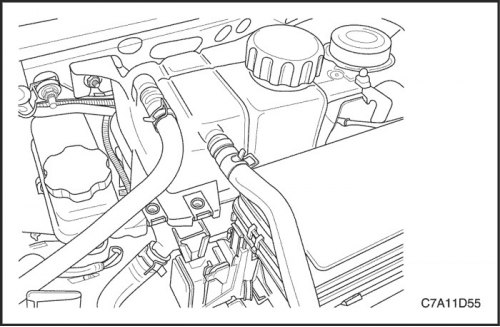
10. Connect the negative battery cable.


For details, visit the website: «chevyman.ru»

The article was checked: Vladimir Romannikov
This article is available at russian, bulgarian, belarusian, ukrainian, serbian, croatian, romanian, polish, slovak, hungarian

Share information:

Previous articles
Captiva 1: Cooling system
Next articles

Water outlet channel
Removal and installation the water pump
Removal and installation the thermostat
Draining and filling the cooling system
Cooling system diagnostics
Expansion tank
Removal and installation the radiator


See similar articles on the topic of Chevrolet cars:
Possible malfunctions of the cooling system, their causes and methods of elimination Chevrolet Aveo T300 (2012-2018)
Features of the design of the engine cooling system Chevrolet Cruze 1 (2008-2016)
Engine Cooling System Fan Wiring Diagram Chevrolet Lacetti 1 (2002-2009)
Cooling system Chevrolet Lanos T150 (2002-2009)
Engine cooling system Chevrolet Niva 1 (2002-2016)
Cooling system of a gasoline engine Chevrolet Tahoe 1 (1992-2000)
Cooling system check (every 3000 miles or 3 months) Chevrolet Lumina 1 (1989-1994)
Link in different formats to this page


Visitor comments

No comments yet


How much will 37 + 33 =


Captiva 1 (2006-2018) 
  • Manual
  • Before leaving
  • Keys, doors and windows
  • Seats, protection systems
  • Instruments and controls
  • Lighting system
  • Information and entertainment
  • Navigation system
  • Climate control
  • Driving a car
  • Car care
  • Maintenance
  • Engine 2.0 l (diesel)
  • Engine device
  • Troubleshooting
  • Engine repair
  • Cooling system
  • Engine electrical equipment
  • Control and power systems
  • Exhaust system
  • Engine FAM II 2.4D
  • Engine device
  • Troubleshooting
  • Engine repair
  • Cooling system
  • Engine electrical equipment
  • Control and power systems
  • Exhaust system
  • Engine HFV6 3.2L
  • Engine device
  • Troubleshooting
  • Engine repair
  • Cooling system
  • Engine electrical equipment
  • Control and power systems
  • Exhaust system
  • Transmission
  • Front drive axle
  • Rear drive axle
  • Automatic gearbox - device
  • Automatic gearbox - service
  • Automatic gearbox - repair
  • Manual gearbox - device
  • Manual gearbox - service and repair
  • Clutch
  • Transfer case
  • Chassis
  • Car suspension
  • Brake system
  • Steering
  • Body
  • Heating and ventilation
  • Air conditioning (manual)
  • Air conditioning (automatic)
  • Seat belts
  • Airbags
  • Car seat
  • Interior (internal elements)
  • Exterior (external elements)
  • Doors and windows
  • Electrical equipment
  • Equipment and devices
  • Lighting and lamps
  • Windshield wipers and washers
  • Electrical circuits


ChevyMan.ru © 2017-2026 · Mobile version · Feedback · Site search · Interesting to read · Sitemap: EN BG BY UA RS HR RO PL SK HU

Aveo 2003-2008 · Aveo 2006-2011 · Aveo 2012-2018 · Captiva 2006-2018 · Cruze 2008-2016 · Lacetti 2002-2009 · Lanos 2002-2009 · Niva 2002-2016 · Tahoe 1992-2000 · Tahoe 2000-2014 · Lumina 1 1989-1994 · Trailblazer 1 2001-2008 · Orlando 1 2010-2018 ·
🛡️ For your security and to improve our service, this site uses cookies. You can disable them in your browser.