


General description
1. The coolant temperature sensor is a thermistor (a resistor that changes its resistance value with temperature). Changing the resistance values directly affects the magnitude of the signal voltage from the sensor. As the temperature decreases, the resistance increases. As temperature increases, resistance decreases. A fault in the sensor circuit will cause codes 14 or 15 to be set. These codes indicate a fault in the coolant temperature control circuit and in most cases the solution is to either repair the faulty wire or replace the sensor.
Examination
2. To check the sensor, determine its resistance value when it is completely cold (for temperatures of 10-30°C, the resistance varies between 5600 and 2400 Ohm). Then start the engine and warm it up to operating temperature. The resistance should be lower (for temperatures of 85-95°C the resistance varies from 300 to 200 Ohms).
Note: The position of the coolant temperature sensor makes it difficult to install electrical probes onto its terminals. If necessary, remove the sensor and test it in a hot water tank to simulate the appropriate conditions.
Replacement
3. To replace the sensor, remove the retaining plate, disconnect the electrical connector (see illustration) and carefully unscrew the sensor.
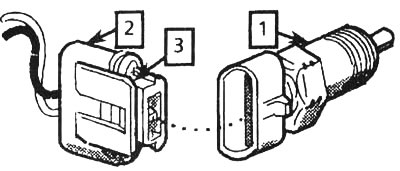
4.3a. To remove the engine coolant temperature sensor (1), use a small screwdriver to remove the retaining plate (3), disconnect the electrical connector (2) and carefully unscrew the sensor using a socket wrench |
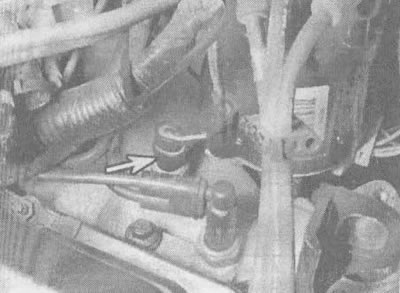
4.3b. The coolant temperature sensor on the 3.1L engine is located in the intake manifold near the TBI block |
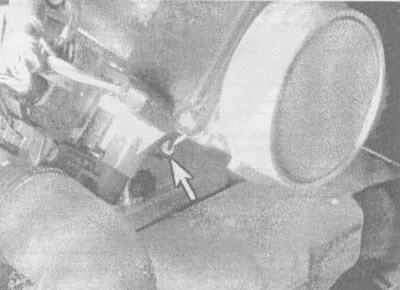
4. Zv. The coolant temperature sensor on the 3.8 L engine is located in the intake manifold under the throttle body
Caution: Handle the sensor with care. Its failure will affect the operation of the entire fuel injection system.
4. Before installing the new sensor, wrap the threads with Teflon sealing tape to prevent leaks and thread corrosion (see illustration).
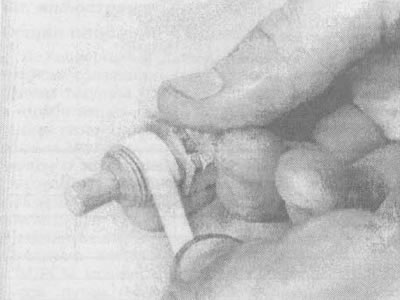
4.4 Before installing a new sensor, wrap the threads with Teflon tape to prevent leaks
5. Installation is carried out in reverse order.
[The article is based on data from the website: CHEVYMAN.ru]