ChevyMan.ru
Mazda Mitsubishi Toyota Land Rover Honda Kia Nissan
English Русский
Български
Беларускі
Український
Српски
Hrvatski
Română
Polski
Slovenský
Magyar
|
Articles | Sitemap | Contacts |


Home   Aveo   Captiva   Cruze   Lacetti   Lanos   Niva   Tahoe   Others  
Lacetti 1 (2002-2009)
  • Home
  • Lacetti
  • J200 (2002-2009)
  • Power unit
  • Supply system
  • Removal the intake manifold

Removal the intake manifold (Chevrolet Lacetti J200)

            0

We remove the intake manifold to replace the sealing rings at the connection between the manifold and the cylinder head, to replace the manifold itself, and also when repairing the cylinder head.

Disconnect the wire terminal from the negative terminal of the battery. Remove the fuel rail with injectors (see Removal the fuel rail and injectors) and, to prevent dirt and objects from getting into the intake channels of the cylinder head, plug the holes for the injectors in the pipeline with a rag. Remove the throttle assembly without disconnecting the coolant supply and outlet hoses from the heating unit pipes (see Removal the throttle assembly) and move the unit away from the intake manifold.
Disconnect the wire terminal from the negative terminal of the battery. Remove the fuel rail with…


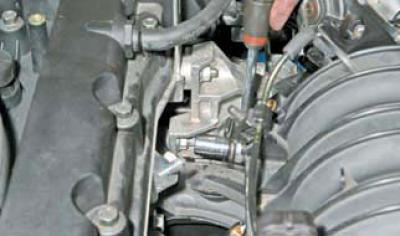
Using a Torx T-30 key, unscrew the screw that secures the upper EGR tube to the intake manifold body.
Using a Torx T-30 key, unscrew the screw that secures the upper EGR tube to the intake manifold…


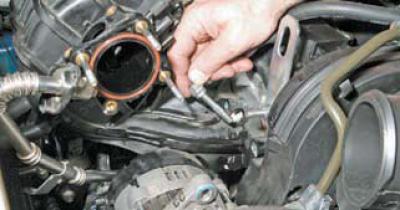
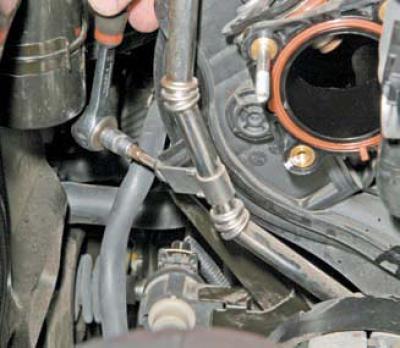
Using a 5 mm Allen key, unscrew the two screws securing the flange of the recirculation system tube to the flange of the intake manifold…
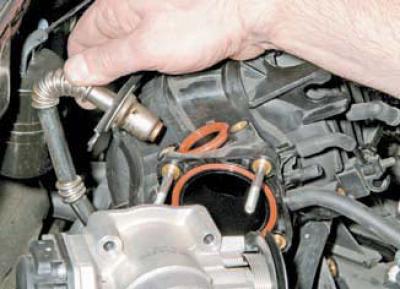


Using a 5 mm Allen key, unscrew the two screws securing the flange of the recirculation system tube…


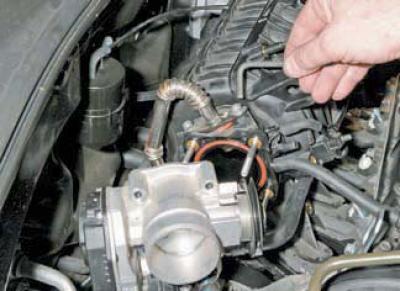
…and we remove the tube tip from the pipeline socket.
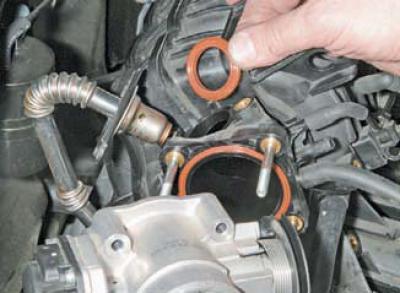
…and we remove the tube tip from the pipeline socket.


The connection is sealed with a rubber ring.
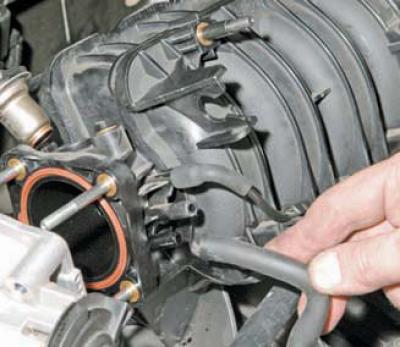
The connection is sealed with a rubber ring.


We remove the crankcase ventilation hose from the pipeline fitting.

We disconnect the tips of the vacuum tubes of the intake tract length variation system..
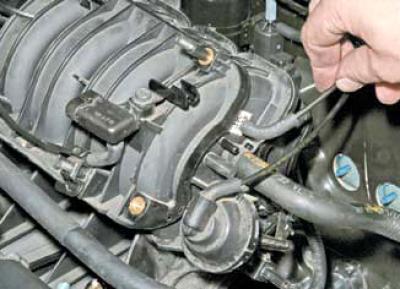
We disconnect the tips of the vacuum tubes of the intake tract length variation system..


…from the pipeline fitting…
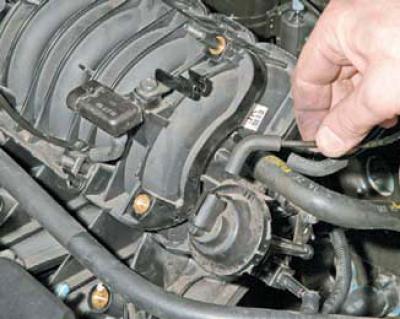


…from the pipeline fitting…


…and from the pneumatic chamber of the system's actuator.
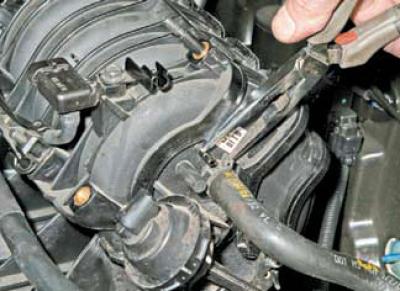
…and from the pneumatic chamber of the system's actuator.


Using pliers, squeeze the ends of the brake booster hose clamp and slide the clamp along the hose..
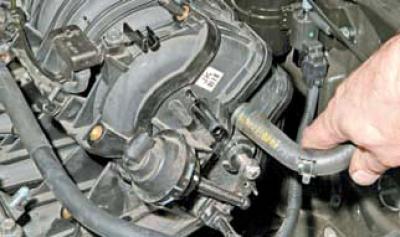
Using pliers, squeeze the ends of the brake booster hose clamp and slide the clamp along the hose..


…and remove the hose from the pipeline fitting.

Disconnect the engine management system wiring harness connector from the intake air temperature sensor (see Removal the engine intake air temperature sensor).


Disconnect the fuel vapor supply pipe from the adsorber from the purge valve fitting (we do not disconnect the other tube and the connector of the engine management system wiring harness from the sensor)…
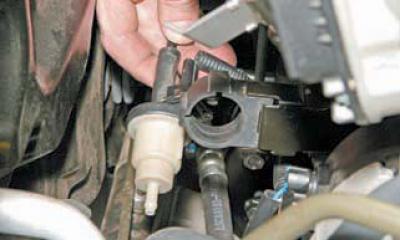
Disconnect the fuel vapor supply pipe from the adsorber from the purge valve fitting (we do not…


…we remove the purge valve from the rubber holder and move it to the side.

From underneath the vehicle, disconnect the engine management system wiring harness connector from the knock sensor connector (see Removal the knock sensor).
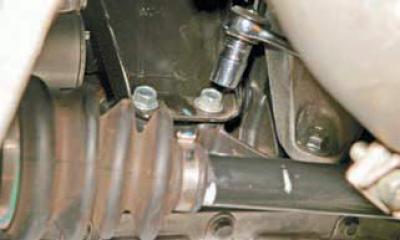
From underneath the vehicle, disconnect the engine management system wiring harness connector from…


Using a 14 mm socket head, unscrew the two bolts that secure the lower bracket of the intake manifold to the cylinder block.
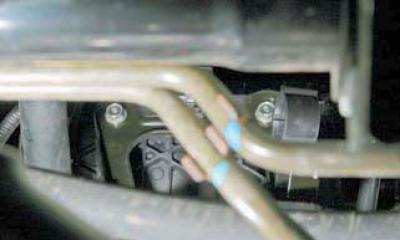
Using a 14 mm socket head, unscrew the two bolts that secure the lower bracket of the intake…


We unscrew the two bolts of the upper bracket mount to the intake manifold housing using a 12 mm head.
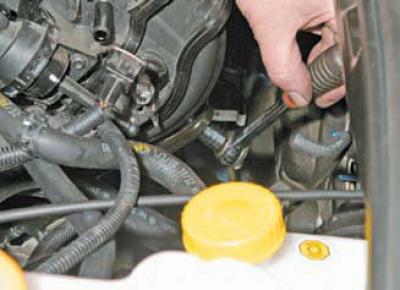


We unscrew the two bolts of the upper bracket mount to the intake manifold housing using a 12 mm…


This operation is conveniently performed from above.
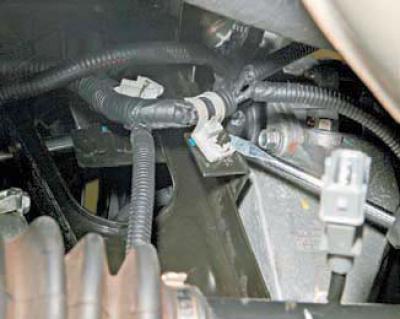
This operation is conveniently performed from above.


Using a screwdriver, pry the wire harness holder off the intake manifold bracket stud..
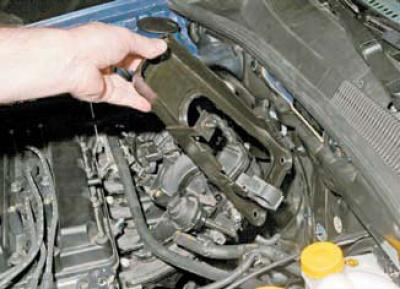
Using a screwdriver, pry the wire harness holder off the intake manifold bracket stud..


…and we take out the bracket.
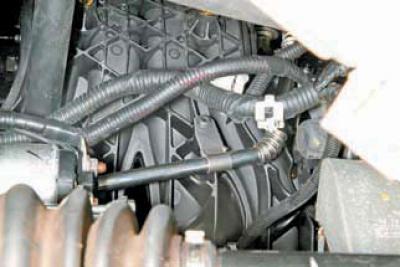
…and we take out the bracket.


Using a Torx T-30 key, unscrew the screw that secures the lower exhaust gas recirculation tube to the intake manifold body.
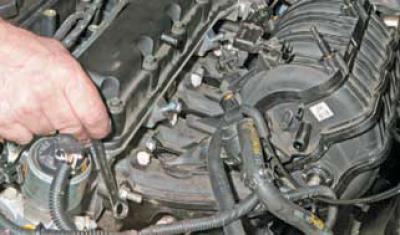


Using a Torx T-30 key, unscrew the screw that secures the lower exhaust gas recirculation tube to…


Using a 12 mm open-end wrench, unscrew one nut and three bolts securing the upper intake manifold to the cylinder head.

Having disconnected the power steering tube bracket from the generator upper mounting stud, unscrew the stud (see Removal the generator)…
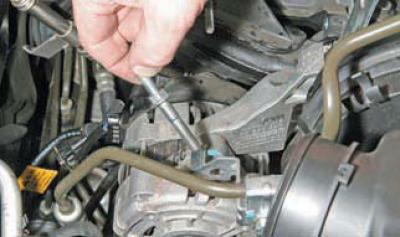
Having disconnected the power steering tube bracket from the generator upper mounting stud, unscrew…


…and we take it off.

…and we take it off.


Using a 12 mm socket, unscrew the generator bracket mounting nut and the nut that also secures the intake manifold.
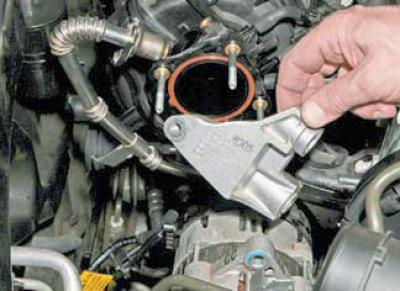
Using a 12 mm socket, unscrew the generator bracket mounting nut and the nut that also secures the…


We remove the generator bracket from the cylinder head studs.

Using a 12 mm socket, unscrew the four bolts of the lower intake manifold mount.
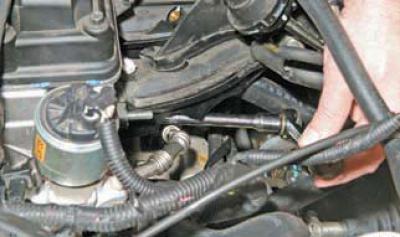
Using a 12 mm socket, unscrew the four bolts of the lower intake manifold mount.


It is convenient to unscrew the left bolt of the lower pipeline mount from above..
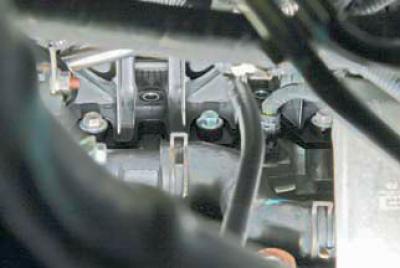
It is convenient to unscrew the left bolt of the lower pipeline mount from above..


…and the other three bolts are at the bottom.
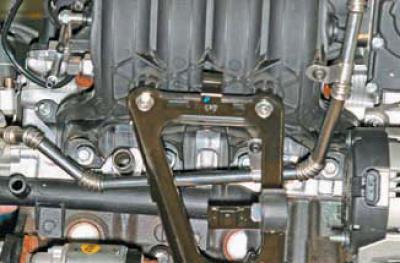
…and the other three bolts are at the bottom.


Location of lower intake manifold mounting bolts (for clarity, shown on a removed engine).

When removing the intake manifold from the two studs of the cylinder head, the generator interferes. Therefore, we screw two nuts onto the right stud and lock them.
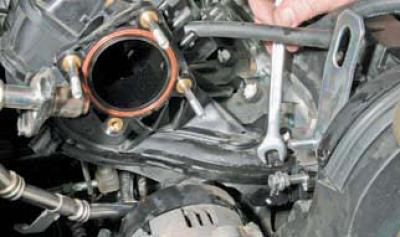
When removing the intake manifold from the two studs of the cylinder head, the generator…


We turn out the pin..

We turn out the pin..


…from the threaded hole in the cylinder head.
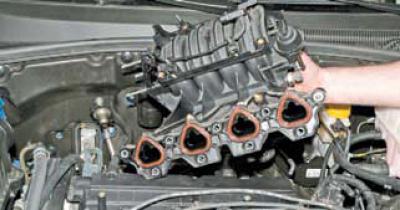
…from the threaded hole in the cylinder head.


…and remove the intake manifold.
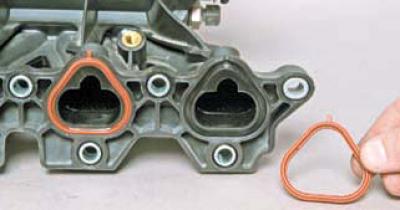
…and remove the intake manifold.


We remove the channel sealing ring from the pipeline flange groove.

Similarly, we remove the sealing rings of other pipeline channels.

We clean the mating surfaces of the intake manifold and cylinder head from carbon deposits and dirt. We install new sealing rings.

We install the intake manifold in the reverse order. We tighten the bolts and nuts of its fastening to the prescribed torque in the sequence shown in the photo.
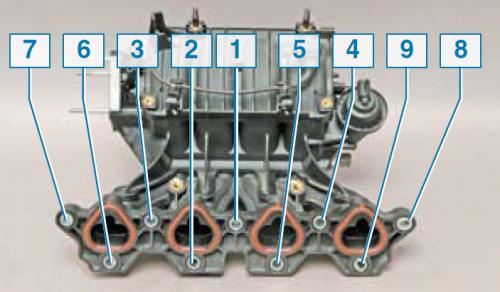
We install the intake manifold in the reverse order. We tighten the bolts and nuts of its fastening…


Sequence of tightening the threaded elements of the intake manifold fastening.

The article was checked: Vladimir Romannikov
This article is available at russian, bulgarian, belarusian, ukrainian, serbian, croatian, romanian, polish, slovak, hungarian

Share information:

Previous articles
Lacetti 1: Supply system
Next articles

Removal the throttle assembly
Removal the air filter
Removal the fuel rail and injectors
Removal and disassembling the fuel module
Engine power supply system device
Removal the filler pipe
Removal the fuel tank
Removal the fuel vapor recovery system canister
Removal the purge valve of the adsorber
Replacing the throttle cable


See similar articles on the topic of Chevrolet cars:
Replacing the intake manifold gasket Chevrolet Aveo T300 (2012-2018)
Intake manifold — removal and installation Chevrolet Captiva 1 (2006-2018)
Replacing the intake manifold gasket Chevrolet Cruze 1 (2008-2016)
Checking the intake manifold air temperature sensor Chevrolet Lanos T150 (2002-2009)
Intake manifold — removal and installation Chevrolet Tahoe 1 (1992-2000)
Removal and installation the intake manifold Chevrolet Lumina 1 (1989-1994)
Link in different formats to this page


Visitor comments

No comments yet


How much will 45 + 13 =


Lacetti 1 (2002-2009) 
  • General information
  • User manual
  • Maintenance
  • Power unit
  • Engine repair
  • Control system
  • Supply system
  • Cooling system
  • Exhaust system
  • Transmission
  • Clutch
  • Manual gearbox
  • Front wheel drives
  • Chassis
  • Front suspension
  • Rear suspension
  • Steering
  • Brake system
  • Body
  • Repair of body elements
  • Heating and air conditioning
  • Electrical equipment
  • Engine electrics
  • Lighting and lamps
  • Equipment and devices
  • Electrical circuits


ChevyMan.ru © 2017-2026 · Mobile version · Feedback · Site search · Interesting to read · Sitemap: EN BG BY UA RS HR RO PL SK HU

Aveo 2003-2008 · Aveo 2006-2011 · Aveo 2012-2018 · Captiva 2006-2018 · Cruze 2008-2016 · Lacetti 2002-2009 · Lanos 2002-2009 · Niva 2002-2016 · Tahoe 1992-2000 · Tahoe 2000-2014 · Lumina 1 1989-1994 · Trailblazer 1 2001-2008 · Orlando 1 2010-2018 ·
🛡️ For your security and to improve our service, this site uses cookies. You can disable them in your browser.