


Attention! Since 1996, a separate upper intake manifold is installed on engines. On all engines except the V8 7.4 liters, the manifold is removed as an assembly (the upper and lower parts of the manifold are removed together). On 7.4L V8 engines, the upper intake manifold is removed first.
1. Disconnect the battery from ground, drain the coolant system. On 1996 and later models with the V8 7.4L engine, remove the upper intake manifold first (see below).
2. Remove the air filter. If the manifold is removed for grinding the split plane or for replacement, then also remove the throttle pipe (see Chapter 4).
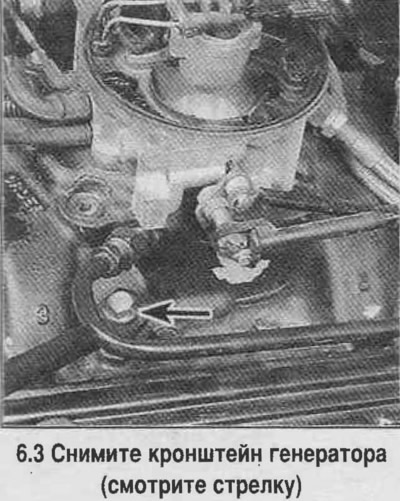
3. On some vehicles, remove the rear generator bracket (see photo). On models with air conditioning, detach the air conditioner brackets and move the air conditioner to the side.
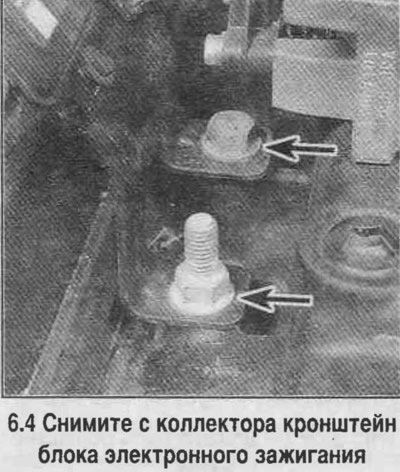
4. Remove the ESC electronic ignition unit bracket from the manifold (see photo). Remove the tensioner pulley bracket.
5. Identify and disconnect all fuel lines and hoses, wires, and vacuum hoses from the intake manifold. Depending on engine type, year, and body style, other components attached to the intake manifold may need to be removed.
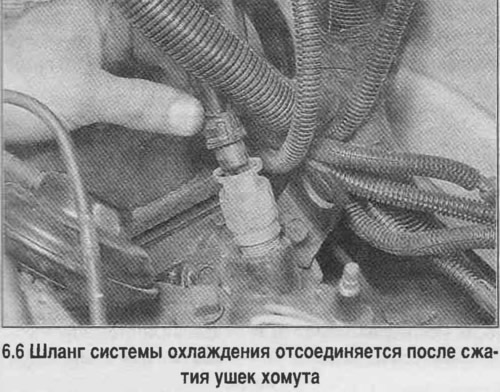
6. Disconnect the upper radiator hose and heater hose from the thermostat housing cover (see photo).
7. Remove the ignition distributor and ignition coil wires (Chapter 5).
8. Gradually, 1/4 turn at a time, loosen the mounting bolts so that they can be unscrewed by hand. The manifold usually sticks to the cylinder head. Pry the front of the manifold with a pry bar inserted under the cylinder head boss next to the thermostat housing.
Caution! Do not place the tool between the cylinder block and manifold, or the cylinder heads and manifold, otherwise the separating surface will be damaged, which will lead to a decrease in the vacuum in the manifold.
Attention! The separating surfaces of the cylinder head and block and manifold must be absolutely clean. It is recommended to use a solvent for cleaning old seals.
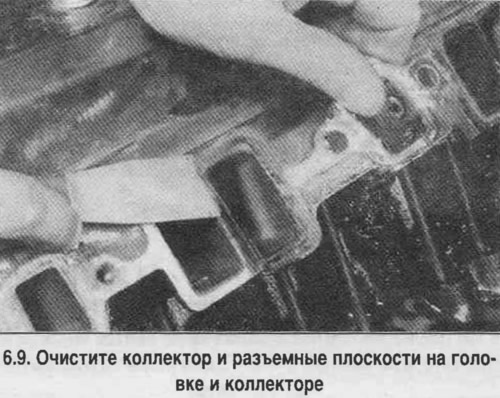
9. Clean the manifold and the split surfaces on the head and manifold. Cover the tappet openings with a rag to prevent dirt from getting in (see photo).
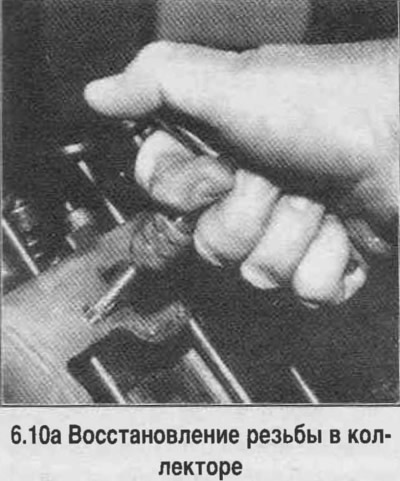
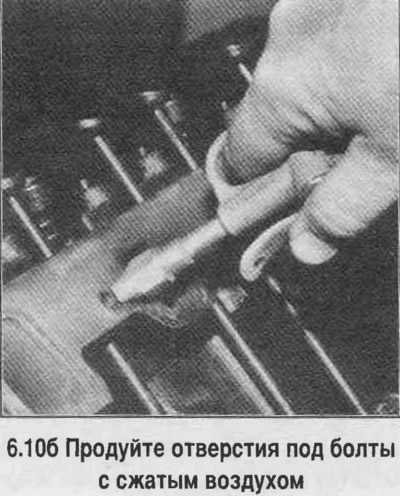
10. Run threads of manifold holes and blow them out with compressed air (see photo).
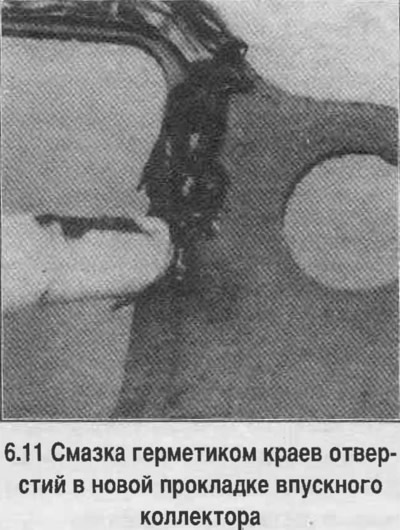
11. Apply a thin layer of RTV sealant (see photo) around the holes in the new intake manifold gasket for coolant to pass through on the cylinder head side.
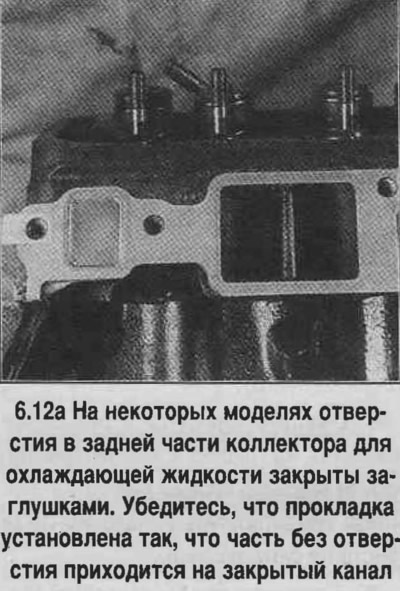
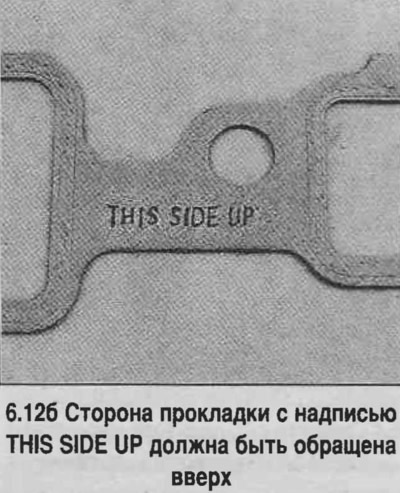
12. Install the gasket onto the cylinder head. The side with the inscription THIS SIDE UP should be facing up (see photo).
13. On the 7.4L V8 engine, install the front and rear seals into the cylinder block (see photo). Typically the seals will have either rubber grommets that fit into the holes in the block or rubber mounting flags. Apply a bead of RTV sealant about 4mm in diameter to each corner of the seals where they meet the gasket.
Attention! On 7.4 liter models since 1996, the lower intake manifold gasket and seals are reusable. They are replaced only if damage is detected.
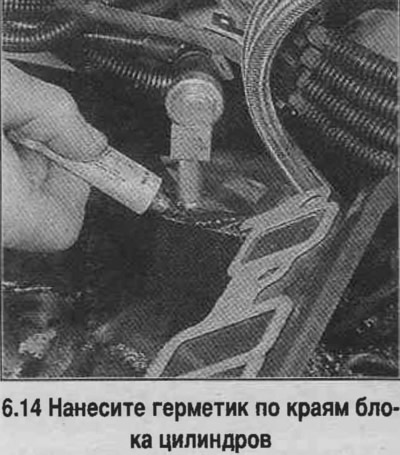
14. On V6, 5.0 and 5.7 liter engines, a 4 mm diameter bead of RTV sealant is applied to the front and rear edges of the cylinder block (see photo). Apply a 12mm bead to each cylinder head and secure the gaskets to them.
15. Carefully install the manifold in place, without disturbing the position of the gasket. Once the manifold is installed in place, it must not be moved.
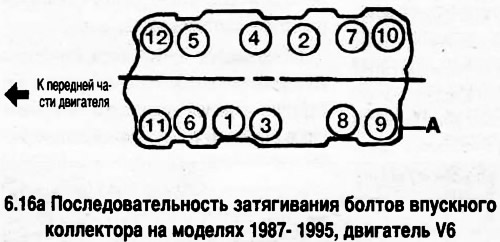
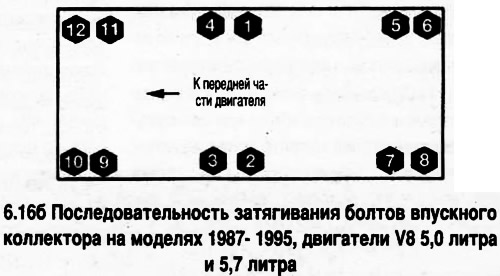
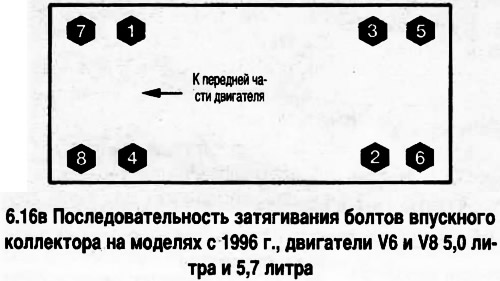
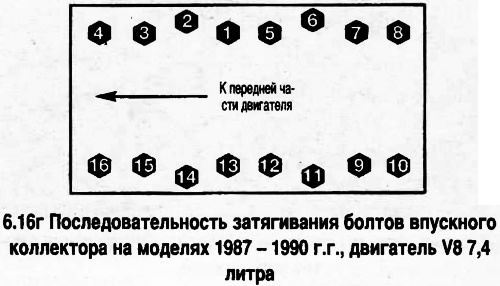
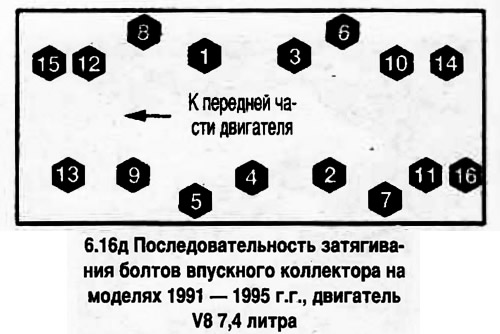
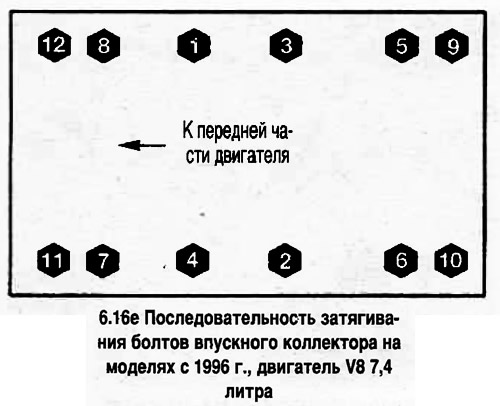
16. Apply Loctite 242 or equivalent to the bolt threads and tighten the bolts. While the sealant is still wet, tighten the bolts to the specified torque, starting from the center, in a crisscross pattern (see photo). Tighten the bolts in 3 stages.
Other installation steps
17. Then assembly is carried out in reverse order.
Upper intake manifold (models since 1996)
Caution! All SFI models since 1996 have a composite two-piece intake manifold. On all engines except the 7.4L, the space between these two manifolds houses the fuel injection system units. On the 7.4L engine, the upper manifold must be removed before removing the lower manifold.
18. Disconnect the battery from ground, drain the liquid from the cooling system.
19. Remove the air filter and air duct.
20. Mark and disconnect any wires that may interfere with removal of the manifold section.
21. Remove the throttle and cruise control cables together with the brackets (see Chapter 4).
22. On 5.0L and 5.7L V6 and V8 engines, disconnect the fuel lines from the manifold to the rear of the engine block.
23. Remove the ignition coil and bracket.
24. On the 7.4L V8 engine, disconnect the PCV hose, EGR inlet pipe, canister purge solenoid and connectors, and disconnect any spark plug wires that may interfere with removal of the manifold section.
25. Remove the upper intake manifold. Mark the location of the studs and mounting bolts.
26. Install the gasket and upper manifold.
27. Tighten the bolts in two stages, starting from the center in a crisscross pattern. On a 7.4L engine, lubricate the bolt threads with locking compound.
28. Then assembly is carried out in reverse order.
(The article is reprinted from the website «chevyman»)