ChevyMan.ru
Mazda Mitsubishi Toyota Land Rover Honda Kia Nissan
English Русский
Български
Беларускі
Український
Српски
Hrvatski
Română
Polski
Slovenský
Magyar
|
Articles | Sitemap | Contacts |


Home   Aveo   Captiva   Cruze   Lacetti   Lanos   Niva   Tahoe   Others  
Tahoe 2 and 3 (2000-2014) Tahoe 1 (1992-2000)
  • Home
  • Tahoe
  • 1 (1992-2000)
  • Power unit
  • Engine in a car
  • Camshaft and tappets — removal, inspection and installation

Camshaft and tappets — removal, inspection and installation (Chevrolet Tahoe 1)

            0

Contents: Checking the camshaft lift ↧ Camshaft and bearings - check ↧ Pushers ↧ Roller tappets ↧

Checking the camshaft lift


1. The degree of wear of the camshaft lobes is checked by the cam lift value before removing the camshaft. Remove the head and cylinder covers.

2. Set the piston of the 1st cylinder to TDC of the compression stroke.

3. The check starts with the cams of the 1st cylinder. Loosen the rocker arm nuts and turn to the side. Set the dial indicator so that the indicator leg runs parallel to the rod axis and rests against the end of the rod (see photo).
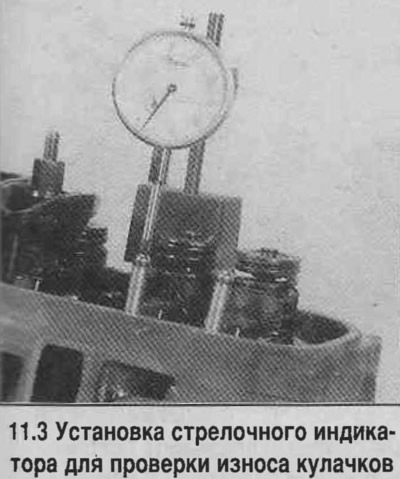
3. The check starts with the cams of the 1st cylinder. Loosen the rocker arm nuts and turn to the…


4. Set the indicator to zero, turn the crankshaft in the direction of normal rotation. Immediately after the indicator arrow deflects in the opposite direction (the reading will start to decrease), read the reading, which is equal to the cam lift.

5. Set the piston of the 1st cylinder back to TDC of the compression stroke.

6. Move the dial indicator to the other push rod of the 1st cylinder and repeat the check.

7. Repeat the check for the valves of the remaining cylinders. Since each piston must be at TDC of the compression stroke, set the cylinders one by one, in the order of engine operation.


8. Compare the results with the standard. If the reduction in cam size due to wear exceeds the standard, replace the camshaft.

9. Remove the intake manifold, rocker arms, pushrods, camshaft sprocket and timing chain. Remove the radiator.

Warning! If the vehicle is equipped with an air conditioning system, it may be necessary to remove the air conditioning condenser. If the condenser is to be removed, the system should first be depressurized at a car service center.


10. The tappets can be removed using a special tool. On late-model engines, the tappets can be removed with a small magnet or your fingers. You can also remove the tappet with a curved scriber by prying up the retaining ring at the top of the tappet. Do not use pliers.

11. Remove the tappets and store them in the order they were originally installed so that they can be installed in their original positions during assembly (see photo).
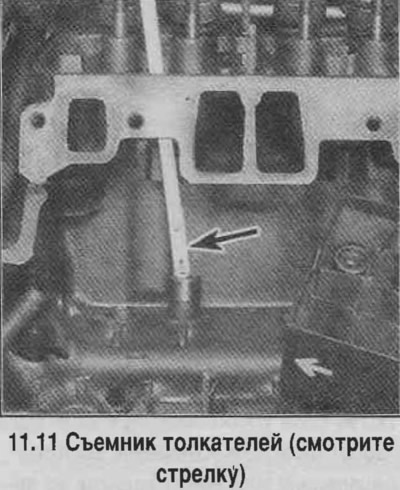
11. Remove the tappets and store them in the order they were originally installed so that they can…


Caution! On engines with roller tappets, the tappet limiter plates must be removed first. Do not remove the camshaft until the tappets have been removed.


12. On 1994 4.3L V6 engines, remove the balance shaft gears (see below).


13. On some V6 engines, remove the camshaft thrust plate (see photo). Screw 150mm long bolts into the camshaft sprocket bolt holes to use as handles when removing the camshaft from the cylinder block (see photo).
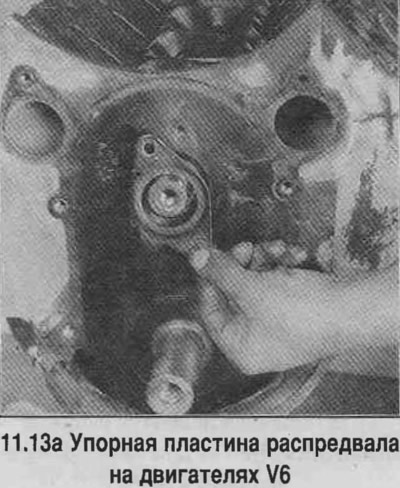
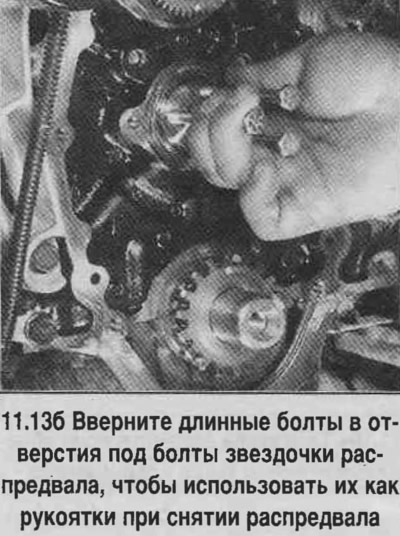
13. On some V6 engines, remove the camshaft thrust plate (see photo). Screw 150mm long bolts into…


13. On some V6 engines, remove the camshaft thrust plate (see photo). Screw 150mm long bolts into…


14. Carefully remove the camshaft, avoiding damage to the journals on the edges of the cylinder block.

Camshaft and bearings - check


15. Clean the camshaft and check the condition of the journals. If there are signs of wear on the journals, then the camshaft bearings are also worn. In this case, the camshaft and bearings should be replaced (bearings are changed at a car service center, for this you need to remove the engine and disassemble it).

16. If the journals are in satisfactory condition, then check their diameter in several places, determine the taper and ovality of the camshaft bearing journals (see photo).
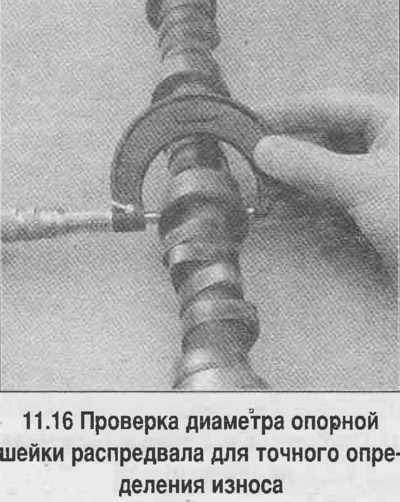


16. If the journals are in satisfactory condition, then check their diameter in several places,…


17. Check the condition of the camshaft cams, the presence of traces of overheating, chipping marks and other damage. If the cams are in good condition and all dimensions are normal, the camshaft can be used further.

Pushers


18. Clean the tappets one by one and dry them, maintaining the order in which they are installed.

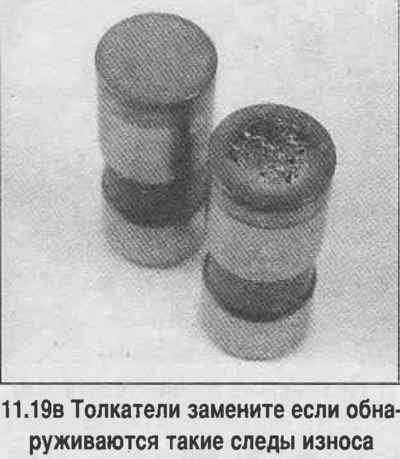
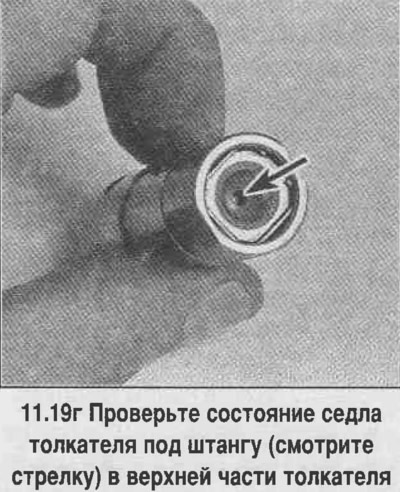
19. Check the wear of the thrust surface of the pusher, the rod seat and the condition of the side surface. The thrust surface of the pusher has a concavity with a large radius of curvature. If the thrust surface is badly worn (see photo), then the camshaft and tappets should be replaced. If the side surface is worn (which is unlikely), then check the condition of the holes in the cylinder block. Check the condition of the rod seats and the ends of the rods themselves.
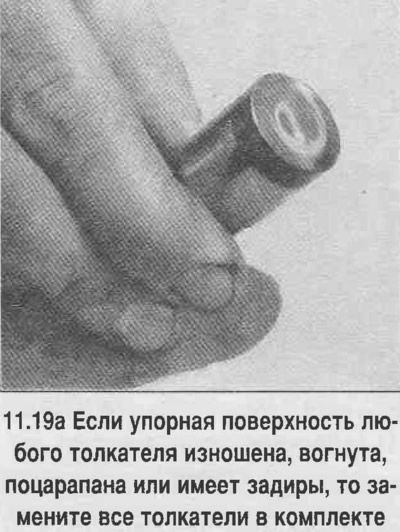
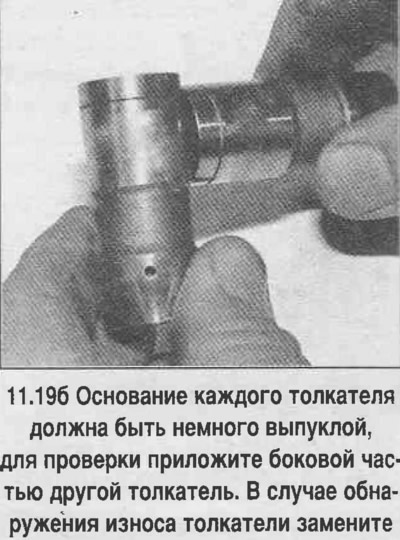
19. Check the wear of the thrust surface of the pusher, the rod seat and the condition of the side…


19. Check the wear of the thrust surface of the pusher, the rod seat and the condition of the side…


19. Check the wear of the thrust surface of the pusher, the rod seat and the condition of the side…


19. Check the wear of the thrust surface of the pusher, the rod seat and the condition of the side…


20. The camshaft and tappets are changed only together. Put the removed tappets back in their original places.


Roller tappets


21. Check the condition of the rollers, make sure that the rollers rotate freely without excessive play (see photo). The procedure for checking roller tappets is no different from that discussed above for conventional tappets.
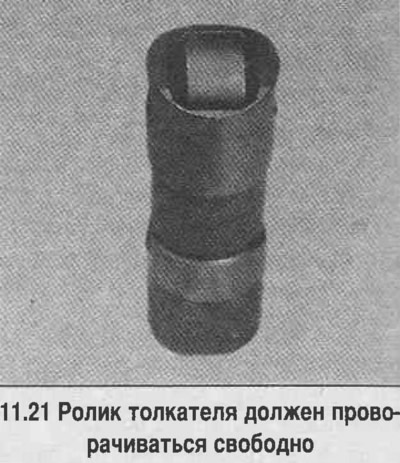
21. Check the condition of the rollers, make sure that the rollers rotate freely without excessive…


22.Removed roller tappets can be installed with a new camshaft, and a removed camshaft can be used with new roller tappets.

23. Lubricate the camshaft cams and bearing journals with molybdenum grease (see photo).
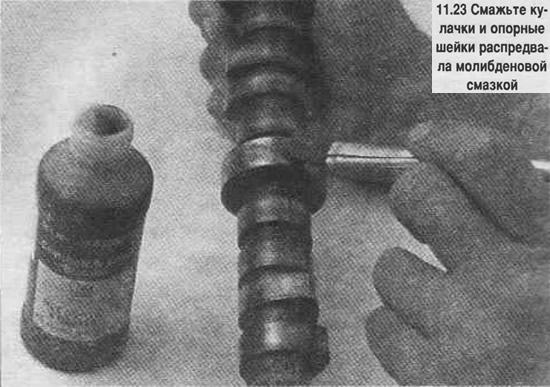
23. Lubricate the camshaft cams and bearing journals with molybdenum grease (see photo).


24. Install the camshaft in place.

25. Turn the camshaft so that the pin is in the 9 o'clock position (see photo).
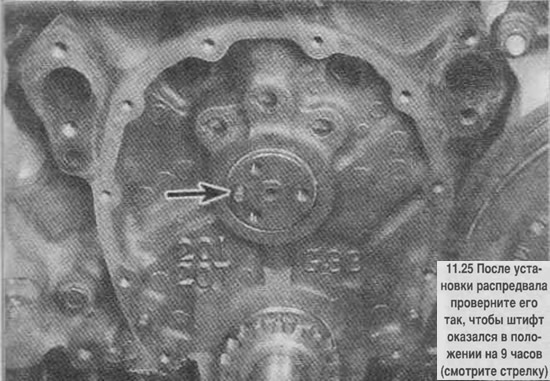
25. Turn the camshaft so that the pin is in the 9 o'clock position (see photo).


26. On 4.3L engines since 1994, install the balance shaft gears (see below).


27. Install the timing chain and sprockets.

28. Lubricate the tappets with clean engine oil and install them in the cylinder block. Install the removed tappets in their original places.

29. Then assembly is carried out in reverse order.

The article was checked: Vladimir Romannikov
This article is available at russian, bulgarian, belarusian, ukrainian, serbian, croatian, romanian, polish, slovak, hungarian

Share information:

Previous articles
Tahoe 1: Engine in a car
Next articles

Timing Gear Cover, Chain and Sprockets — Removal and Installation
The order of setting the piston of the 1st cylinder at TDC of the compression stroke
Cylinder head — removal and installation
Exhaust manifold — removal and installation
Intake manifold — removal and installation
Balance shaft — removal and installation (V6 engines since 1994)
Oil pan — removal and installation
Oil pump — removal and installation
Crankshaft seals — replacement
Engine Mounts — Checking and Replacing


See similar articles on the topic of Chevrolet cars:
Replacing camshaft seals Chevrolet Aveo T300 (2012-2018)
Camshaft Position (CMP) Sensor Chevrolet Captiva 1 (2006-2018)
Replacing camshaft seals Chevrolet Cruze 1 (2008-2016)
Replacing the camshaft seal Chevrolet Lacetti 1 (2002-2009)
Replacing the camshaft seal Chevrolet Lanos T150 (2002-2009)
Camshaft and its drive Chevrolet Niva 1 (2002-2016)
Removal and installation the camshaft drive chain and sprockets Chevrolet Lumina 1 (1989-1994)
Link in different formats to this page


Visitor comments

No comments yet


How much will 46 + 24 =


Tahoe 2 and 3 (2000-2014) 
  • General information
  • Vehicle characteristics
  • Vehicle device
  • Manual
  • Maintenance
  • Power unit
  • Engine repair
  • Engine overhaul
  • Cooling system
  • Injection and control system
  • Exhaust system
  • Engine electrical equipment
  • Transmission
  • Automatic gearbox 4L60, 4L65, 4L70
  • Automatic gearbox 6L50, 6L80, 6L90
  • Transfer case
  • Drive shafts and cardan
  • Front drive axle
  • Rear drive axle
  • Chassis
  • Car suspension
  • Steering
  • Brake system
  • Body (until 2007)
  • Exterior (external elements)
  • Interior (internal elements)
  • Doors, locks and windows
  • Heating and air conditioning
  • Security System (SRS)
  • Body (since 2007)
  • Exterior (external elements)
  • Doors, locks and windows
  • Interior (internal elements)
  • Electrical equipment
  • Electrical appliances (until 2007)
  • Lighting and lamps (until 2007)
  • Audio system (until 2007)
  • Electrical appliances (since 2007)
  • Lighting and lamps (since 2007)
  • Audio system (since 2007)
  • Wiring diagrams (2000-2005)
  • Wiring diagrams (2005-2007)
  • Wiring diagrams (since 2007)


Tahoe 1 (1992-2000) 
  • General information
  • User manual
  • Maintenance
  • Power unit
  • Engine in a car
  • Engine removed
  • Cooling system
  • Heating and air conditioning
  • Fuel and exhaust systems
  • Decreased toxicity
  • Transmission
  • Manual gearbox
  • Automatic gearbox
  • Transfer case
  • Clutch and drive shafts
  • Chassis
  • Brake system
  • Car suspension
  • Steering
  • Body
  • Repair of body elements
  • Electrical equipment
  • Engine electrics
  • Equipment and devices
  • Electrical circuits


ChevyMan.ru © 2017-2026 · Mobile version · Feedback · Site search · Interesting to read · Sitemap: EN BG BY UA RS HR RO PL SK HU

Aveo 2003-2008 · Aveo 2006-2011 · Aveo 2012-2018 · Captiva 2006-2018 · Cruze 2008-2016 · Lacetti 2002-2009 · Lanos 2002-2009 · Niva 2002-2016 · Tahoe 1992-2000 · Tahoe 2000-2014 · Lumina 1 1989-1994 · Trailblazer 1 2001-2008 · Orlando 1 2010-2018 ·
🛡️ For your security and to improve our service, this site uses cookies. You can disable them in your browser.