


2. Raise the front of the vehicle.
3. Drain the oil and remove the oil filter.
4. Disconnect the exhaust pipe from the manifold.
5. On some vehicles, disconnect the suspension struts at the bell housing cover, remove the strut brackets from the front engine mounts. Disconnect the oil cooler and transmission fluid cooler hoses from the oil pan.
6. Remove the lower transmission bell housing cover.
7. Remove the starter.
All-wheel drive models
8. Remove the front shield.
9. Remove the front propeller shaft.
10. Remove the two right bolts and two nuts from the front axle shaft. Remove the one upper left bolt and nut.
11 Remove the front axle shaft by turning the axle shaft forward as the wheel turns back.
Cars with 7.4 liter engine
12. Disconnect the oil pressure indicator tube from the side of the cylinder block.
13. Remove the distributor cap to prevent it from breaking when the engine is lifted.
14. Remove the bolts and slide the fan shroud back, removing it from the fan. If necessary, insert a piece of cardboard between the fan and the radiator to protect the radiator inter-fin spaces from being hit by the fan blades when the engine is suspended.
15. Unscrew the through bolts of the engine mounts.
16. Carefully lift the engine with a hoist, raising it by 75 mm. Make sure not to damage the radiator and distributor cap.
Caution! Do not lift the engine with a jack to avoid damaging the coarse oil filter.
17. Place a block of wood between the crossmember and the cylinder block, near the supports, to hold the engine in the raised position, then remove the hoist.
All engines
18. Turn the crankshaft so that the timing mark on the front flywheel faces downwards.
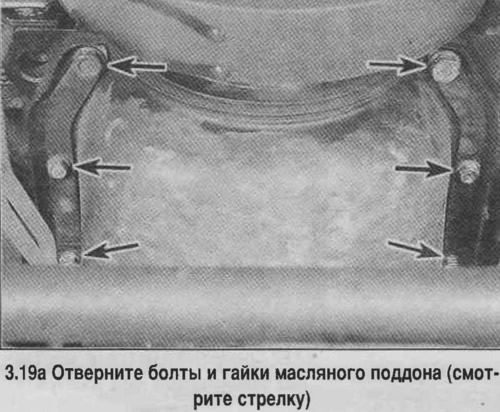
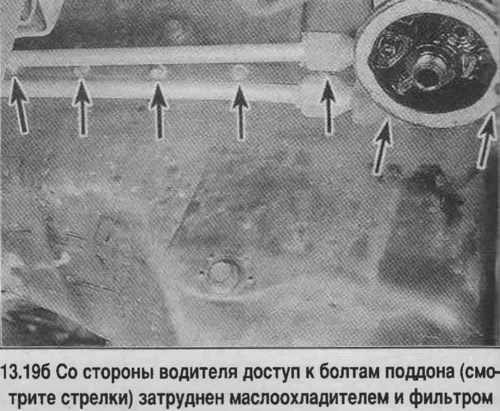
19. Unscrew the bolts and nuts of the pan (see photo).
20. Remove the tray by tilting the rear part downwards.
21. Clean the tray.
22. Wash the sealing surfaces with acetone. Clean the bolt holes in the cylinder block.
23. Check the split surface of the pan for deformations, especially near the holes for the bolts. If necessary, straighten the surface with a hammer.
24. Install new pan seals in place of the old ones (except for engines that have a solid rubber gasket), lubricate them with RTV sealant. Apply a bead of RTV sealant to the joints in the cylinder block. Secure the side gaskets to the oil pan, lubricating them with the same sealant.
25. Check the condition of the one-piece rubber gasket used on some models. Replace the gasket if damaged.
Caution! The oil pan gasket on 1997 7.4L engines is reusable. This gasket is replaced only if damage is detected. Apply a bead of RTV silicone sealant to the corners of the gasket before installation.
26. Position the tray in place and tighten the bolts. Do not allow the tray to shift after installation. Tighten the bolts/nuts in 3 stages to the specified torque, starting from the center, in a spiral sequence,
27. Further assembly is carried out in reverse order.
[Original version of the article on the website: «chevyman»]