


2. Starting at the front of the cylinder head, loosen and remove the rocker arm stud nuts. Mark and store them separately for reinstallation.
Attention! If you are removing only the pushrods, loosen the nuts enough to move the rocker arms to the side, after which you can remove the pushrods.
3. Remove the rocker arms and ball studs, place them together with the nuts in the designated bags so that they can be installed in their original places during assembly.
4. Remove the push rods, mark them and store them separately so that they can be installed in their original places during assembly (see photo).
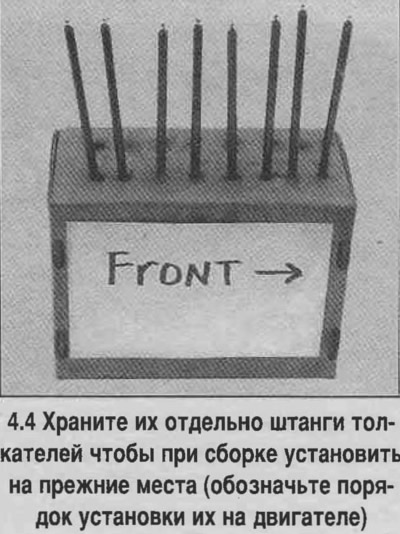
Please note: On the 7.4 liter engine, the exhaust valve lifters are longer than the intake valve lifters.
5. Check each rocker arm for wear, chips or other damage, especially where it contacts the valve lifters and stems.
6. Check the cleanliness of the hole in the rocker arm thrust portion that contacts the pushrod.
7. Check the rocker arm recesses for the ball axles. If the rocker arms are worn or damaged in these areas, replace them with new ones along with the ball axles.
8. Inspect the push rods, make sure there are no cracks or excessive wear on the ends. Roll each push rod on a mirror to see if they are deformed.
9. Lubricate the relatively lower end of each rod with clean engine oil or molybdenum grease and install them in their original locations. Make sure the rods fit into the pushrod seats.
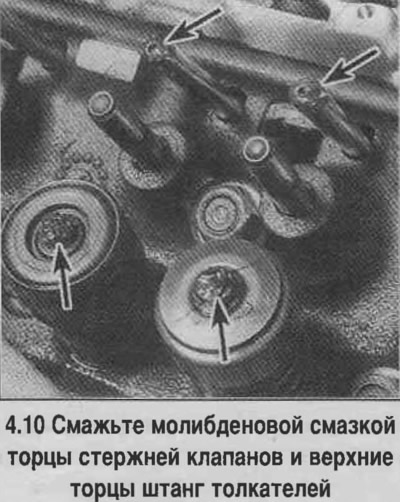
10. Lubricate the ends of the valve stems and the upper ends of the pushrods with molybdenum grease (see photo).
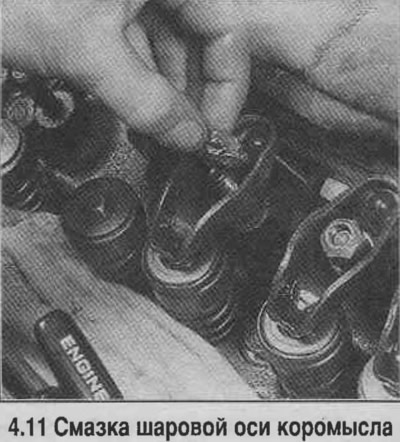
11. Install the rocker arms in place, then install the ball shafts and screw on the nuts. Lubricate the ball shafts with molybdenum grease. Make sure the nuts are facing the ball shaft with the flat side (see photo).
Valve adjustment (all models except 7.4L V8 models built since 1991 and V6 models built since 1995.)
Attention! On models with a 7.4 liter V8 engine, produced since 1991, as well as models with a U6 engine, produced since 1995, valve adjustment is not provided. There is a rocker arm limiting flange on the rocker arm studs/bolts. After repair (or replacements) valves, tighten the nuts/bolts to the specified torque. If the timing mechanism parts have not been ground or turned, which could lead to a change in the valve clearance, then after tightening the nuts/bolts, the valve clearance will be set accurately.
12. Set the piston of the 1st cylinder to TDC of the compression stroke (see below).
13 Tighten the rocker arm nuts of the 1st cylinder so that the push rod turns with your fingers under noticeable force (see photo).
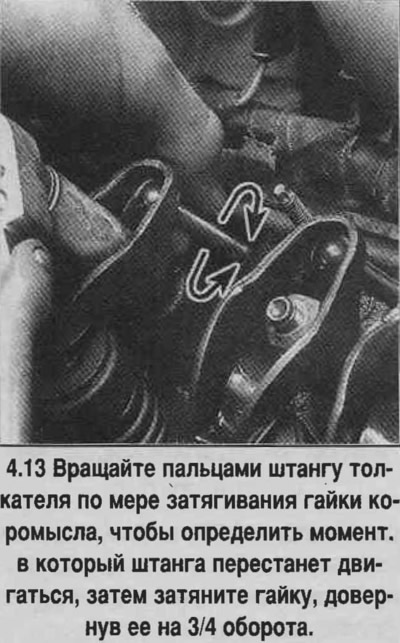
14. Tighten the nuts an additional 3/4 turn to center the tappets. The valves of cylinder 1 will now be adjusted.
On a V6 engine
15. If the car is equipped with a V6 engine, you can adjust the intake valves of the 2nd and 3rd cylinders, as well as the exhaust valves of the 5th and 6th cylinders without changing the position of the crankshaft. Then turn the crankshaft one full revolution and adjust the intake valves of the 4th, 5th and 6th cylinders and the exhaust valves of the 2nd, 3rd and 4th cylinders.
On a V8 engine
16. If the car is equipped with a V8 engine, you can also adjust the intake valves of cylinders 2, 5, and 7, as well as the exhaust valves of cylinders 3, 4, and 8. Then turn the crankshaft one full revolution and adjust the intake valves of cylinders 3, 4, 6, and 8, and the exhaust valves of cylinders 2, 5, 6, and 7.
All engines
17. Install the cylinder head covers. Start the engine, listen to its operation. Make sure there are no leaks.