
Note: On vehicles with a 3.8L engine, it may be easier to replace the spark plug on the rear (right) cylinder block underneath. If you choose to do this, raise the vehicle and support it securely on stands.
2. In most cases, the tools needed to replace spark plugs include: a socket wrench that fits into a ratchet (spark plug wrenches have a lining inside to prevent damage to the porcelain insulators), various auxiliary equipment, attachments and feeler gauge for checking and adjusting the gap size on new spark plugs (see illustration). There is a special tool for removing spark plug tips, and it is convenient to use on the described car models, since the tips are installed very tightly. To tighten new spark plugs, use a torque wrench. It is also recommended to allow the engine to cool before removing or installing spark plugs.
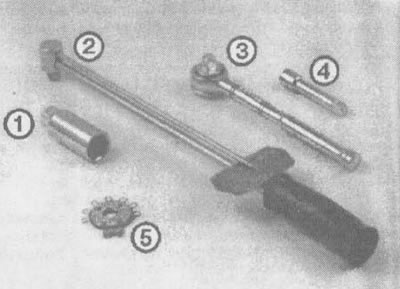
32.2. Tools required to replace spark plugs:
1 - Spark plug socket wrench - this wrench has a gasket inside to protect the porcelain insulator of the spark plugs
2 - Torque Wrench - Although not necessary, using this tool is the best way to ensure that your spark plugs are properly tightened
3 - Ratchet - standard spark plug hand tool
4 - Nozzle - Depending on the model and accessories, you may need special nozzles and universal joints to remove any of the spark plugs
5 - Spark Plug Gap Gauge - This gap gauge comes in a variety of versions. Check that the dipstick is suitable for your engine
3. The best approach to replacing spark plugs is to purchase a complete set of new plugs in advance, adjust them to the correct gap size, and replace all the plugs in the set at the same time. When purchasing new spark plugs, make sure the type of spark plug is correct for your vehicle's engine. The type of candle can be found in the section "Technical data" at the beginning of this chapter and on the label "Emission Control Information" ("Emission Control Information") located under the hood. If the two sources list different types of candles, use the value printed on the label.
4. Allow the engine to cool completely before replacing the spark plugs. While the engine is cooling, check the new spark plugs for defects and adjust their gaps.
5. Check the gap by inserting a feeler gauge of the appropriate thickness between the electrodes at the top of the spark plug (see illustration). The gap size between the electrodes should be as indicated on the label "Emission Control Information". The probe should pass between the electrodes with slight friction. If the gap size is incorrect, use the adjuster on the feeler gauge body to bend the electrode slightly to achieve the correct gap size (see illustration). If the side electrode is not positioned exactly above the center electrode, bend it so that it is positioned just below it. Check for cracks in the porcelain insulator (if they are present, the candle cannot be used).
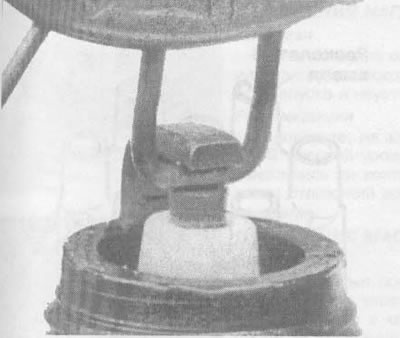
32.5a. Spark plug manufacturers recommend using a wire feeler gauge when checking the gap size - if the wire does not pass between the electrodes with slight friction, adjustment is necessary |
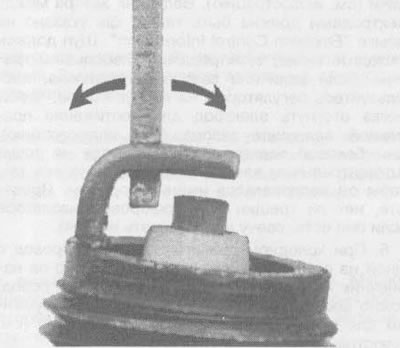
32.5b. To change the gap size, bend only the side electrode (as indicated by the arrows) and be very careful not to chip or break the porcelain insulator surrounding the center electrode |
6. With the engine cold, remove the wire from one of the spark plugs. Pull only on the tip at the end of the wire, not on the wire itself. You can use a special tool to remove spark plug wires (see illustration).

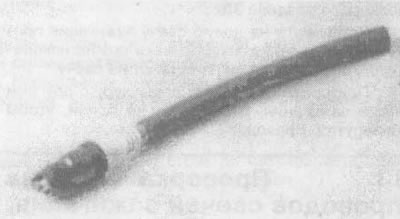
32.6. When removing the wires from the spark plugs, pull only on the cap, unscrewing and pulling it off the spark plug
7. If a source of compressed air is available, use it to blow dirt or foreign matter out of the spark plug hole. A regular bicycle pump will also work. The general idea here is to prevent contaminants from getting into the cylinder when the spark plug is removed.
8. Place the socket head on the spark plug and unscrew the spark plug by turning it counterclockwise (see illustration).
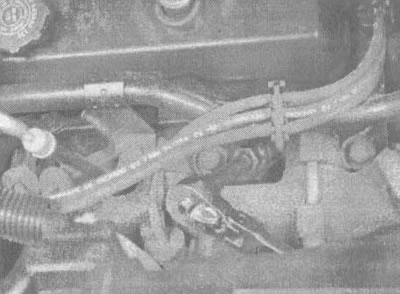
32.8. To remove spark plugs on engines of this type, you will need a nozzle and a socket head
9. Compare the spark plug with those shown in the photographs in this chapter to get an idea of the general condition of the engine.
10. Screw in one of the new spark plugs by hand, then tighten it with a torque wrench (if it exists) or using a ratchet. It is also recommended to stretch a small piece of rubber hose over the end of the spark plug and use it as a screw-in tool (see illustration). The hose will grip the spark plug tightly enough to turn it, but it will begin to slip if the spark plug is not threaded properly - this will prevent damage to the threads and avoid costly repairs.
32.10. Using a 3/16-inch diameter rubber hose will save time and prevent thread damage when installing spark plugs
11. Before installing the spark plug wire onto the spark plug, check it by following the procedures described in section 33.
12. Install the spark plug wire onto the new spark plug by threading it onto the tip until it seats on the spark plug.
13. Repeat the above procedure with the other spark plugs, replacing them one at a time to avoid mixing up the wires.