ChevyMan.ru
Mazda Mitsubishi Toyota Land Rover Honda Kia Nissan
English Русский
Български
Беларускі
Український
Српски
Hrvatski
Română
Polski
Slovenský
Magyar
|
Articles | Sitemap | Contacts |


Home   Aveo   Captiva   Cruze   Lacetti   Lanos   Niva   Tahoe   Others  
Orlando 1 (2010-2018) Trailblazer 1 (2001-2008, petrol) Lumina 1 (1989-1994)
  • Home
  • Chevrolet
  • Lumina 1
  • General information
  • Maintenance
  • Automatic transmission fluid change and filter replacement (every 30,000 miles or 24 months)

Automatic transmission fluid change and filter replacement (every 30,000 miles or 24 months) (Chevrolet Lumina 1)

            0

1. At the intervals specified in the technical specifications, the hydraulic fluid in the drive axle in the block with the automatic transmission should be drained and replaced. Since the liquid will remain hot for a long time after driving, perform this procedure only after everything has cooled down completely.

2. Before starting work, purchase the appropriate hydraulic fluid for the gearbox (see subsection "Recommended oils and fluids" at the beginning of this chapter) and a new filter.

3. For this job you will also need jack stands to keep the car raised; a drain pan capable of holding several quarts of liquid; rags.

4. Raise the vehicle and support it on jack stands.

5. With the drain pan in place, remove the front and side transmission housing mounting bolts.

6. Loosen the rear oil pan bolts one turn.

7. Carefully pry the gearbox housing with a screwdriver, allowing the hydraulic fluid to flow out (see illustration).
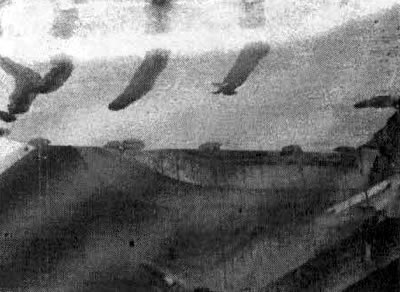
27.7. After removing the front and side bolts of the gearbox housing, loosen the rear bolts and…

27.7. After removing the front and side bolts of the gearbox housing, loosen the rear bolts and allow the fluid to drain, then remove the bolts and lower the pan from the car


8. Unscrew the remaining bolts, remove the pan and gasket. Thoroughly clean the transmission gasket surface to remove all traces of old gasket and seal.

9. Drain the fluid from the gearbox, clean the crankcase with solvent and dry with compressed air. Be careful; don't lose the magnet.

10. Remove the filter and take out the seal (see illustrations).
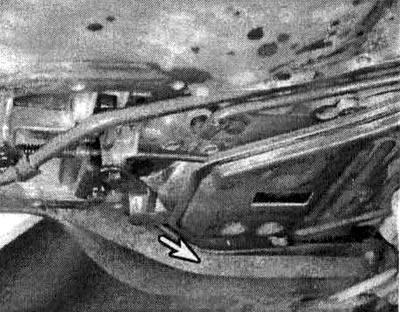
27.10a. Unscrew the filter from the clamp on the gearbox (indicated by the arrow), then pull it…

27.10a. Unscrew the filter from the clamp on the gearbox (indicated by the arrow), then pull it down and remove it
27.10b. Using a screwdriver, remove the old seal

27.10b. Using a screwdriver, remove the old seal

11. Install the new seal and filter (see illustrations).
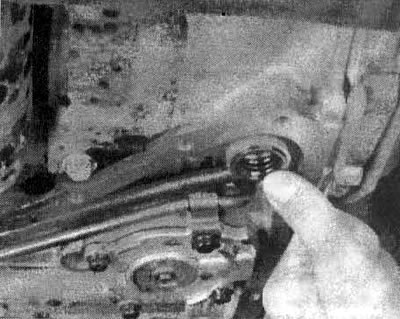
27.11a. Press the new seal all the way into the hole in the gearbox

27.11a. Press the new seal all the way into the hole in the gearbox
27.11b. Press the filter into the seal and rotate it into place in the clamp

27.11b. Press the filter into the seal and rotate it into place in the clamp


12. Make sure the gasket surface on the transmission pan is clean, then install the magnet and new gasket (see illustration). Place the pan back in place on the gearbox and insert the bolts. Using small turns of the wrench, gradually tighten each bolt around the perimeter until the final torque value is reached.
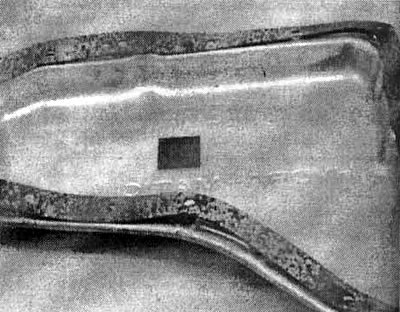
27.12. After cleaning the pan, place the magnet in place and install the gasket

27.12. After cleaning the pan, place the magnet in place and install the gasket


13. Lower the vehicle and add the specified amount of automatic transmission hydraulic fluid through the filler tube (see section 6).

14. With the gearshift lever in the park position and the vehicle set, start the engine at fast idle speed.

15. Move the gear shift lever through each gear and return to the park position. Check the hydraulic fluid level.

16. During the first few trips, check for leaks under the vehicle.

The article was checked: Vladimir Romannikov
This article is available at russian, bulgarian, belarusian, ukrainian, serbian, croatian, romanian, polish, slovak, hungarian

Share information:

Previous articles
Lumina 1: Maintenance
Next articles

Chassis and body lubrication (every 30,000 miles or 24 months)
Fuel Filter Replacement (every 30,000 miles or 24 months)
Check spare tire and jack (every 7,500 miles or 12 months)
Check starter interlock (every 7,500 miles or 12 months)
Seat Belt Inspection (Every 7,500 Miles or 12 Months)
Check Thermostat (3.1L Engine) (Every 30,000 miles or 24 months)
Drain, flush and fill the cooling system (every 30,000 miles or 24 months)
Check and replace PCV valve (every 30,000 miles or 24 months)
Evaporative Emission System Check (every 30,000 miles or 12 months)
Replace spark plugs (every 30,000 miles or 12 months)


See similar articles on the topic of Chevrolet cars:
Replacing automatic transmission seals Chevrolet Aveo T300 (2012-2018)
Automatic transmission Chevrolet Captiva 1 (2006-2018)
Checking the level and adding working fluid to the automatic transmission Chevrolet Cruze 1 (2008-2016)
Checking the fluid level in the automatic transmission Chevrolet Lacetti 1 (2002-2009)
Checking the fluid level in the windshield washer reservoir Chevrolet Lanos T150 (2002-2009)
Transmission control levers Chevrolet Niva 1 (2002-2016)
Automatic transmission fluid and filter replacement Chevrolet Tahoe 1 (1992-2000)
Link in different formats to this page


Visitor comments

No comments yet


How much will 17 + 44 =


Orlando 1 (2010-2018) 
  • General information
  • Introduction to manual
  • User manual
  • Maintenance
  • Troubleshooting
  • Power unit
  • Engine repair
  • Fuel and control system
  • Cooling and lubrication system
  • Ignition system
  • Transmission
  • Clutch
  • Gearbox
  • Drive shafts
  • Chassis
  • Car suspension
  • Steering
  • Brake system
  • Body
  • Exterior (external elements)
  • Doors, locks and windows
  • Electrical equipment
  • Equipment and devices
  • Windscreen wipers
  • Power devices
  • Electrical diagrams


Trailblazer 1 (2001-2008) 
  • General information
  • User manual
  • Troubleshooting
  • Maintenance
  • Power unit
  • Engine in a car
  • Engine overhaul
  • Cooling and heating
  • Fuel and exhaust system
  • Engine electrical equipment
  • Engine control
  • Transmission
  • Automatic gearbox
  • Transfer case
  • Drive shafts and cardan
  • Chassis
  • Brake system
  • Car suspension
  • Steering
  • Body
  • Exterior (external elements)
  • Interior (internal elements)
  • Doors, locks and windows
  • Electrical equipment
  • Equipment and devices
  • Electrical circuits


Lumina 1 (1989-1994) 
  • General information
  • Maintenance
  • Power unit
  • Engine 3.1L V6
  • Engine 3.8L V6
  • Engine overhaul
  • Cooling system
  • Power and exhaust system
  • Fuel injection
  • Engine electrical equipment
  • Reduced exhaust gas toxicity
  • Transmission
  • Automatic gearbox
  • Drive shafts
  • Chassis
  • Brake system
  • Car suspension
  • Steering
  • Body
  • Heating and air conditioning
  • Repair of body elements
  • Doors, covers and windows
  • Interior (internal elements)
  • Electrical equipment
  • Equipment and devices
  • Electrical circuits


ChevyMan.ru © 2017-2026 · Mobile version · Feedback · Site search · Interesting to read · Sitemap: EN BG BY UA RS HR RO PL SK HU

Aveo 2003-2008 · Aveo 2006-2011 · Aveo 2012-2018 · Captiva 2006-2018 · Cruze 2008-2016 · Lacetti 2002-2009 · Lanos 2002-2009 · Niva 2002-2016 · Tahoe 1992-2000 · Tahoe 2000-2014 · Lumina 1 1989-1994 · Trailblazer 1 2001-2008 · Orlando 1 2010-2018 ·
🛡️ For your security and to improve our service, this site uses cookies. You can disable them in your browser.