
12. Loosen the screws securing the IAC valve and remove the valve (see illustration).
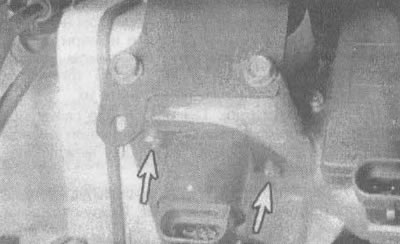
12/13 You will need a Phillips head screwdriver to remove the screws holding the IAC in place (indicated by arrows)
13. Remove the IAC valve and replace the rubber sealing ring.
14. Clean the throttle body sealing surface and the idle air control valve body bore to ensure proper sealing.
Caution: Do not immerse the IAC valve, which is an electrical device, in solvent or cleaning bath; otherwise it may be damaged.
15. Before installing the IAC valve, it is necessary to check the location of the distribution axis. If the axle is extended too far, the block may be damaged.
16. Measure the distance between the end of the axle and the gasket mounting surface.
17. If this distance is more than 1 1/8 inches, reduce it by pressing hard on the axle with your hand to lower it.
18. Install a new O-ring onto the IAC valve block. Lubricate the ring with engine oil.
19. Install the IAC valve to the idle air control unit and tighten the screws.
20. Connect the IAC valve electrical connector.
Note: No adjustments to the IAC valve are made after assembly. The IAC valve is "reset" by the ECM after engine start.