


Contents: Removal procedure ↧ Installation procedure ↧
Removal procedure
1. Disconnect the cable from the negative terminal of the battery.
2. Remove the console. See Section 9G, Interior Trim.
3. Remove the shift control cable adjusting clamps (1).
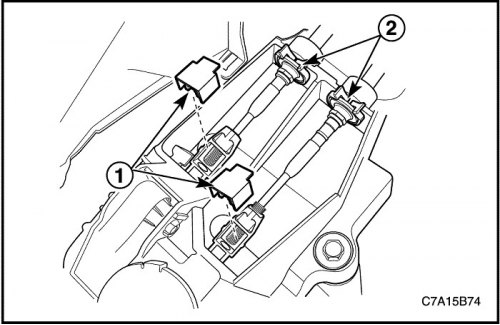
4. Remove the shift control cables (2) from the gear shift lever housing bracket.
5. Disconnect the shift control cables from the shift control adjusters.
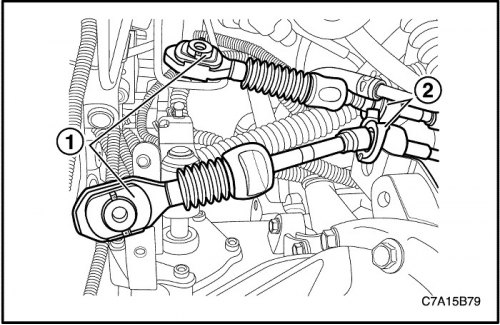
6. Remove the shift control cables (1) from the transaxle assembly using a suitable tool.
7. Remove the cables (2) from the shift control cable bracket.
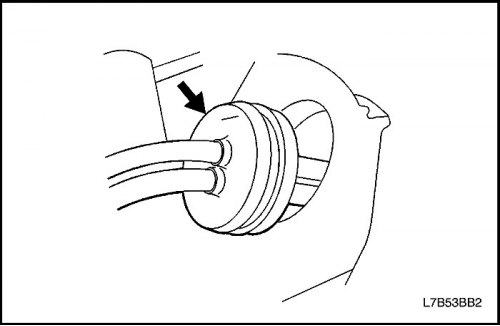
8. Remove the insulating bushing from the instrument panel.
9. Remove the shift control cables from the vehicle.
Installation procedure
1. Install the shift control cables onto the vehicle.
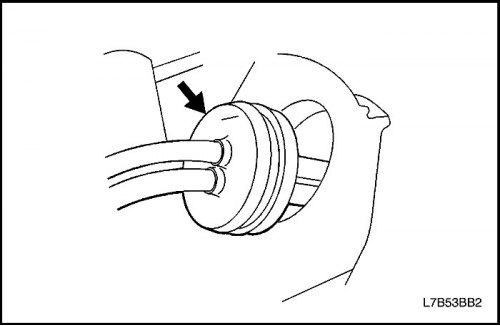
2. Install the insulating grommet into the instrument panel.
Important: Make sure the shift control cable bushing is seated correctly and that the arrow on the bushing is pointing up.
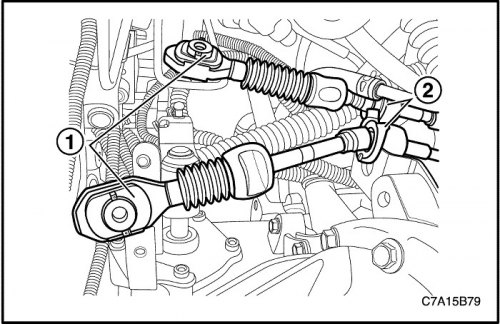
3. Install the cables (2) into the shift control cable bracket.
4. Install the shift control cables (1) into the gearbox assembly.
5. Move the gearbox with the final drive assembly to the position corresponding to neutral gear.
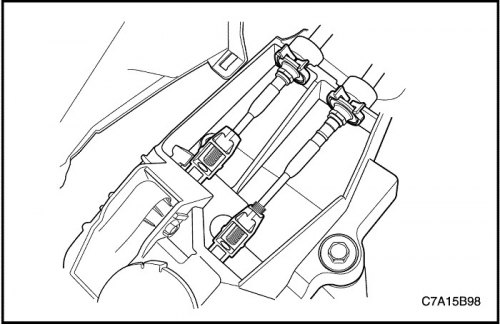
6. Connect the shift mechanism drive cables to the shift control regulators.
7. Install the shift control cables into the shift lever housing bracket.
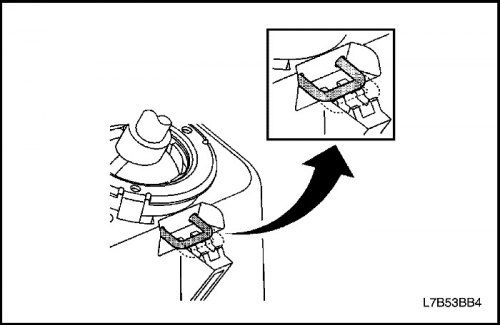
8. Move the gear shift lever to the neutral position.
9. Without pulling the ends of the shift cables out of the adjuster, adjust the cables by pressing on the neutral lock pin. Move the shift lever slightly to center the neutral lock pin.
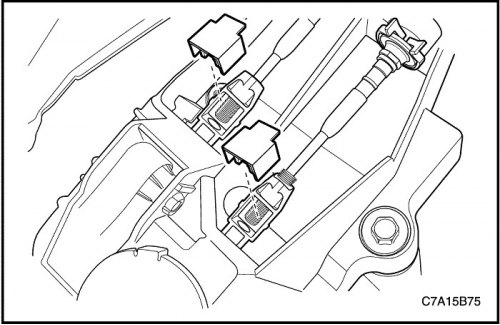
10. Press in and lock the shift control cable adjustment tabs.
11. Pull the neutral lock pin back to its original position.
12. Reinstall the console. See Section 9G, Interior Trim.
13. Connect the cable to the negative terminal of the battery.