
ChevyMan.ru
Mazda Mitsubishi Toyota Land Rover Honda Kia Nissan
English Русский
Български
Беларускі
Український
Српски
Hrvatski
Română
Polski
Slovenský
Magyar
|
Articles | Sitemap | Contacts |


Home   Aveo   Captiva   Cruze   Lacetti   Lanos   Niva   Tahoe   Others  
Tahoe 2 and 3 (2000-2014) Tahoe 1 (1992-2000)
  • Home
  • Tahoe
  • 2 (2000-2014)
  • General information
  • Vehicle device
  • Folding cab wall and removable rear window (Chevrolet Avalanche)

Folding cab wall and removable rear window (Chevrolet Avalanche) (Chevrolet Tahoe 2)

            0

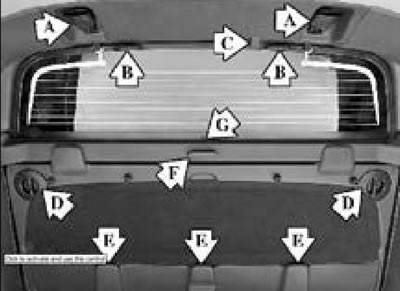
Your vehicle is equipped with a folding cabin wall and a removable rear window. Lowering the cabin wall allows you to increase the luggage space of the vehicle's cargo platform. The figure shows the main elements of the cabin wall.

A - lock levers,

A - lock levers,
B - handle,
C - rear window lock button,
D - rear window clamps,
E - rear window fastenings,
F - cabin wall handle,
G - rear window installation marks.


1. Removing and storing the rear window. Caution: If the removed rear window is stored incorrectly, it may break in the event of an accident or sudden braking and cause injury to the driver or passengers. When transporting the removed window in the car, always place it in the special rear window storage compartment.

Note: Do not remove the rear window while the rear window defroster is on. Removing the rear window while the defroster is on will cause sparking in the window lock area.


a) Fold the rear seats (see section "Seats").

Note: Folding the rear seats provides access to the rear window storage compartment.


b) Squeeze and pull down the levers (A) located near the upper corners of the rear window to unlock the window. The window will now be held in place by the rear window lock button (C).
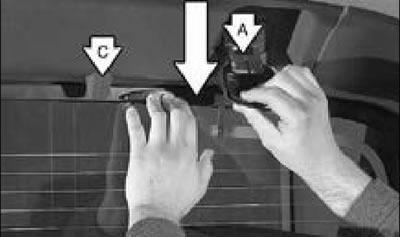


b) Squeeze and pull down the levers (A) located near the upper corners of the rear window to unlock…


c) While holding the rear window, press the rear window lock button (C) and pull the upper part of the window towards you using the handles (B) located at the upper part of the rear window.
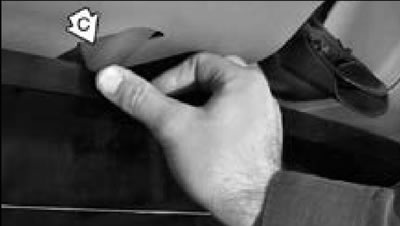
c) While holding the rear window, press the rear window lock button (C) and pull the upper part of…


d) With the glass tilted, remove it from the lower guide as shown in the figure.
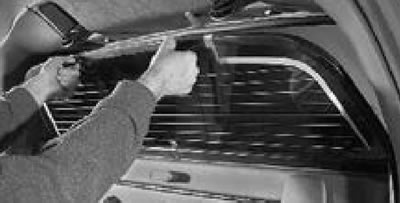
d) With the glass tilted, remove it from the lower guide as shown in the figure.


d) Install the rear window into the rear window storage recess in the cab wall, guiding the lower edge of the window into the mounts (E). Press the window against the cab wall and hold it in this position until the next step.
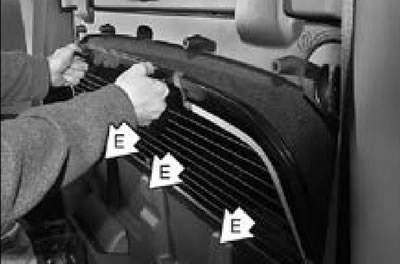


d) Install the rear window into the rear window storage recess in the cab wall, guiding the lower…


e) Turn both rear window locks (D) to the "LOCK" position.
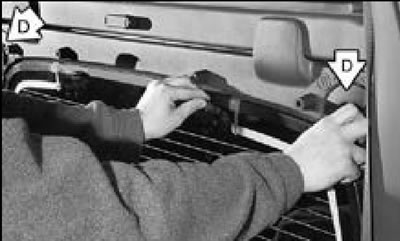
e) Turn both rear window locks (D) to the «LOCK» position.


g) When the locks are set to the "LOCK" position, the rear window is secured.
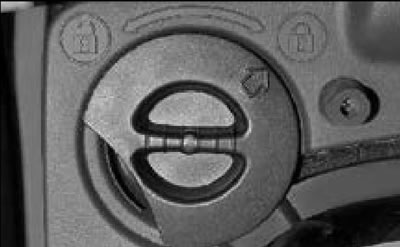
g) When the locks are set to the «LOCK» position, the rear window is secured.


h) Set the rear window lock levers to the locking position, and you should hear the locks clicking. Then fold down the rear seats.

2. Installing the rear window.

a) Squeeze and lower the rear window lock levers (A) to unlock the rear window.


b) While holding the glass, turn the rear glass locks (D) to the "UNLOCK" position.

c) Holding the glass by the handles, remove the glass from the niche.

d) Holding the glass at an angle, install the lower edge of the rear glass into the guide.
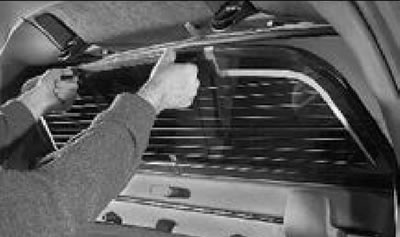
d) Holding the glass at an angle, install the lower edge of the rear glass into the guide.


d) Make sure that the rear window alignment marks are aligned.
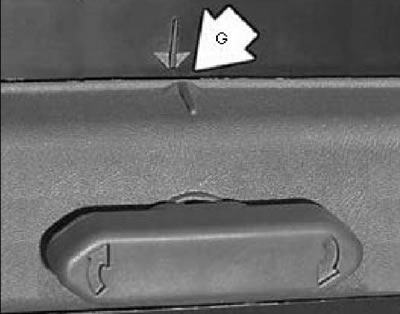
d) Make sure that the rear window alignment marks are aligned.


e) Press the glass down, then press the glass against the glass frame.

g) Pressing the glass against the frame, move the rear window lock levers to the lock position. When the glass is locked, you should hear the locks clicking.

3. Lowering the cabin wall (without removing the rear window).

Note: Lowering the cabin wall allows you to increase the luggage space of the cargo platform by allowing access into the vehicle interior.


a) Fold the rear seats (see section "Seats").

b) From outside the vehicle, hold the cabin wall to prevent it from falling. Turn the cabin wall handle clockwise and pull the wall toward you.
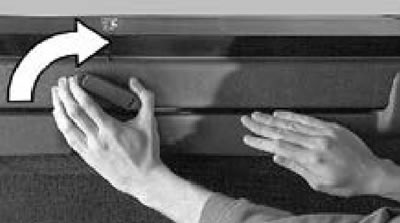
b) From outside the vehicle, hold the cabin wall to prevent it from falling. Turn the cabin wall…


c) Lower the cabin wall to the level of the cargo platform.
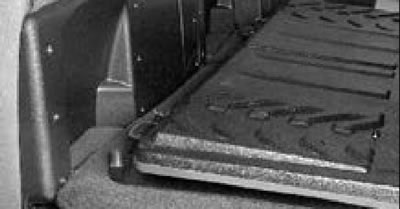
c) Lower the cabin wall to the level of the cargo platform.


d) Raising the cabin wall is performed in the reverse order.

The article was checked: Vladimir Romannikov
This article is available at russian, bulgarian, belarusian, ukrainian, serbian, croatian, romanian, polish, slovak, hungarian

Share information:

Previous articles
Tahoe 2 and 3: Vehicle device
Next articles

Rear door (Cadillac Escalade, Chevrolet Tahoe)
Opening and closing the hood
Cruise control system
Windscreen wipers and washers
Light signaling on the car
Tailgate cargo bed (Chevrolet Avalanche)
Fuel tank filler flap
Rear view mirror control
Adjusting the position of the steering wheel
Adjusting the position of the pedal assembly


See similar articles on the topic of Chevrolet cars:
Removal and installation the rear door window regulator Chevrolet Aveo T300 (2012-2018)
Rear window heating/windscreen defrost system Chevrolet Captiva 1 (2006-2018)
Replacing the rear door window regulator Chevrolet Cruze 1 (2008-2016)
Wiring diagram for windshield and rear window wipers and washers (hatchback and station wagon, without rain sensor) Chevrolet Lacetti 1 (2002-2009)
Rear window heating circuit diagram Chevrolet Lanos T150 (2002-2009)
Rear window cleaner Chevrolet Niva 1 (2002-2016)
Checking and repairing the rear window defroster Chevrolet Lumina 1 (1989-1994)
Link in different formats to this page


Visitor comments

No comments yet


How much will 13 + 25 =


Tahoe 2 and 3 (2000-2014) 
  • General information
  • Vehicle characteristics
  • Vehicle device
  • Manual
  • Maintenance
  • Power unit
  • Engine repair
  • Engine overhaul
  • Cooling system
  • Injection and control system
  • Exhaust system
  • Engine electrical equipment
  • Transmission
  • Automatic gearbox 4L60, 4L65, 4L70
  • Automatic gearbox 6L50, 6L80, 6L90
  • Transfer case
  • Drive shafts and cardan
  • Front drive axle
  • Rear drive axle
  • Chassis
  • Car suspension
  • Steering
  • Brake system
  • Body (until 2007)
  • Exterior (external elements)
  • Interior (internal elements)
  • Doors, locks and windows
  • Heating and air conditioning
  • Security System (SRS)
  • Body (since 2007)
  • Exterior (external elements)
  • Doors, locks and windows
  • Interior (internal elements)
  • Electrical equipment
  • Electrical appliances (until 2007)
  • Lighting and lamps (until 2007)
  • Audio system (until 2007)
  • Electrical appliances (since 2007)
  • Lighting and lamps (since 2007)
  • Audio system (since 2007)
  • Wiring diagrams (2000-2005)
  • Wiring diagrams (2005-2007)
  • Wiring diagrams (since 2007)


Tahoe 1 (1992-2000) 
  • General information
  • User manual
  • Maintenance
  • Power unit
  • Engine in a car
  • Engine removed
  • Cooling system
  • Heating and air conditioning
  • Fuel and exhaust systems
  • Decreased toxicity
  • Transmission
  • Manual gearbox
  • Automatic gearbox
  • Transfer case
  • Clutch and drive shafts
  • Chassis
  • Brake system
  • Car suspension
  • Steering
  • Body
  • Repair of body elements
  • Electrical equipment
  • Engine electrics
  • Equipment and devices
  • Electrical circuits


ChevyMan.ru © 2017-2026 · Mobile version · Feedback · Site search · Interesting to read · Sitemap: EN BG BY UA RS HR RO PL SK HU

Aveo 2003-2008 · Aveo 2006-2011 · Aveo 2012-2018 · Captiva 2006-2018 · Cruze 2008-2016 · Lacetti 2002-2009 · Lanos 2002-2009 · Niva 2002-2016 · Tahoe 1992-2000 · Tahoe 2000-2014 · Lumina 1 1989-1994 · Trailblazer 1 2001-2008 · Orlando 1 2010-2018 ·
🛡️ For your security and to improve our service, this site uses cookies. You can disable them in your browser.