
ChevyMan.ru
Mazda Mitsubishi Toyota Land Rover Honda Kia Nissan
English Русский
Български
Беларускі
Український
Српски
Hrvatski
Română
Polski
Slovenský
Magyar
|
Articles | Sitemap | Contacts |


Home   Aveo   Captiva   Cruze   Lacetti   Lanos   Niva   Tahoe   Others  
Orlando 1 (2010-2018) Trailblazer 1 (2001-2008, petrol) Lumina 1 (1989-1994)
  • Home
  • Chevrolet
  • Lumina 1
  • Power unit
  • Fuel injection
  • Injector housing — removal and installation (3.1 l)

Injector housing — removal and installation (3.1 l) (Chevrolet Lumina 1)

            0

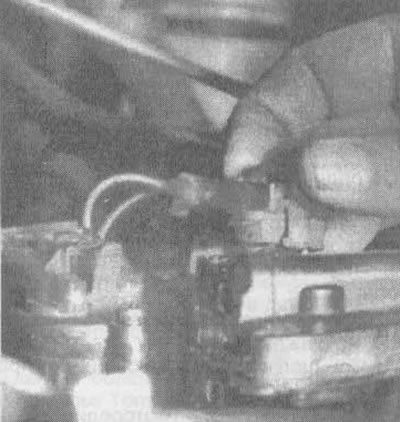
14. To disconnect the connectors from the injectors, squeeze the plastic tabs and pull the connectors upwards (see illustration).

12.14 To remove any electrical connector, press the two tabs at the front and back of each…

12.14 To remove any electrical connector, press the two tabs at the front and back of each connector and lift the connector up


15. Remove the fuel pressure regulator and fuel flow meter cover.

Note: Do not remove the fuel pressure regulator gasket or fuel gauge cover; leave it in place to protect the castings from damage when removing the injectors.


16. Use a screwdriver and a support (see illustration) to remove the injector.
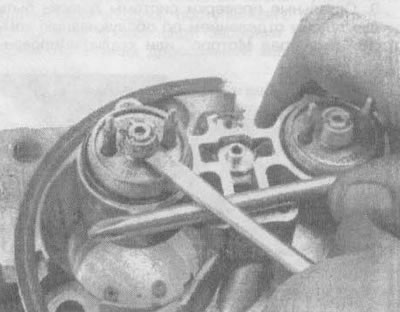
12.16 To remove the injector, insert the tip of a flat-head screwdriver under the tab of the clamp…

12.16 To remove the injector, insert the tip of a flat-head screwdriver under the tab of the clamp on top of the injector and, using another screwdriver as a support, carefully remove the injector


17. Remove the upper (larger) and lower (smaller) sealing rings and filter from the injector.

18. Remove the steel washer from the top of the injector.

19. Inspect the fuel injector filter for dirt and deposits. Also check for dirt in the fuel line and fuel tank.

20. Make sure that the injectors are replaced with identical ones. Other model injectors may fit the TBI Model 220 unit, but they may be calibrated for different output.

21. Pull the new filter onto the injector (see illustration).
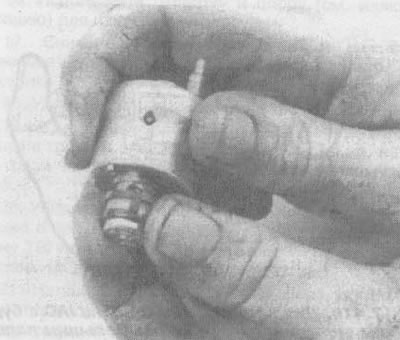
12.21. Pull the new filter onto the injector

12.21. Pull the new filter onto the injector


22. Lubricate the new lower O-ring with transmission hydraulic fluid, then place it on the groove in the bottom of the injector in the fuel meter housing (see illustration).
12.22. Lubricate the lower O-ring with transmission hydraulic fluid, then place it on the groove in…

12.22. Lubricate the lower O-ring with transmission hydraulic fluid, then place it on the groove in the bottom of the injector


23. Install the steel rear washer (see illustration).
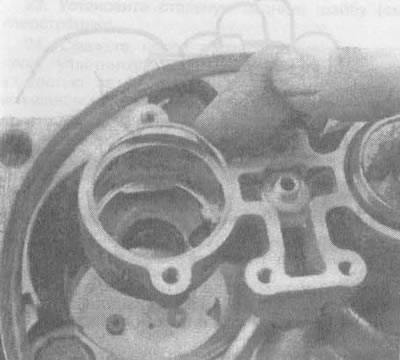
12.23 Place the steel rear washer on the recess near the top of the injector

12.23 Place the steel rear washer on the recess near the top of the injector


24. Lubricate the new top (larger size) the O-ring with transmission fluid, then install it on top of the steel washer (see illustration).
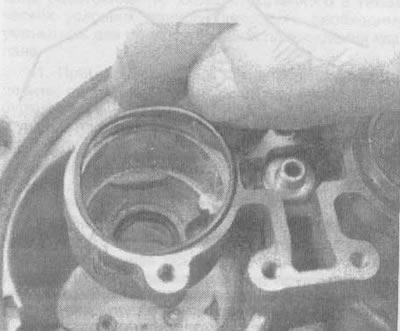
12.24 Lubricate the upper O-ring with transmission fluid, then install it on top of the steel washer

12.24 Lubricate the upper O-ring with transmission fluid, then install it on top of the steel washer


Note: The washer and large o-ring should be installed in front of the injector. Failure to do so may result in improper seating of the large O-ring, causing fuel leakage.


Note: Electrical contacts must be parallel to the throttle axis.
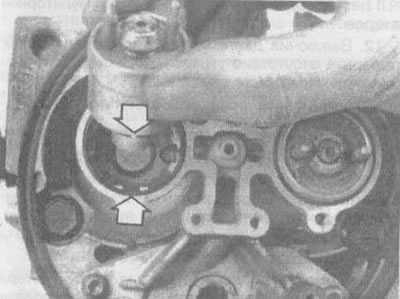

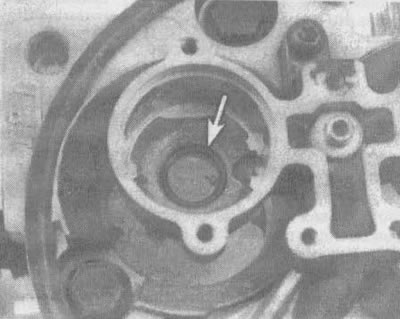
12.25. Make sure that the protrusion is aligned with the recess in the lower part of the injector…

12.25. Make sure that the protrusion is aligned with the recess in the lower part of the injector cavity


26. Install the fuel flow meter cover and gasket.

27. Connect the wire to the battery.

28. After turning off the engine and leaving the ignition on, check for fuel leaks.

29. Connect the electrical connectors to the injectors.

30. Reinstall the air filter, adapter and gaskets.

The article was checked: Vladimir Romannikov
This article is available at russian, bulgarian, belarusian, ukrainian, serbian, croatian, romanian, polish, slovak, hungarian

Share information:

Previous articles
Lumina 1: Fuel injection
Next articles

Fuel Pressure Regulator and Fuel Gauge Cap (3.1L)
Checking the fuel injection system
Electronic Fuel Injection Control System — General Information
Throttle Position Sensor (TPS, 3.1L)
Idle Air Control Valve (IAC, 3.1L)
Fuel flow meter — removal and installation (3.1 l)
Throttle Body — Removal and Installation (3.1L)
Adjusting the minimum idle speed (3.1 l)


See similar articles on the topic of Chevrolet cars:
Removal and installation the oil filter housing Chevrolet Aveo T300 (2012-2018)
Removal and installation the injector Chevrolet Captiva 1 (2006-2018)
Removal and installation the air filter housing Chevrolet Cruze 1 (2008-2016)
Front axle shaft with housing (all-wheel drive models) — removal and installation Chevrolet Tahoe 1 (1992-2000)
Link in different formats to this page


Visitor comments

No comments yet


How much will 10 + 16 =


Orlando 1 (2010-2018) 
  • General information
  • Introduction to manual
  • User manual
  • Maintenance
  • Troubleshooting
  • Power unit
  • Engine repair
  • Fuel and control system
  • Cooling and lubrication system
  • Ignition system
  • Transmission
  • Clutch
  • Gearbox
  • Drive shafts
  • Chassis
  • Car suspension
  • Steering
  • Brake system
  • Body
  • Exterior (external elements)
  • Doors, locks and windows
  • Electrical equipment
  • Equipment and devices
  • Windscreen wipers
  • Power devices
  • Electrical diagrams


Trailblazer 1 (2001-2008) 
  • General information
  • User manual
  • Troubleshooting
  • Maintenance
  • Power unit
  • Engine in a car
  • Engine overhaul
  • Cooling and heating
  • Fuel and exhaust system
  • Engine electrical equipment
  • Engine control
  • Transmission
  • Automatic gearbox
  • Transfer case
  • Drive shafts and cardan
  • Chassis
  • Brake system
  • Car suspension
  • Steering
  • Body
  • Exterior (external elements)
  • Interior (internal elements)
  • Doors, locks and windows
  • Electrical equipment
  • Equipment and devices
  • Electrical circuits


Lumina 1 (1989-1994) 
  • General information
  • Maintenance
  • Power unit
  • Engine 3.1L V6
  • Engine 3.8L V6
  • Engine overhaul
  • Cooling system
  • Power and exhaust system
  • Fuel injection
  • Engine electrical equipment
  • Reduced exhaust gas toxicity
  • Transmission
  • Automatic gearbox
  • Drive shafts
  • Chassis
  • Brake system
  • Car suspension
  • Steering
  • Body
  • Heating and air conditioning
  • Repair of body elements
  • Doors, covers and windows
  • Interior (internal elements)
  • Electrical equipment
  • Equipment and devices
  • Electrical circuits


ChevyMan.ru © 2017-2026 · Mobile version · Feedback · Site search · Interesting to read · Sitemap: EN BG BY UA RS HR RO PL SK HU

Aveo 2003-2008 · Aveo 2006-2011 · Aveo 2012-2018 · Captiva 2006-2018 · Cruze 2008-2016 · Lacetti 2002-2009 · Lanos 2002-2009 · Niva 2002-2016 · Tahoe 1992-2000 · Tahoe 2000-2014 · Lumina 1 1989-1994 · Trailblazer 1 2001-2008 · Orlando 1 2010-2018 ·
🛡️ For your security and to improve our service, this site uses cookies. You can disable them in your browser.