
ChevyMan.ru
Mazda Mitsubishi Toyota Land Rover Honda Kia Nissan
English Русский
Български
Беларускі
Український
Српски
Hrvatski
Română
Polski
Slovenský
Magyar
|
Articles | Sitemap | Contacts |


Home   Aveo   Captiva   Cruze   Lacetti   Lanos   Niva   Tahoe   Others  
Orlando 1 (2010-2018) Trailblazer 1 (2001-2008, petrol) Lumina 1 (1989-1994)
  • Home
  • Chevrolet
  • Lumina 1
  • Power unit
  • Engine overhaul
  • Checking the compression in the cylinders

Checking the compression in the cylinders (Chevrolet Lumina 1)

            0

1. Checking the compression will provide information about the mechanical condition of the upper part of the engine (pistons, rings, valves, cylinder head gaskets). More specifically, this test can show whether the pressure drop is due to leaks due to worn piston rings, damaged valves and valve seats, or a blown cylinder head gasket.

Note: During this test, the engine must be at normal operating temperature and the battery must be fully charged.


2. Start by cleaning the surfaces around the spark plugs before removing the plugs. You should use compressed air for this, but you can also use a small brush or even a bicycle pump. The purpose of this procedure is to prevent dirt from entering the cylinders when performing a pressure test.

3. Remove all spark plugs from the engine (see chapter 1, section 32).

4. Lock the throttle valve in the fully open position.

5. Disconnect the power and ignition systems by removing the ECM fuse (see chapter 12, section 3).

6. Insert the pressure sensor into the spark plug hole of cylinder 1 (see illustration).
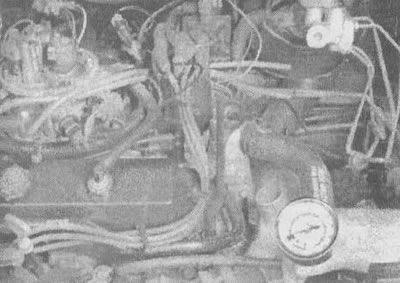
3.6 Use a threaded pressure sensor to install into the spark plug hole; do not use a sensor with a…

3.6 Use a threaded pressure sensor to install into the spark plug hole; do not use a sensor with a conical rubber tip - its readings are usually inaccurate, since they depend on how hard you press it with your hand, ensuring a tight seal between the sensor and the combustion chamber


7. Crank the engine crankshaft with the starter for at least seven compression strokes and look at the sensor readings. In a healthy engine, the pressure should build up quickly. Low pressure on the first compression stroke followed by a gradual increase on subsequent strokes indicates wear of the piston rings. Low pressure on the first compression stroke that does not increase on subsequent compression strokes indicates leaking valves or a blown head gasket (the cause could also be cracks in the head). Carbon deposits on the top surfaces of the valve heads can also cause pressure to drop. Record the highest compression gauge reading.

8. Repeat the measurement for the remaining cylinders and compare the results with the specifications in this chapter.

9. If the readings are below normal, add a little engine oil into each cylinder through the spark plug holes and repeat the check.

10. If the pressure increases after adding oil, this indicates wear of the piston rings. If the pressure does not increase significantly, then the leaks are in the valves or through the cylinder head gasket. Valve leaks may be due to burnout of valve seats or contact surfaces, wear, damage or cracks.

11. If the same low pressure is noticed in two adjacent cylinders, then there is a high probability that the gasket between them is torn. The appearance of coolant in the combustion chambers or crankcase may confirm this assumption.

12. If the pressure in one cylinder is 20% lower than in the others, and at the same time there is a slightly uneven idle speed of the engine, then the cause may be wear of the exhaust cam of the camshaft.


13. If the pressure exceeds the norm, this may be due to carbon deposits (carbon) on the walls of the combustion chambers. In this case, it is necessary to remove the cylinder heads and clean them.

14. If the pressure drops or varies significantly between different cylinders, we recommend that you have the engine checked for leaks at an auto repair shop. This test will show exactly where the leak is and how serious it is.

15. Insert the ECM fuse and drive the vehicle to restore the computer's learning memory.

The article was checked: Vladimir Romannikov
This article is available at russian, bulgarian, belarusian, ukrainian, serbian, croatian, romanian, polish, slovak, hungarian

Share information:

Previous articles
Lumina 1: Engine overhaul
Next articles

Engine overhaul is a necessity
General information about engine overhaul
Technical data for overhaul of 3.8 liter engines
Technical data for overhaul of 3.1 liter engines
Engine Removal — Precautions
Removal and installation the engine
Engine Overhaul Options
Engine Overhaul — Disassembly Sequence
Disassembling the cylinder head


See similar articles on the topic of Chevrolet cars:
Checking the compression in the cylinders Chevrolet Aveo T300 (2012-2018)
Checking the compression pressure Chevrolet Captiva 1 (2006-2018)
Checking the compression in the cylinders Chevrolet Cruze 1 (2008-2016)
Checking the condition of wheels and tires Chevrolet Lacetti 1 (2002-2009)
Checking the condition of wheels and tires Chevrolet Lanos T150 (2002-2009)
Checking the rear brake wheel cylinders on the stand Chevrolet Niva 1 (2002-2016)
Checking the compression in the engine cylinders Chevrolet Tahoe 1 (1992-2000)
Link in different formats to this page


Visitor comments

No comments yet


How much will 37 + 30 =


Orlando 1 (2010-2018) 
  • General information
  • Introduction to manual
  • User manual
  • Maintenance
  • Troubleshooting
  • Power unit
  • Engine repair
  • Fuel and control system
  • Cooling and lubrication system
  • Ignition system
  • Transmission
  • Clutch
  • Gearbox
  • Drive shafts
  • Chassis
  • Car suspension
  • Steering
  • Brake system
  • Body
  • Exterior (external elements)
  • Doors, locks and windows
  • Electrical equipment
  • Equipment and devices
  • Windscreen wipers
  • Power devices
  • Electrical diagrams


Trailblazer 1 (2001-2008) 
  • General information
  • User manual
  • Troubleshooting
  • Maintenance
  • Power unit
  • Engine in a car
  • Engine overhaul
  • Cooling and heating
  • Fuel and exhaust system
  • Engine electrical equipment
  • Engine control
  • Transmission
  • Automatic gearbox
  • Transfer case
  • Drive shafts and cardan
  • Chassis
  • Brake system
  • Car suspension
  • Steering
  • Body
  • Exterior (external elements)
  • Interior (internal elements)
  • Doors, locks and windows
  • Electrical equipment
  • Equipment and devices
  • Electrical circuits


Lumina 1 (1989-1994) 
  • General information
  • Maintenance
  • Power unit
  • Engine 3.1L V6
  • Engine 3.8L V6
  • Engine overhaul
  • Cooling system
  • Power and exhaust system
  • Fuel injection
  • Engine electrical equipment
  • Reduced exhaust gas toxicity
  • Transmission
  • Automatic gearbox
  • Drive shafts
  • Chassis
  • Brake system
  • Car suspension
  • Steering
  • Body
  • Heating and air conditioning
  • Repair of body elements
  • Doors, covers and windows
  • Interior (internal elements)
  • Electrical equipment
  • Equipment and devices
  • Electrical circuits


ChevyMan.ru © 2017-2026 · Mobile version · Feedback · Site search · Interesting to read · Sitemap: EN BG BY UA RS HR RO PL SK HU

Aveo 2003-2008 · Aveo 2006-2011 · Aveo 2012-2018 · Captiva 2006-2018 · Cruze 2008-2016 · Lacetti 2002-2009 · Lanos 2002-2009 · Niva 2002-2016 · Tahoe 1992-2000 · Tahoe 2000-2014 · Lumina 1 1989-1994 · Trailblazer 1 2001-2008 · Orlando 1 2010-2018 ·
🛡️ For your security and to improve our service, this site uses cookies. You can disable them in your browser.