


You can replace the oil seals without removing the cylinder head from the engine.
You will need: the tools needed to remove the timing drive (see "Replacing the timing belt and its tension roller"), the rear cover of the timing drive (see "Removal and installation the oil pump"), cylinder head covers (see "Replacing the cylinder head cover gasket"), as well as tweezers (or a magnetized screwdriver) for extracting crackers from valve spring plates...
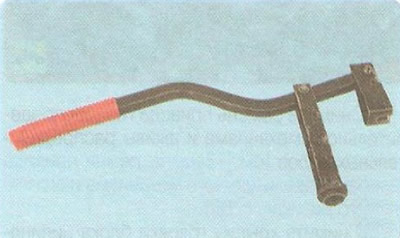
...a device for compressing valve springs...
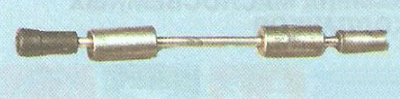
...and an inertial valve stem seal puller. The puller shown has a mandrel on the other end for pressing the seals on.
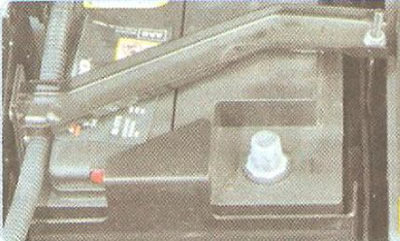
1. Disconnect the wire from the negative terminal of the battery.
2. Remove all spark plugs (see "Replacement and maintenance of spark plugs").
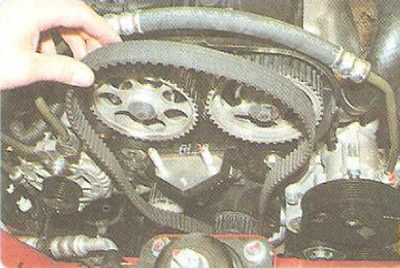
3. Remove the timing belt and camshaft pulleys (see "Replacing the timing belt and its tension roller").
4. Remove the cylinder head cover (see "Replacing the cylinder head cover gasket").
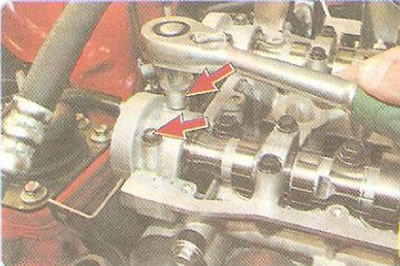
5. Unscrew two bolts securing the front camshaft bearing caps...
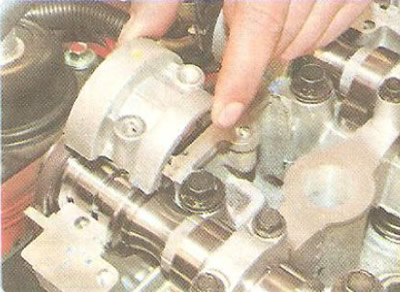
6. ...and remove the lids.
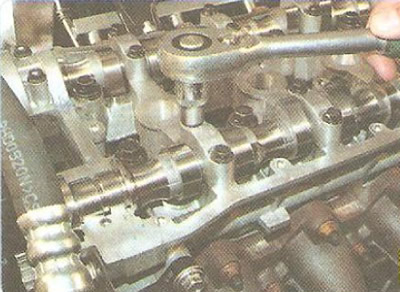
7. Unscrew the two bolts securing the remaining camshaft bearing caps and remove the caps.
Note: Remove bearing cap bolts in sequence 2, 6, 10, 1, 5 and 9 (numbers are printed on the lids) in three stages: half a turn, one turn, finally unscrew the bolts. Then gradually unscrew the cover mounting bolts crosswise in the sequence 4, 8, 3 and 7.
Warnings: Do not de-identify the camshaft bearing caps: they are not interchangeable, as the bearing seats are machined together with the caps. If there are no numbers on the caps, mark them in any way possible (for example, by kerning), to install them in their original places. In addition to the numbers, the covers have arrows pointing towards the timing drive.
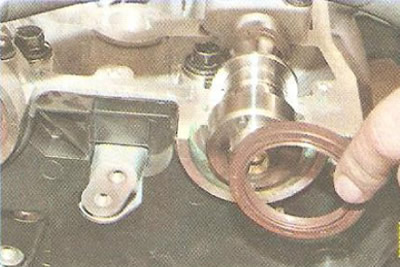
8. Remove the camshaft seals.
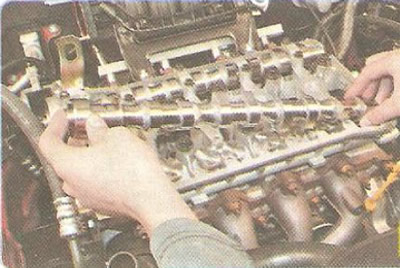
9. Remove the camshafts.
Note: Before removing the camshafts, mark them in any way so that they can be installed in their original locations during assembly.
Warning: The following operations for replacing the valve stem seals are shown for clarity on a removed cylinder head. When replacing the valve stem seals on a cylinder head installed on the engine, to prevent the valves from falling into the cylinder, turn the crankshaft so that the piston of the cylinder whose valve stem seals are being replaced is at TDC.
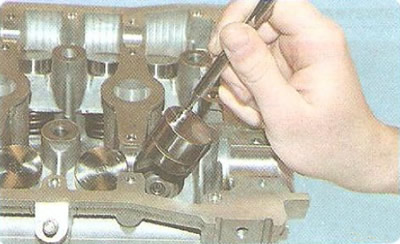
10. Remove the hydraulic compensator of the valve whose oil seal you are replacing from its socket in the cylinder head.
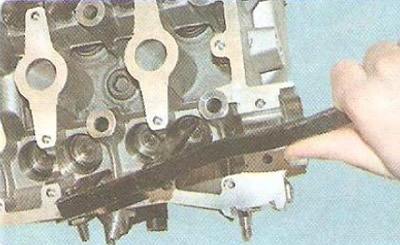
11. Install the valve spring compressor by screwing the camshaft bearing cap mounting bolt into one of the cylinder head holes and hooking the compressor onto this bolt. Compress the valve spring with the compressor.
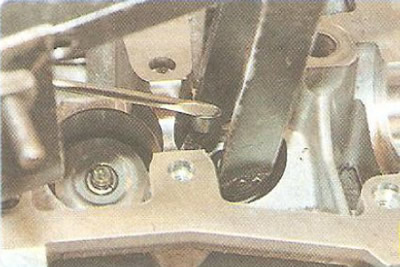
12. Remove the two crackers from the upper spring plate using tweezers or a magnetized screwdriver. Then remove the device.
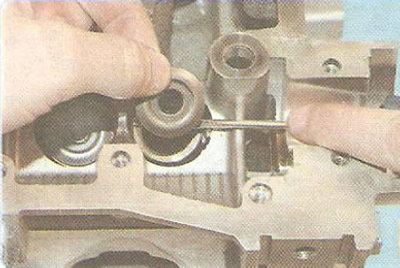
13. Using a screwdriver, pry the upper spring plate out of the cylinder head socket...
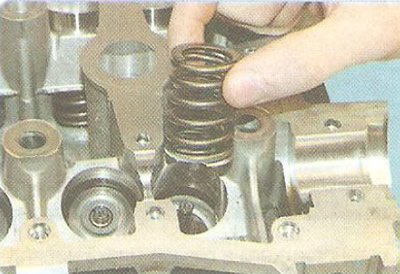
14. ...and the valve spring.
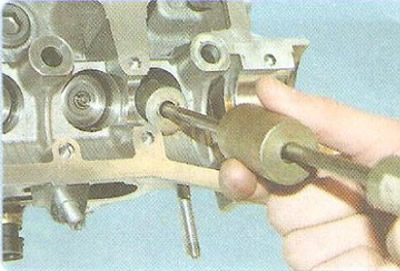
15. Press off the valve guide sleeve oil seal G. To do this, place the collet of the valve guide sleeve removal device on the seal and sharply strike the collet sleeve with the striker. Then, just as sharply strike the handle of the device with the striker...
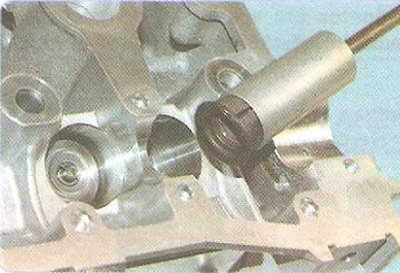
16. ...thereby pressing the cap off the sleeve.
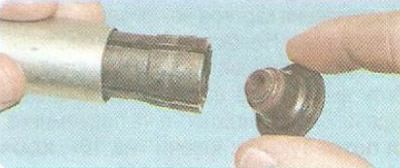
17. Remove the cap from the collet of the device. If there is no device for removing caps, remove them with pliers. In this case, the force must be applied strictly upwards and do not turn the caps so as not to damage the valve guide bushings.
Warning: Do not remove the cap by prying it from both sides with screwdrivers. The guide sleeve on which the cap is placed is made of metal ceramics and its edge easily chips off.
18. If your new caps include a plastic installation sleeve, place the sleeve onto the valve stem.
19. Lubricate the inner surface of the valve stem seal with engine oil and slide the seal along the valve stem to the guide sleeve.
20. Install the mandrel for pressing the cap. Using light blows of the striker on the mandrel, press the cap until it stops.
21. Remove the guide bushing from the valve stem or place the spring on the cap if it was removed.
22. Install the spring and valve plate in the reverse order of removal. Install the crackers using the device so that they fit into the grooves of the valve stem. After installing the crackers, hit the end of the valve with a hammer through a metal rod so that the crackers sit in place.
Warning: If the crimped valve crackers are not secured in place, the "lost" valve will fall into the cylinder when the engine is started, which will cause serious engine failure.
23. Install the hydraulic compensator in place.
24. Replace the oil seals of the remaining valves in the same way.
Helpful Hint: Install the front camshaft bearing caps with sealant to prevent oil from leaking through the joint between the cap and the bearing bed.
Note: Install the camshaft oil seals after installing the front camshaft bearing caps. The installation techniques for the oil seals are described in the subsection "Replacing camshaft seals".