
ChevyMan.ru
Mazda Mitsubishi Toyota Land Rover Honda Kia Nissan
English Русский
Български
Беларускі
Український
Српски
Hrvatski
Română
Polski
Slovenský
Magyar
|
Articles | Sitemap | Contacts |


Home   Aveo   Captiva   Cruze   Lacetti   Lanos   Niva   Tahoe   Others  
Cruze 1 (2008-2016)
  • Home
  • Cruze
  • J300 (2008-2016)
  • Power unit
  • Engine repair
  • Replacing crankshaft seals

Replacing crankshaft seals (Chevrolet Cruze J300)

            0

If you find traces of oil leakage through the crankshaft seals, first check whether the crankcase ventilation system is clogged and whether the crankcase ventilation hoses are pinched, and fix the faults if necessary. If the oil leak does not stop, replace the seals.

A sign that the front crankshaft oil seal needs to be replaced is oil leaking from its edge. The oil is then splashed by the rotating crankshaft pulley, causing the entire front of the engine and the timing belt to become oily.

You will need: all the tools needed to remove the timing drive (see "Replacing the timing belt and its tension roller"), the rear cover of the timing drive (see "Removal and installation the oil pump"), cylinder head covers (see "Replacing the cylinder head cover gasket"), as well as a screwdriver and a hammer.

To replace the front crankshaft oil seal, follow these steps:.

1. Disconnect the wire from the negative terminal of the battery.

2. Set the piston of the 1st cylinder to the TDC position of the compression stroke (see "Setting the piston of the first cylinder to the TDC position of the compression stroke").

3. Remove the timing belt (see "Replacing the timing belt and its tension roller").

4. Remove the rear timing cover (see "Removal and installation the oil pump").
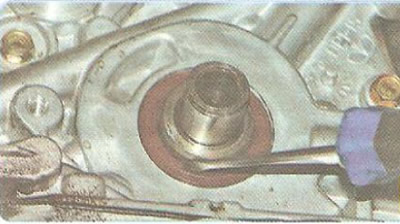
4. Remove the rear timing cover (see «Removal and installation the oil pump»).


5. Using a screwdriver, remove the seal from the oil pump cover.
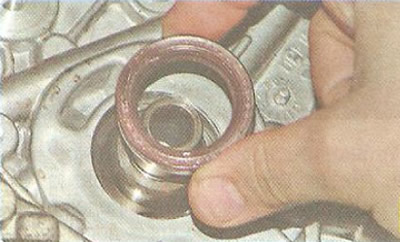


5. Using a screwdriver, remove the seal from the oil pump cover.


6. Lubricate the working edge of the new oil seal with engine oil and install it in the oil pump cover, orienting the working edge towards the inside of the engine.
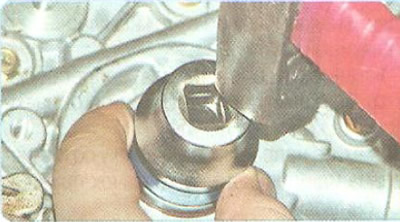
6. Lubricate the working edge of the new oil seal with engine oil and install it in the oil pump…


7. Press the seal into the pump cover until it stops using a mandrel. You can use a suitable sized socket from the tool kit or an old seal as a mandrel.

8. Install all removed parts and assemblies of the timing mechanism in the reverse order of removal.

The reason for the clutch discs becoming oily may be a leak in the primary shaft seal of the gearbox or the rear seal of the crankshaft.

Motor and transmission oils have different smells, so with a certain amount of skill you can determine which of the seals is defective.

Helpful Hint: There is another way to determine the type of oil. Drop the oil into a thin layer of water in a container (you can fall into a puddle). The transmission oil will spread across the entire surface of the water in the form of a rainbow film, while the motor oil will remain in the form of a drop, similar to a grain of lentil.


To replace the rear oil seal, follow these steps:.

1. Remove the gearbox (see "Removal and installation of a manual gearbox").

2. Remove the clutch (see "Removal and installation the clutch").

3. Remove the flywheel (see "Removal, defect detection and installation of the flywheel").

4. Inspect the oil seal: if it has lost its tightness, oil will be visible from its lower part.
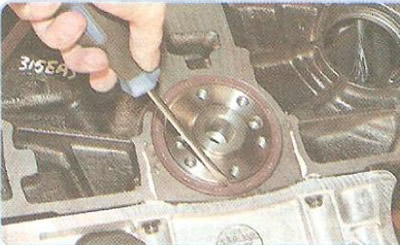
4. Inspect the oil seal: if it has lost its tightness, oil will be visible from its lower part.


5. Using a screwdriver, remove the seal.
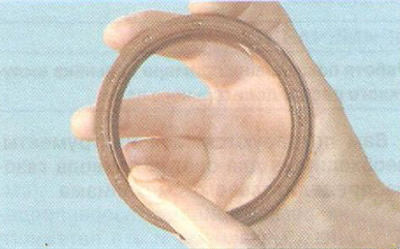
5. Using a screwdriver, remove the seal.


6. Lubricate the working lip of the new oil seal with engine oil...
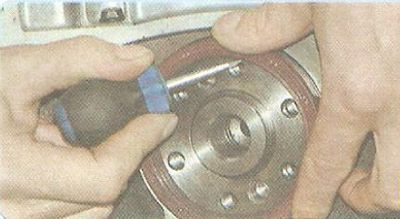
6. Lubricate the working lip of the new oil seal with engine oil...


7. ...install it into the cylinder block socket, orienting the working edge inside the engine, and carefully tuck the working edge onto the crankshaft journal.
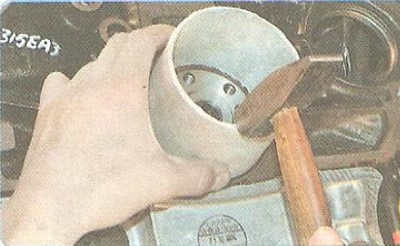


7. ...install it into the cylinder block socket, orienting the working edge inside the engine, and…


8. Press the oil seal into the seat until it stops, using a mandrel or an old oil seal as a mandrel.

9. Install the removed components in the reverse order of removal.

Note: When installing the flywheel, lubricate the threaded portion of the flywheel mounting bolts with Loctite or similar thread locking compound.


[The source of the article is available on the website: chevyman.ru]

The article was checked: Vladimir Romannikov
This article is available at russian, bulgarian, belarusian, ukrainian, serbian, croatian, romanian, polish, slovak, hungarian

Share information:

Previous articles
Cruze 1: Engine repair
Next articles

Replacing camshaft seals
Replacing valve stem seals
Replacing the cylinder head gasket
Replacing the cylinder head cover gasket
Removal, defect detection and installation of the flywheel
Replacing the oil pan seal
Replacing the intake manifold gasket
Replacing the exhaust manifold gasket
Removal, inspection and installation of camshafts
Replacing hydraulic compensators


See similar articles on the topic of Chevrolet cars:
Replacing crankshaft seals Chevrolet Aveo T300 (2012-2018)
Replacing windshield wiper blades Chevrolet Captiva 1 (2006-2018)
Replacing the front crankshaft oil seal Chevrolet Lacetti 1 (2002-2009)
Replacing the front crankshaft oil seal Chevrolet Lanos T150 (2002-2009)
Replacing fuses Chevrolet Niva 1 (2002-2016)
Crankshaft seals — replacement Chevrolet Tahoe 1 (1992-2000)
Replacing the front crankshaft oil seal Chevrolet Lumina 1 (1989-1994)
Link in different formats to this page


Visitor comments

No comments yet


How much will 43 + 44 =


Cruze 1 (2008-2016) 
  • General information
  • User manual
  • Troubleshooting
  • Maintenance
  • Power unit
  • Engine repair
  • Lubrication system
  • Cooling system
  • Exhaust system
  • Supply system
  • Control system
  • Transmission
  • Clutch
  • Car gearbox
  • Front wheel drives
  • Chassis
  • Front suspension
  • Rear suspension
  • Steering
  • Brake system
  • Body
  • Exterior (external elements)
  • Interior (internal elements)
  • Doors, covers and windows
  • Heating and air conditioning
  • Security systems
  • Electrical equipment
  • Equipment and devices
  • Power devices
  • Lighting and signaling
  • Electrical circuits


ChevyMan.ru © 2017-2026 · Mobile version · Feedback · Site search · Interesting to read · Sitemap: EN BG BY UA RS HR RO PL SK HU

Aveo 2003-2008 · Aveo 2006-2011 · Aveo 2012-2018 · Captiva 2006-2018 · Cruze 2008-2016 · Lacetti 2002-2009 · Lanos 2002-2009 · Niva 2002-2016 · Tahoe 1992-2000 · Tahoe 2000-2014 · Lumina 1 1989-1994 · Trailblazer 1 2001-2008 · Orlando 1 2010-2018 ·
🛡️ For your security and to improve our service, this site uses cookies. You can disable them in your browser.