
ChevyMan.ru
Mazda Mitsubishi Toyota Land Rover Honda Kia Nissan
English Русский
Български
Беларускі
Український
Српски
Hrvatski
Română
Polski
Slovenský
Magyar
|
Articles | Sitemap | Contacts |


Home   Aveo   Captiva   Cruze   Lacetti   Lanos   Niva   Tahoe   Others  
Captiva 1 (2006-2018)
  • Home
  • Captiva
  • 1 (2006-2018)
  • Chassis
  • Brake system
  • Bleeding the hydraulic brake system (Manual)

Bleeding the hydraulic brake system (Manual) (Chevrolet Captiva 1)

            0

Important: It is not possible to bleed the hydraulic modulator manually. If air has entered the ABS hydraulic modulator, or if an unfilled modulator is installed, a diagnostic tool must be used to bleed the brake system. Replacement modulators are supplied filled and bled. Air will not enter the modulator if the vehicle is subject to routine maintenance procedures that include the modulator, such as replacing the brake controller. In such cases, bleed the system according to the instructions in this section.


1. With the engine off, press the brake pedal several times to equalize the pressure in the vacuum booster with atmospheric pressure.

Important: If there is a suspicion that there is no air in the master cylinder, then bleeding should begin at step 11. If there is a suspicion that there may be air in the master cylinder, then the master cylinder should be bled starting at step 2.

Important: If there is a suspicion that there is no air in the master cylinder, then bleeding…


Note: Avoid contact with brake fluid on the paintwork as this may damage it.


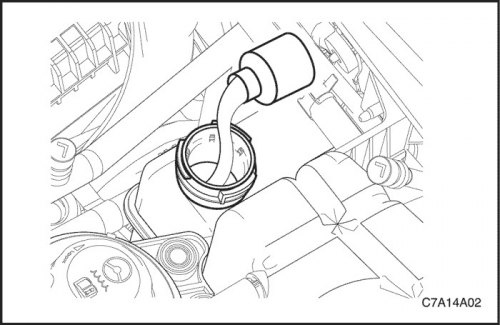
2. Fill the master cylinder reservoir with brake fluid. When bleeding, the master cylinder reservoir should be at least half full of fluid


2. Fill the master cylinder reservoir with brake fluid. When bleeding, the master cylinder…


3. Disconnect the brake line from the master cylinder.

4. Fill the master cylinder with fluid until it starts to flow out through the fitting.

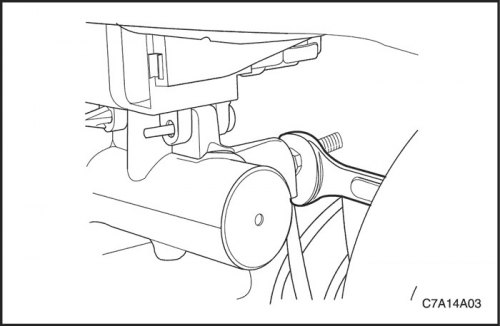
5. Reconnect the brake line to the master cylinder.
5. Reconnect the brake line to the master cylinder.


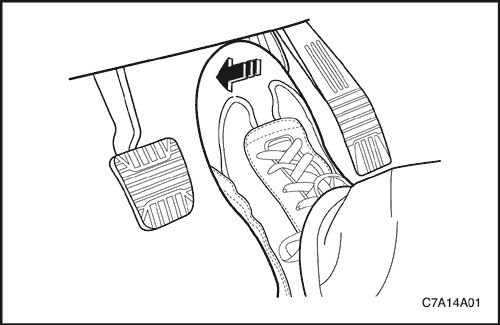
6. Slowly press the brake pedal and hold it in this position.
6. Slowly press the brake pedal and hold it in this position.


7. With the brake pedal depressed, loosen the brake pipe fastening at the top of the master cylinder to release air from the cylinder.


8. Lightly tighten the brake pipe fastener. Then slowly release the brake pedal. Wait 15 seconds before proceeding to the next step.

9. Repeat steps 6-8 as many times as necessary to completely remove air from the master cylinder cavity.

10. Tighten the brake pipe fastening.

Tighten

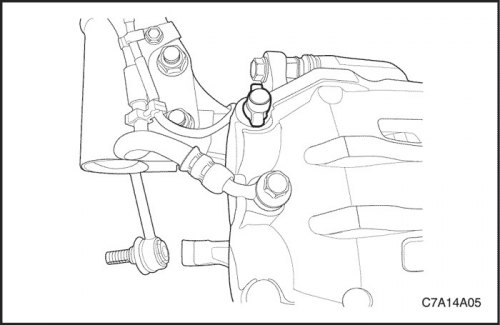
Tighten the brake pipe fastening to 16 Nm (12 ft·lbs).
Tighten the brake pipe fastening to 16 Nm (12 ft·lbs).


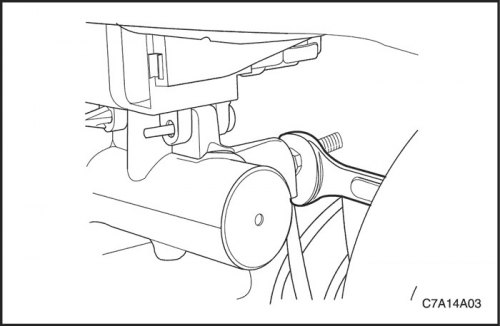
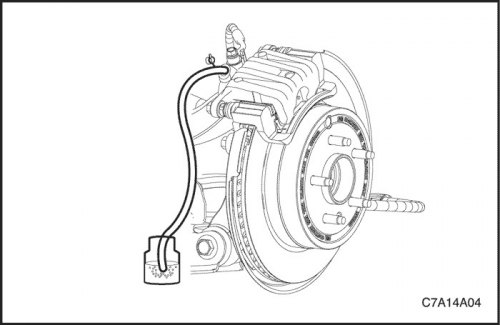
11. Install a transparent tube on the bleed nipple on the right rear caliper. Lower the end of the tube into brake fluid poured into a transparent container. After bleeding the right rear caliper in the sequence described below, you must perform this procedure using the bleed nipples on the left front, left rear, and right front calipers.
11. Install a transparent tube on the bleed nipple on the right rear caliper. Lower the end of the…


12. Slowly press the brake pedal and hold it in this position. When bleeding, do not press the brake pedal sharply.


13. While holding the brake pedal down, loosen the bleeder screw to release air from the caliper.

14. When the air bubbles stop coming out into the vessel, you should tighten the bleed nipple a little.

15. Release the brake pedal slowly. Wait 15 seconds before moving on to the next step.

Note: Avoid contact with brake fluid on the paintwork as this may damage it.


16. Repeat steps 12-15 as many times as necessary to completely remove the air. The air will be completely removed when air bubbles stop coming out into the container after loosening the bleed nipple. During bleeding, the master cylinder reservoir should be filled with fluid at least halfway

17. Tighten the bleed screw.

Tighten

Tighten the bleed nipple to 6 Nm (53 lbs.in).

18. Bleed the remaining calipers in the following order: left front, left rear, right front. Use the procedure consisting of steps 11-16.

19. After bleeding air through all calipers, check the brake pedal for "softness". If the brake pedal is not "hard", then repeat the entire bleeding procedure to eliminate this malfunction.

The article was checked: Vladimir Romannikov
This article is available at russian, bulgarian, belarusian, ukrainian, serbian, croatian, romanian, polish, slovak, hungarian

Share information:

Previous articles
Captiva 1: Brake system
Next articles

Diagnostics of the hydraulic brake system
Brake warning lamp electrical circuit
Technical characteristics of the hydraulic brake system
Rear wheel brake hose
Front wheel brake hose
Brake light switch
Brake pedal — removal and installation
General description and operation of the brake master cylinder


See similar articles on the topic of Chevrolet cars:
Bleeding the hydraulic brake system Chevrolet Aveo T300 (2012-2018)
Bleeding the hydraulic brake system Chevrolet Cruze 1 (2008-2016)
Bleeding the hydraulic brake system Chevrolet Lacetti 1 (2002-2009)
Bleeding the hydraulic brake system Chevrolet Lanos T150 (2002-2009)
Brake system Chevrolet Niva 1 (2002-2016)
Bleeding the brake hydraulic system Chevrolet Tahoe 1 (1992-2000)
Hydraulic brake system — bleeding Chevrolet Trailblazer 1 (2001-2008, petrol)
Link in different formats to this page


Visitor comments

No comments yet


How much will 39 + 37 =


Captiva 1 (2006-2018) 
  • Manual
  • Before leaving
  • Keys, doors and windows
  • Seats, protection systems
  • Instruments and controls
  • Lighting system
  • Information and entertainment
  • Navigation system
  • Climate control
  • Driving a car
  • Car care
  • Maintenance
  • Engine 2.0 l (diesel)
  • Engine device
  • Troubleshooting
  • Engine repair
  • Cooling system
  • Engine electrical equipment
  • Control and power systems
  • Exhaust system
  • Engine FAM II 2.4D
  • Engine device
  • Troubleshooting
  • Engine repair
  • Cooling system
  • Engine electrical equipment
  • Control and power systems
  • Exhaust system
  • Engine HFV6 3.2L
  • Engine device
  • Troubleshooting
  • Engine repair
  • Cooling system
  • Engine electrical equipment
  • Control and power systems
  • Exhaust system
  • Transmission
  • Front drive axle
  • Rear drive axle
  • Automatic gearbox - device
  • Automatic gearbox - service
  • Automatic gearbox - repair
  • Manual gearbox - device
  • Manual gearbox - service and repair
  • Clutch
  • Transfer case
  • Chassis
  • Car suspension
  • Brake system
  • Steering
  • Body
  • Heating and ventilation
  • Air conditioning (manual)
  • Air conditioning (automatic)
  • Seat belts
  • Airbags
  • Car seat
  • Interior (internal elements)
  • Exterior (external elements)
  • Doors and windows
  • Electrical equipment
  • Equipment and devices
  • Lighting and lamps
  • Windshield wipers and washers
  • Electrical circuits


ChevyMan.ru © 2017-2026 · Mobile version · Feedback · Site search · Interesting to read · Sitemap: EN BG BY UA RS HR RO PL SK HU

Aveo 2003-2008 · Aveo 2006-2011 · Aveo 2012-2018 · Captiva 2006-2018 · Cruze 2008-2016 · Lacetti 2002-2009 · Lanos 2002-2009 · Niva 2002-2016 · Tahoe 1992-2000 · Tahoe 2000-2014 · Lumina 1 1989-1994 · Trailblazer 1 2001-2008 · Orlando 1 2010-2018 ·
🛡️ For your security and to improve our service, this site uses cookies. You can disable them in your browser.