
Contents: Removal procedure ↧ Installation procedure ↧
Removal procedure
1. Raise and support the vehicle.
2. Remove the tire and wheel.
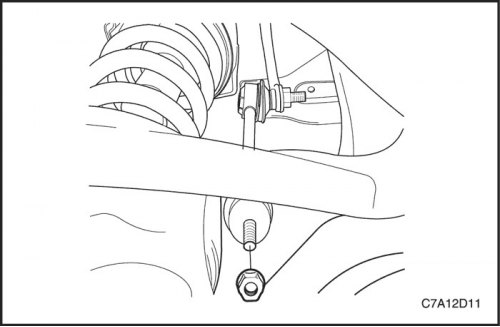
Important: Hold the strut with a wrench while removing the nut.
3. Remove the nut securing the stabilizer bar to the lower suspension arm.

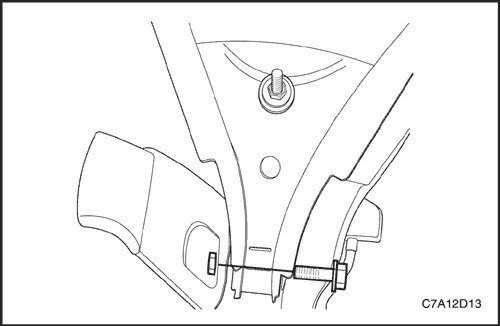
4. Remove the bolts securing the trailing arm bracket to the underbody.

5. Place a screw-type jack stand under the lower control arm.
6. Using a jack stand, compress the coil spring.
7. Remove the lower shock absorber mounting bolt.
8. Loosen the bolt securing the lower suspension arm to the support frame.
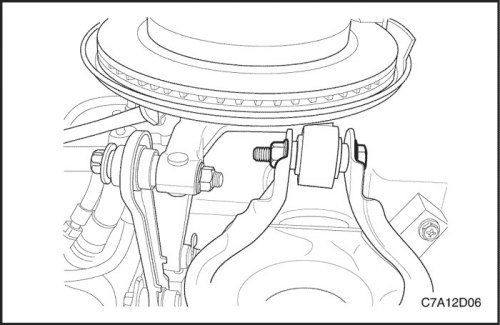
9. Remove the nut and bolt securing the lower control arm to the steering knuckle.
10. Lower the suspension arm to relieve the coil spring.
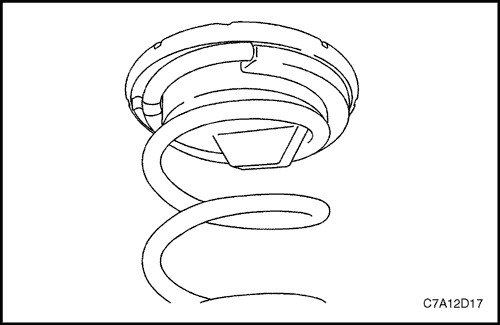
11. Remove the coil spring and insulators.
Installation procedure
1. Fully seat the upper and lower coil spring insulators onto the spring.
2. Attach the spring with rubber insulators to the vehicle.
3. Use a screw type jack stand to compress the spring.

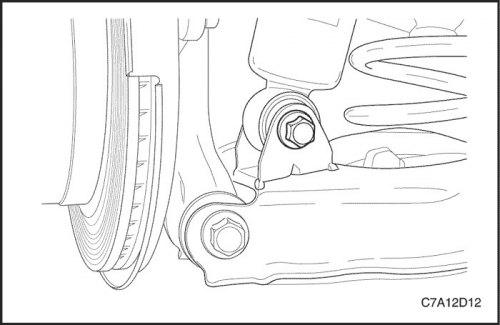
4. Install the steering knuckle onto the lower control arm.
Tighten
Tighten the lower control arm to steering knuckle mounting bolt to 160 Nm (118 ft·lbs).
5. Tighten the nut and bolt securing the lower control arm to the support.
Tighten
Tighten the bolt to a torque of 110 Nm (81 lb-ft).
6. Install the shock absorber on the lower suspension arm.
Tighten
Tighten the lower shock absorber mounting bolt to 110 Nm (81 lb-ft).
7. Remove the jack stand.
Important: Hold the strut with a wrench while installing the nut.
8. Install the stabilizer bar onto the lower suspension arm.
Tighten
Tighten the nut to a torque of 15 Nm (11 ft·lbs).
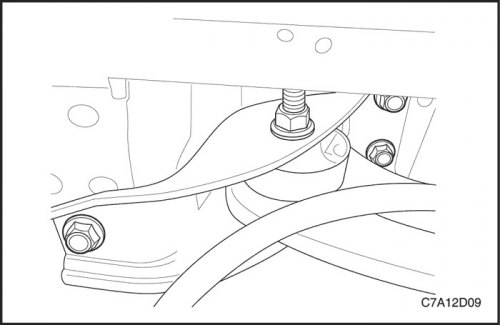
9. Press the trailing arm upward to align the front bracket mounting bolt to the body.
10. Use a drift to help align the bracket and install the remaining bolts.
Tighten
Tighten the bracket mounting bolts to the body until a torque of 110 N·m is reached (81 lb-ft).
11. Install the tire and wheel.
12. Lower the car.
13. Check the rear wheel alignment. See Part 2B. Wheel alignment.