


Replace the spring if it is mechanically damaged or has significantly settled. Signs of settlement:
- deterioration of ride smoothness, frequent suspension "breakdowns";
- visible tilt of the rear of the vehicle or significant difference in height between the front and rear parts that arose during operation;
- clearly visible traces of spring coil impact.
NOTE: Replace springs (left and right) in pairs. The work is shown using the left spring as an example. The right spring is replaced in a similar way.
1. If you are replacing the springs on a lift, place a support under the corresponding rear axle arm and lower the car, slightly loading the suspension. This operation is not required when working on an inspection pit.
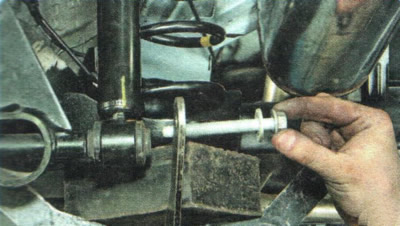
2. Unscrew the lower shock absorber mounting bolt from the bushing in the lever and remove it from the shock absorber eye.
WARNINGS: Do not move the shock absorber out to the side more than necessary to avoid bending the piston rod.
Do not disconnect the lower mounts of both shock absorbers from the rear suspension beam at the same time.
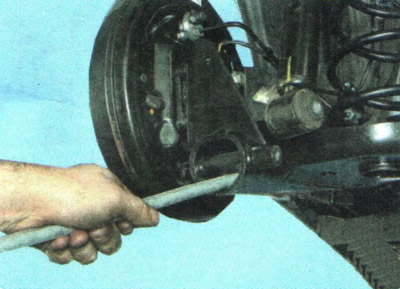
3. By slightly pressing down the suspension arm, relieve the spring...
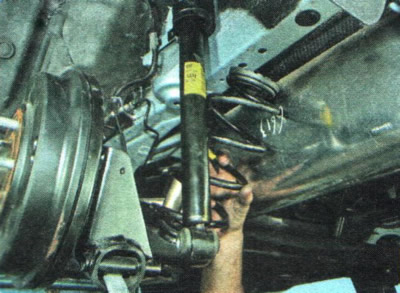
4. ...and remove it from the support cups.
WARNING: Remove and install springs with extreme caution to avoid the spring "shooting" out of the suspension and causing injury.
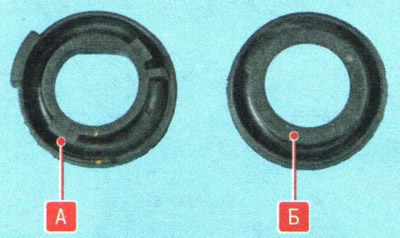
5. Remove the lower A and upper B spring pads. Replace damaged spring pads with new ones.
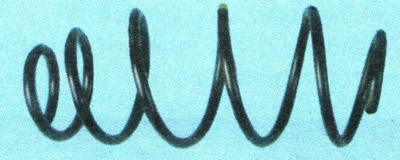
6. Install the spring with the spacers on the vehicle in the reverse order of removal. Finally tighten the nuts of the shock absorber lower lug mounting bolts with the vehicle standing on the ground.
7. Replace the second spring in the same way, but only after securing the lower eye of the shock absorber, disconnected when replacing the first spring.
NOTE: When installing the spring, make sure that the end of the lower coil rests against the special stop in the lower gasket.