
Contents: Storing your tire sealant and… ↧ Tire sealant ↧ Using a sealant and compressor kit… ↧ Using a sealant and compressor kit… ↧ The procedure for removing and… ↧
Storing your tire sealant and compressor kit
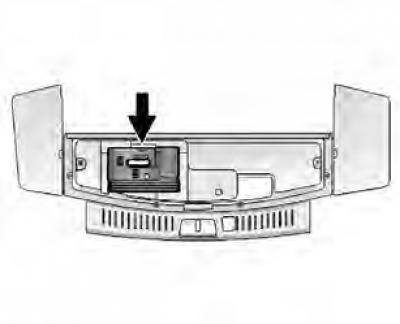
To remove the tire sealant and compressor kit:
1. Open the rear luggage compartment door.
2. Lift the lid.
3. Remove the tire sealant and compressor kit.
To reinstall the tire sealant and compressor kit, follow the above steps in reverse order.
Warning: Leaving the vehicle with the engine running in a closed area is dangerous. Exhaust gases may enter the vehicle's interior. Exhaust gases contain carbon monoxide (CO), which is colorless and odorless.
Inhalation of this gas can cause unconsciousness and even death. Do not leave the engine running if the vehicle is in a closed area without ventilation and fresh air.
Warning: If the air pressure in your tires is too high, your tires may explode and injure you or others. Read the instructions on your tire sealant and compressor kit and inflate your tires to the recommended pressure. Do not inflate your tires higher than the recommended pressure.
Warning: Storing the tire sealant and compressor kit or other tools inside the vehicle may cause injury. During sudden braking or a collision, loose items may fly around the vehicle and hit you. Keep the tire sealant and compressor kit in the designated place.
Cars with a tire sealant and compressor kit may not have a spare tire, tire changing tool, and some cars may not even have a spare tire compartment.
The sealant with compressor can be used to temporarily repair small punctures up to 6 mm (1/4 inch) in diameter in the tire tread area. It is also possible to use this kit for inflating tires.
If the tire has come off the rim, the sidewall of the tire is damaged, or the puncture is too large, the standard kit of sealant and compressor will not allow you to repair such a tire.
Review the manual that came with your tire sealant and compressor kit and follow all instructions provided.

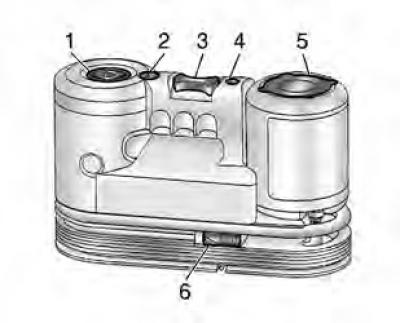
The kit includes:
1. Manometer
2. Pressure release button (white)
3. Selector switch
4. On/Off button (orange)
5. Can of sealant
6. Air hose (black hose with white tip)
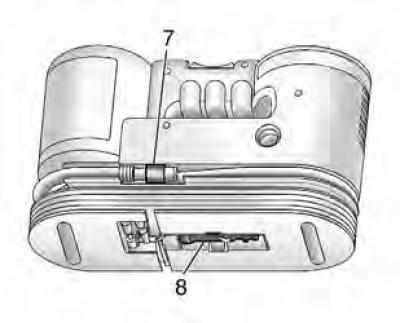
7. Hose for supplying sealant with air (transparent hose with orange tip)
8. Power cord
Tire sealant
Please read the safety precautions on the sealant can label.
Check the expiration date of the sealant indicated on the can. The can of sealant must be replaced with a new one before its expiration date.
A new can of sealant can be purchased from your nearest dealer.
The sealant in the cylinder is sufficient to repair only one tire. The used cylinder and the hose for supplying the sealant with air should be replaced.
Using a sealant and compressor kit to temporarily repair a flat tire
Before using the tire repair kit, consisting of sealant and compressor, in cold weather, it should be warmed up for five minutes.
This will allow the tire to fill faster.
If a tire gets punctured while driving, slow down and move to a level area to avoid further damage to the tire and wheel rim. Turn on the hazard warning lights.
Do not remove any foreign object that has punctured the tire.

1. Take out the tire sealant and compressor kit.
2. Unscrew the air sealant supply hose (7) and the power cord (8).
3. Place the kit on the ground. Make sure the valve on the wheel is close to the ground and the compressor hose can reach it freely.
4. Remove the valve cap from the punctured tire by turning it counterclockwise.

5. Attach the air sealant supply hose (7) to the valve. Turn it clockwise until it stops.
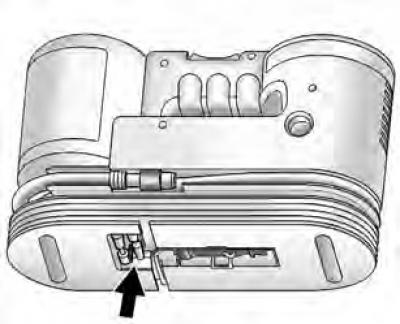
6. Insert the plug (8) of the compressor power cord into the auxiliary equipment power socket located in the vehicle interior. Disconnect all other auxiliary equipment from the other sockets.
If the vehicle is equipped with an auxiliary power outlet, do not use the cigarette lighter.
If the vehicle is equipped with only a cigarette lighter, the equipment can be connected via the cigarette lighter.
Do not pinch the power cord in a door or sliding glass.
7. Start the engine. The engine must be running while the compressor is in use.
8. Turn the selector switch (3) counterclockwise to the sealant and air supply position.
9. Press the on/off button (4) to turn on the compressor. The compressor will begin to pump a mixture of sealant and air into the tire. While the sealant from the can is being pumped into the tire, the pressure gauge (1) will show high pressure. Once all the sealant is in the tire, the pressure will drop quickly and then begin to rise again, indicating that only air is now being pumped into the tire.
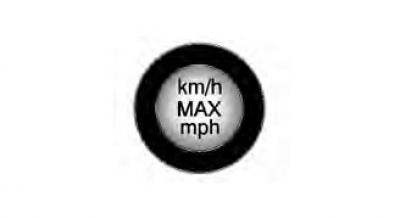
10. Inflate the tire to the recommended pressure, using the pressure gauge (1) as a guide. The recommended pressure is indicated on the tire data plate and the maximum permissible load.
While the compressor is running, the pressure gauge (1) may show a higher pressure than it actually is. To find out the actual air pressure in the tire, turn off the compressor. You can turn the compressor off and on again until the desired pressure is reached.
Warning: If the recommended value cannot be achieved within 25 minutes, the vehicle should not be used for further independent movement. The damage to the tire is too significant and cannot be repaired using sealant and a compressor. Remove the power plug from the socket and unscrew the hose from the tire valve.
11. Press the on/off button (4) to turn off the compressor. The tire will not be sealed and will continue to deflate until the vehicle starts moving and the sealant is evenly distributed over the entire inner surface of the tire, so steps 12-18 should be followed immediately after step 11. Handle the tire sealant and compressor kit with care as it may become hot during use.
equipment located in the vehicle's interior.
13. Remove the air sealant supply hose (7) from the valve by turning it counterclockwise.
14. Replace the tire valve cap.
15. Twist the air sealant supply hose (7) and the power cord (8) and put them in their places.
16. If you have managed to inflate the damaged tyre to the recommended pressure, remove the maximum speed sticker from the cylinder (5) and place it in front of you in a clearly visible place. Do not exceed the speed indicated on this sticker until you have repaired the damaged tyre or replaced it with a new one.
17. Put all used equipment back in their places.
18. Immediately start driving and drive 8 km to allow the sealant to distribute inside the tire.
19. Stop in a safe place, without violating traffic rules, and check the tire pressure. See points 1-11 in the section "Using a sealer kit and an inflating compressor (undamaged) tires".
If the air pressure in the tire has dropped by more than 68 kPa (10 psi) from the recommended pressure, you should not continue driving. The damage to the tire is too significant and cannot be repaired with sealant.
If the pressure has dropped no more than 68 kPa (10 psi) from the recommended pressure, re-inflate the tire to the recommended pressure.
20. Wipe off any traces of sealant from the wheel, tire and other parts of the car.
21. The used cylinder (5) and hose (7) for supplying sealant with air should be disposed of in accordance with local regulations or taken to the nearest dealer.
22. Replace the cylinder with a new one (purchased from a dealer).
23. After the puncture is repaired with a sealant, the vehicle can only be used for a limited time. You should contact your local authorized dealer to repair or replace the tire before the mileage on the repaired tire reaches 161 km.
Using a sealant and compressor kit for inflation (undamaged) tires without using sealant
The compressor can be used to inflate tires with air without sealant. To do this:
If a tire gets punctured while driving, slow down and move to a level area to avoid further damage to the tire and wheel rim. Turn on the hazard warning lights.
1. Take out the tire sealant and compressor kit.
2. Unscrew the air only supply hose (6) and the power cord (8).

3. Place the kit on the ground. Make sure the valve on the wheel is close to the ground and the compressor hose can reach it freely.
4. Remove the cap from the tire valve by turning it counterclockwise.
5. Place the air only supply hose (6) onto the valve and tighten it by turning it clockwise until it stops.
6. Insert the plug (8) of the compressor power cord into the auxiliary power socket located in the vehicle interior. Disconnect all other auxiliary equipment from the other sockets. If the vehicle is equipped with an auxiliary power socket, do not use the cigarette lighter. If the vehicle is equipped with only a cigarette lighter, the equipment can be connected via the cigarette lighter. Do not pinch the power cord in a door or sliding window.
7. Start the engine. The engine must be running while the compressor is in use.
8. Turn the selector switch (3) clockwise to the air only position.
9. Press the on/off button (4) to turn on the compressor. The compressor will begin to pump air into the tire.
10. Inflate the tire to the recommended pressure, using the pressure gauge (1) as a guide. The recommended pressure is indicated on the tire data plate and the maximum permissible load.
While the compressor is running, the pressure gauge (1) may show a higher pressure than it actually is. To find out the actual tire pressure, turn off the compressor. You can turn the compressor off and on again until the desired pressure is reached.
If the pressure in the tire after inflation exceeds the recommended value, it can be released by pressing the button (4) and holding it until the pressure gauge shows the required value.
This function only works if the hose (6) is used to pump air only.
11. Press the on/off button (4) to turn off the compressor.
Handle the tire sealant and compressor kit with care as it may become hot during use.
12. Remove the plug (8) of the compressor power cord from the auxiliary equipment power socket located in the vehicle interior.
13. Disconnect the air only supply hose (6) from the valve by twisting it counterclockwise and replace the valve cap.
14. Twist the air supply hose (6) and power cord (8) and put them in their places.
15. Put all used equipment back in their places.
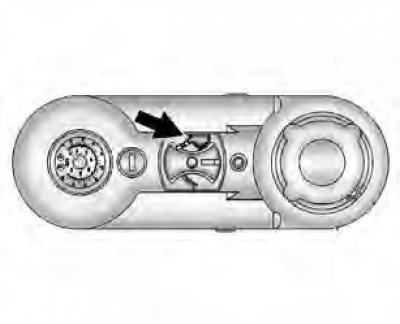
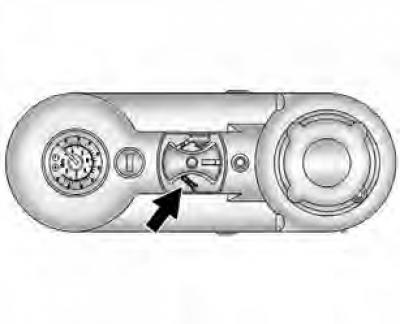
The tire repair compressor and sealant kit includes an adapter stored in a compartment at the bottom of the compressor that can be used to inflate air mattresses, balls, etc.
The procedure for removing and installing a cylinder of sealant
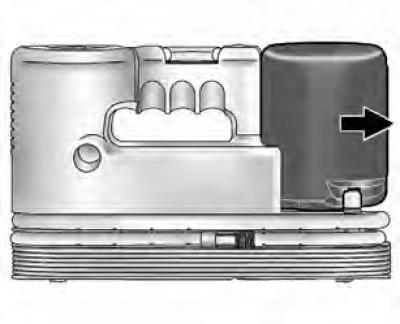
To remove the sealant can:
1. Unroll both hoses.
2. Remove the cylinder from the compressor body.
3. Disconnect the hose screwed onto the cylinder.
4. Replace the cylinder with a new one (purchased from a dealer).
5. Connect the hose to the cylinder and tighten it.
6. Install the new cylinder in place. Make sure that the cylinder is securely seated in the compressor housing.
7. Place both hoses in their places.