Contents: Removal procedure ↧ Installation procedure ↧
Caution! Do not smoke or use open flames in areas where work is being performed on the fuel system. When working on the fuel system, disconnect the negative battery cable except for those checks that require battery voltage.
Removal procedure
1. Remove the common rail assembly. See "Common Fuel Rail" in this section.
2. Clean the ramp regulator mating area using appropriate degreasing agents and dry with compressed air.
Note: Do not allow cleaning agents to enter the electrical connector.
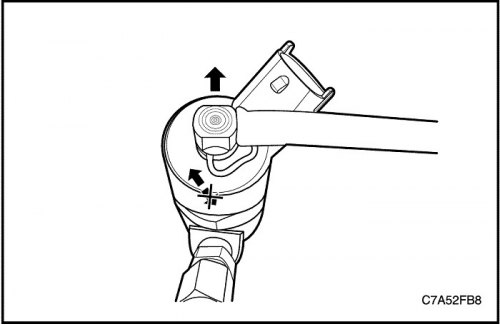
3. Loosen the component fastening using the WAF30 industrial wrench, grasp it with your hand and pull it out while turning it counterclockwise.
Installation procedure
Important: This common rail regulator and o-ring cannot be reused.
Caution! Do not blow air from a spray bottle inside the injector couplings, injection pump and threaded connections of the pipes of the common fuel rail. If dirty, wipe the dusty area with oiled paper.
Caution! Do not wipe with napkins inside the injector couplings, injection pump and threaded connections of the pipes of the common fuel rail. If dirty, wipe the dusty area with oiled paper.
1. Inspect and clean the threads and sealing surface of the ramp.
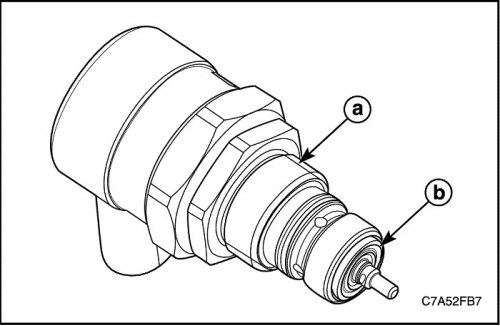
2. Inspect and clean the threads (a) and the cutting edge (b) of the common rail regulator.
Note: Inspect the sealing surfaces of the DRV and the rail or high pressure pump. Only concentric grooves are acceptable. Any cuts in the radial direction are unacceptable. Inspect the Torx or flange screws for any damage.
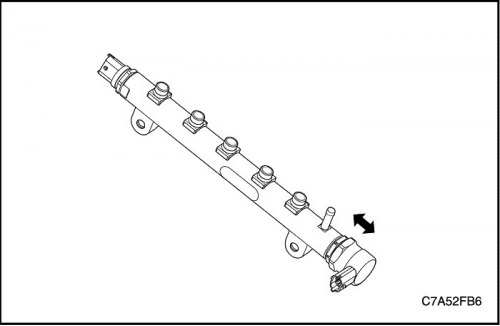
3. Lubricate the sealing rings with fuel.
4. Install the common rail regulator using a WAF30 industrial wrench, holding the hexagonal part of the housing from turning back with a WAF35 wrench.
Tighten
Tighten the common rail regulator to 60 Nm (44.3 ft·lbs), turn the adjuster 90 degrees in the opposite direction and tighten to 85 Nm (62.7 ft·lbs).
5. Perform fuel bleeding. See "Pumping fuel" in this section.