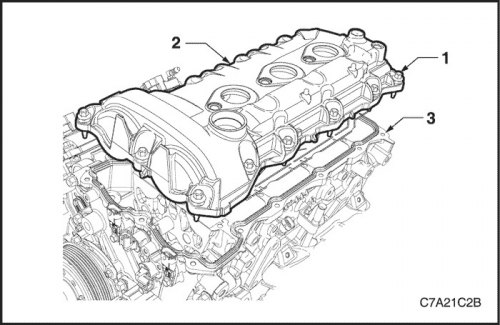
Removal procedure
1. Turn the accessory drive belt tensioner clockwise to decrease the belt tension.
2. While holding the tensioner in the reduced tension position, disconnect the belt.
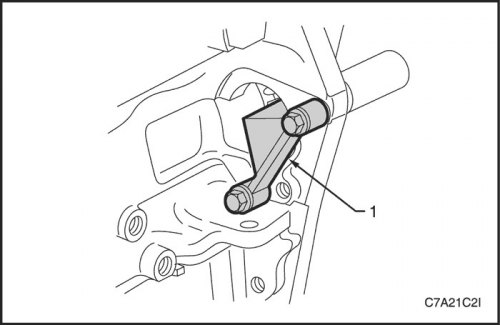
3. Remove the starter. See Part 1E3, Engine Electrical - HFV6 3.2L.
4. Install the EN-46106 tool (1) onto the starter bore to prevent the camshaft from rotating.
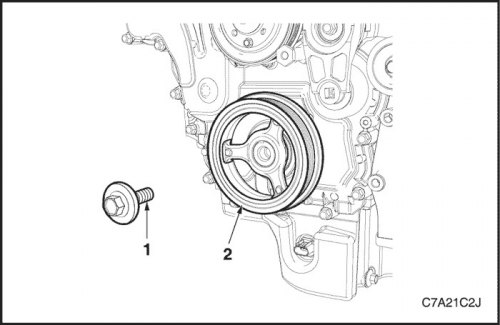
5. Remove the bolt (1) securing the crankshaft pulley (2) to the crankshaft.
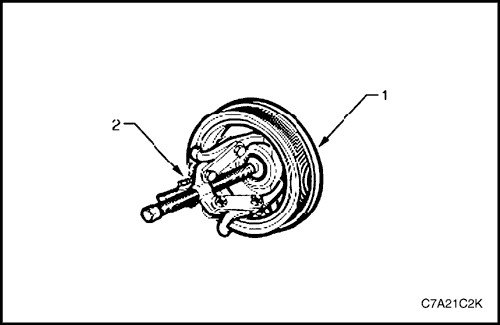
6. Remove the crankshaft pulley assembly (1) from the crankshaft using a J-41816 3-Jaw Puller (2) or equivalent.
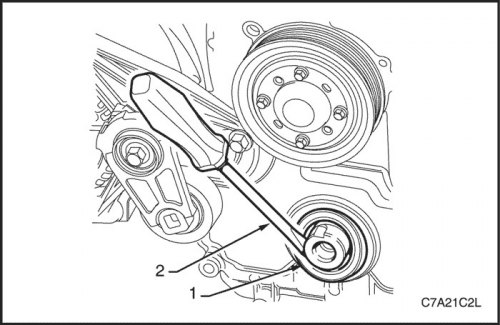
7. Using a flat-bladed tool (2), carefully remove the front crankshaft seal (1) from the front cover.
Cleaning and inspection
1. Clean the crankshaft pulley assembly using a suitable commercially available non-corrosive cleaning solvent and a soft bristle brush.
2. Dry the crankshaft pulley assembly with compressed air.
3. Inspect the crankshaft pulley assembly for the following faults:
- Wear or damage to the inner surface that contacts the crankshaft.
- Wear, grooves or scratches on the sealing surface.
- Wear, separation of the base material from the base and general deterioration of the rubber ring between the hub and the pulley.
- Damage to the pulley guide ribs.
Installation procedure
Caution! Do not lubricate the front crankshaft oil seal or the sealing surfaces of the crankshaft pulley. The crankshaft pulley must be installed on a dry seal.
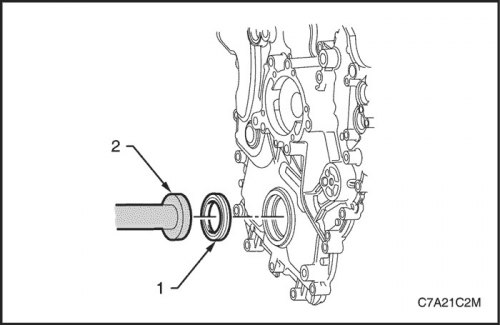
1. Using J-29184 Crankshaft Front Oil Seal Installer (2) and a suitable hammer, install a new crankshaft front oil seal (1) until it is fully seated in the front cover.
2. Lubricate the crankshaft pulley hub hole.
3. Install the crankshaft pulley onto the shaft, but not all the way.
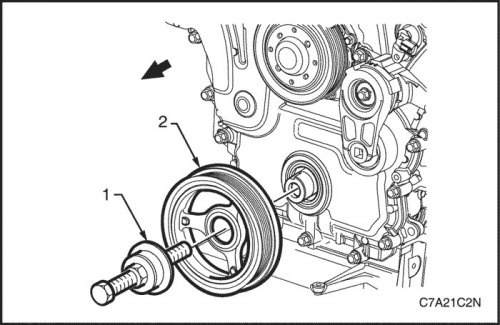
Caution: To avoid damaging the crankshaft threads, fully insert the J-41998-B pulley installation tool (1) into the crankshaft before pressing in the pulley and balancer assembly.
4. Using tool J-41998-B (1), install the pulley completely onto the crankshaft.
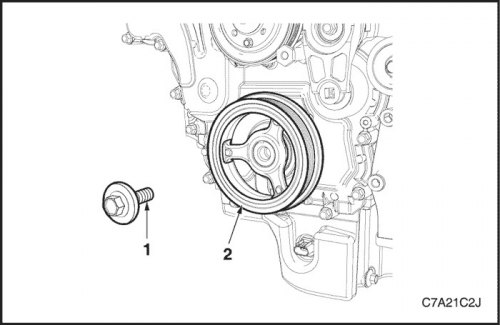
5. Lubricate the threads of the new crankshaft pulley retaining bolt (1) with Loctite 272 or equivalent.
6. Install the crankshaft pulley retaining bolt.
Tighten
Tighten the crankshaft pulley assembly lock bolt to 100 N·m (74 lb-ft) and turn the bolt another 150° using the angular torque gauge KM-470-B.
7. Install the starter. See Part 1E3, Engine Electrical - HFV6 3.2L.
8. Install the auxiliary drive belt.