


Contents: Removal ↧ Installation ↧
Removal
1. Remove the air conditioning compressor belt.
2. On early model engines, remove the lower fan diffuser; on late model engines, remove the radiator fan together with the diffuser.
3. Remove the starter.
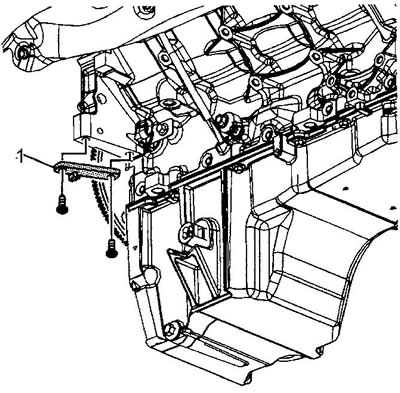
4. Install the crankshaft retainer (1) on the M10x1.5 bolts 120 and 45 mm long. The retainer tooth should fit between the flywheel ring teeth. Tighten the mounting bolts. Tightening torque 50 Nm.
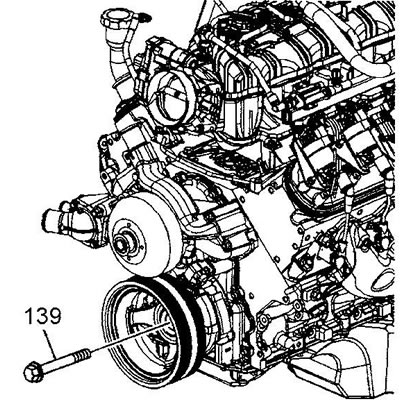
5. Unscrew the bolt (139) securing the crankshaft pulley. The bolt is not reinstalled, but it will be useful when installing the pulley in place.
6. Using a puller, remove the pulley.
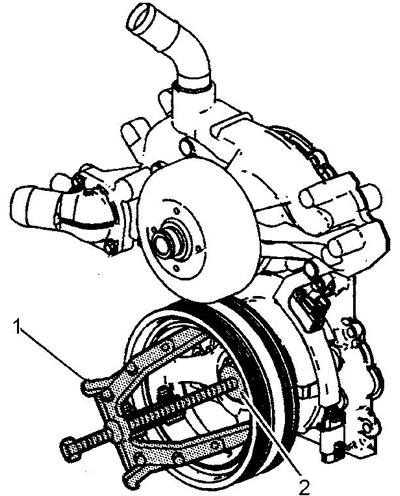
1 - puller, 2 - support
Installation
Note: tightening the crankshaft pulley mounting bolt is done in four passes. The first pass uses the OLD mounting bolt, the rest use the NEW bolt.
1. Install the pulley on the nose of the crankshaft as straight as possible.
2. Using a special mandrel, press the pulley onto the nose of the crankshaft.
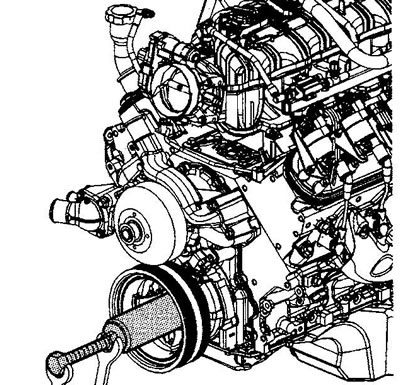
3. Install the OLD pulley mounting bolt. Tighten the bolt. Tightening torque is 330 Nm.
4. Remove the old bolt.
Note: the crankshaft nose must be recessed relative to the end of the pulley by 2.4-4.5 mm.
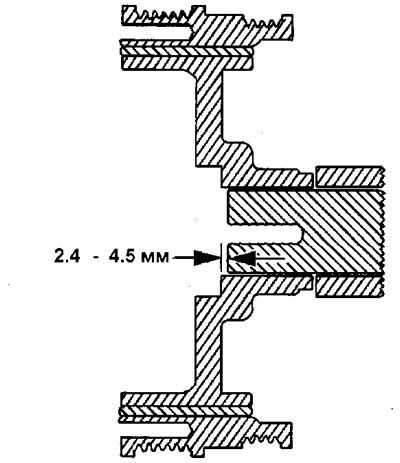
5. Check the amount of recession of the crankshaft nose relative to the pulley end. If the recession is outside the permissible limits, repeat step 2.
6. Install the NEW pulley mounting bolt. Tighten the bolt in two steps. Tightening torque: 1st pass 50 Nm; 2nd pass, turn 140°.
7. Remove the crankshaft lock.
8. Install the starter.
9. Install the radiator fan and fan diffuser.
10. Install the air conditioning compressor drive belt.
11. Perform the variable valve timing system learning procedure.
[The source of the article is available on the website: «chevyman.ru»]