


Contents: Removal procedure ↧ Disassembly ↧ Clear ↧ Inspection ↧ Assembly ↧ Installation procedure ↧
Removal procedure
1. Remove the engine assembly. Follow step "Engine assembly" in this section.
2. Remove the cylinder head covers. See "Cylinder head cover" in this section.
3. Remove the crankshaft pulley assembly. See "Crankshaft pulley" in this section.
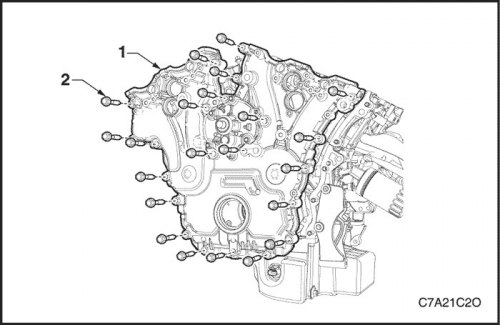
4. Remove the camshaft position sensors and the valve timing actuator valves. See Section 1F3, Engine Controls - HFV6 3.2L.
5. Remove the bolt (2) securing the (22 places) front cover (1).
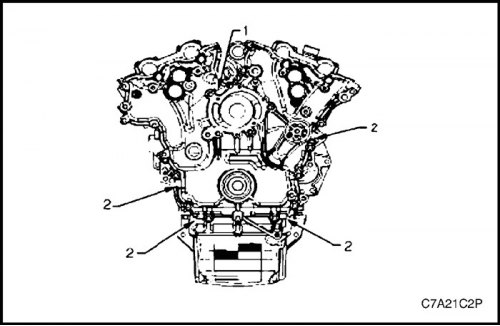
Caution! To remove the front cover, use only the points provided for pressing the cover with a lever and the release screw screwed into the hole provided for it.
6. Screw a suitable forcing screw into the hole provided (1).
7. Using the points (2) provided for pressing the cover with a lever and the release screw, separate the cover held in place by the sealant (RTV).
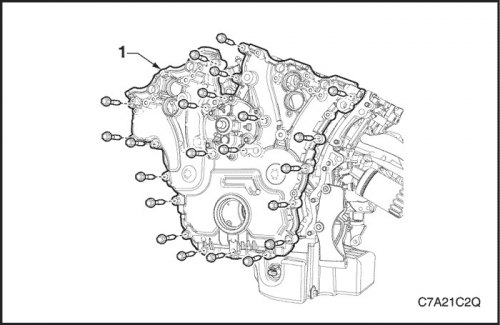
8. Remove the front cover assembly (1).
Disassembly
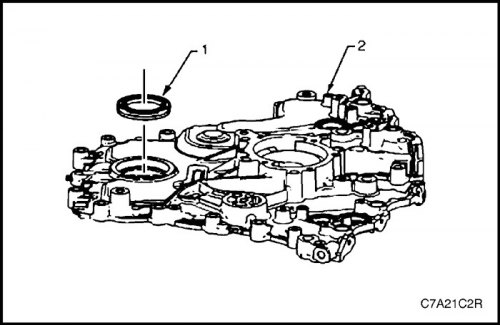
1. Remove the front crankshaft oil seal (1) from the front engine cover (2) using a flat-bladed tool. Discard the seals.
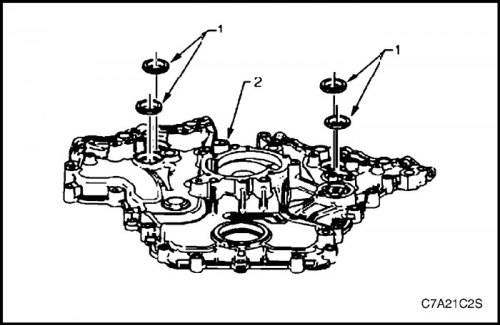
2. Remove the valve timing control valve seals (1) from the front engine cover (2). Discard the seals.
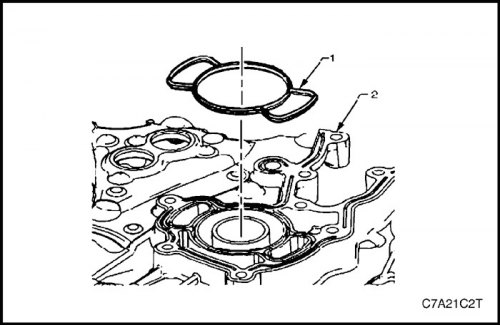
3. Remove the coolant pump seal (1) from the engine front cover (2) and discard the seal.
Clear
Caution! Do not use a sharp scraper or metal gasket to clean the sealing surfaces.
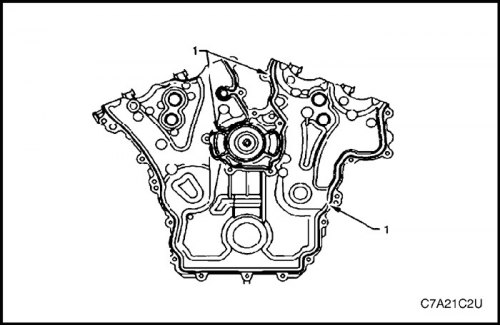
1. Remove the RTV sealant (1) from the front engine cover using a plastic or wooden scraper.
2. Remove all dirt from bolt holes.
3. Clean the front cover using a suitable cleaning solvent.
4. Dry the front cover with compressed air.
Inspection
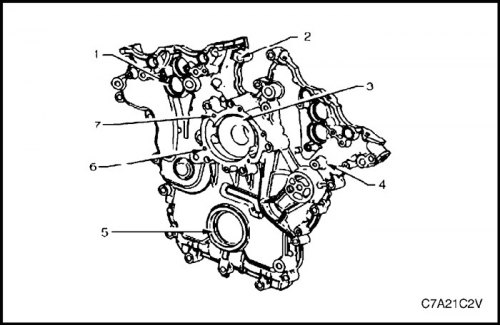
1. Inspect the front engine cover on both sides for the following faults:
- damage to the seats (1) intended for the valve timing drive seals,
- damage to bolt holes (2),
- damage and/or corrosion of coolant passages (3),
- dents or damage to the outside of the lid (4),
- damage to the hole (5) for the front crankshaft oil seal,
- chipping or damage to the sealing surfaces of the coolant pump (6), and
- damage to the threads (7) of the holes for the coolant pump bolts.
2. Repair or replace the front cover if necessary.
Assembly
Caution! Do not lubricate the front crankshaft oil seal or the sealing surfaces of the crankshaft pulley. The crankshaft pulley must be installed on a dry seal.
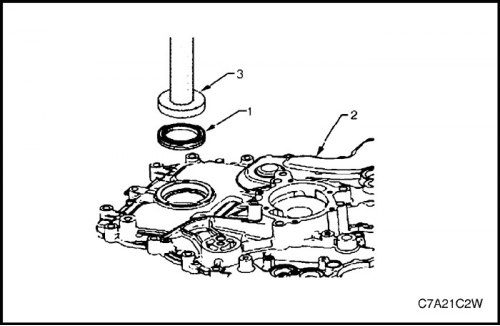
1. Install a new crankshaft front oil seal (1) into the front cover (2) using tool J-29184 (3) and a suitable hammer.
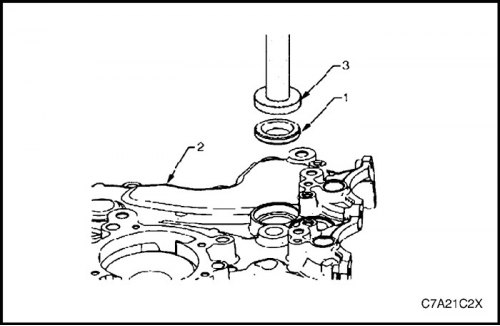
2. Install a new valve timing actuator valve seal (1) into the front cover (2) using the EN-46103 tool (3) and a suitable hammer.
Installation procedure
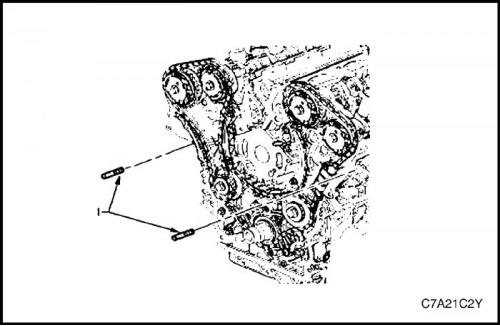
1. Install EN-46109 guide pins (1) into the cylinder block (two places).
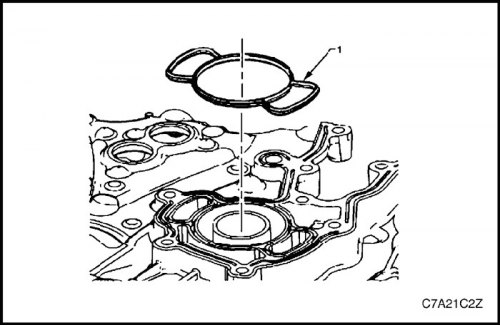
2. Install a new cylinder block seal (1) onto the engine front cover.
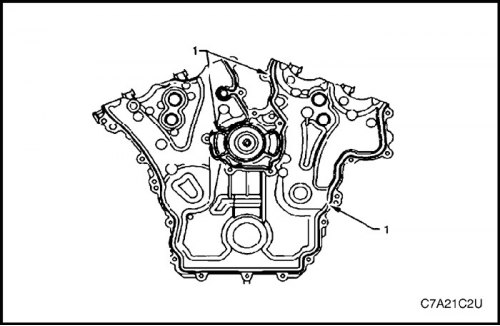
3. Apply RTV sealant (1) to the front cover.
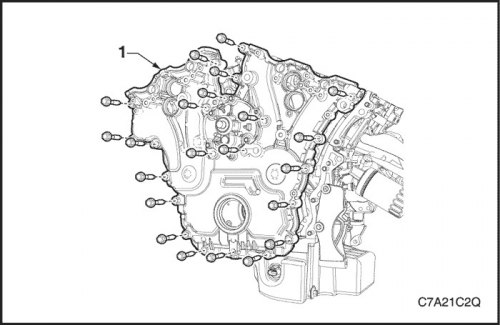
4. Place the front cover on the special device and install it in place.
5. Remove the special tool from the cylinder block.
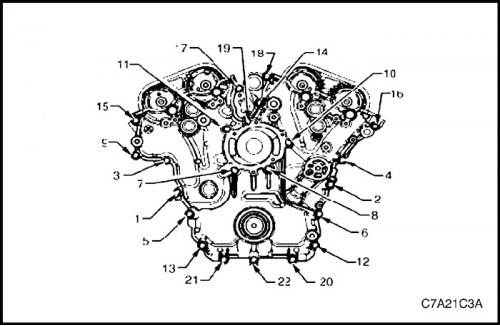
6. Tighten the front engine cover bolts in the sequence shown.
Tighten
Tighten the front engine cover bolts to 23 N·m (17 lb-ft).
7. Install all previously removed external parts.
8. Install the engine assembly. Follow step "Engine assembly" in this section.