Contents: Removal procedure ↧ Installation procedure ↧
Necessary equipment
DW 110–060 Engine clamping fixture
Removal procedure
Caution: Raise the engine sufficiently to relieve the load on the front suspension assembly of the transmission and final drive, otherwise damage to the suspension and failure of the lifting equipment may occur.
1. Remove the decorative engine cover. See "Decorative Engine Cover" in this section.
2. Support the engine assembly using the DW110-060 engine clamp.
3. Remove the transfer case. See Part 5D. "Transfer case".
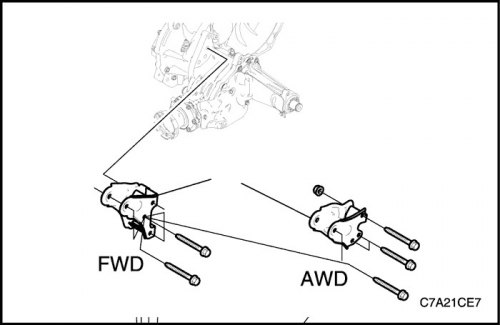
4. Remove the tie bolt securing the gearbox assembly to the rear suspension bracket.
5. Remove the gearbox mounting bracket retaining bolts and nuts from the gearbox.
6. Remove the rear suspension bracket of the gearbox with the final drive assembly.
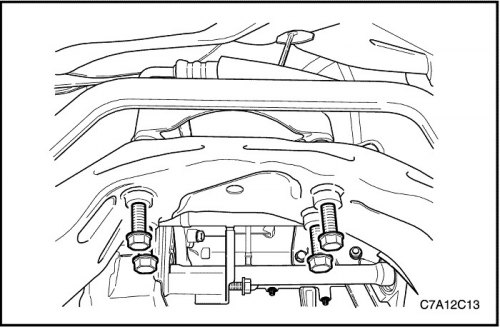
7. Unscrew the locking bolts of the rear suspension of the gearbox with the main gear assembly from the support.
8. Remove the rear suspension of the gearbox with the final drive assembly.
Installation procedure
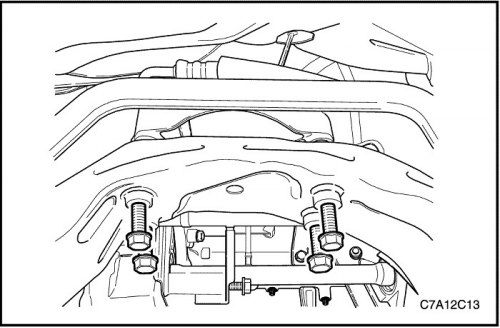
1. Install the rear suspension of the gearbox with the final drive assembly on the support.
Tighten
Tighten the transaxle rear mount retaining bolts to 90 N·m (66 lb-ft).
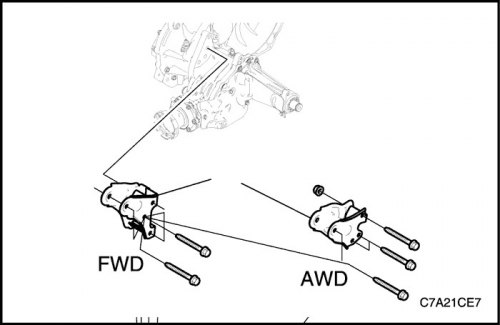
2. Install the gearbox rear suspension bracket with the final drive assembly onto the gearbox.
Tighten
Tighten the transaxle rear mount bracket retaining bolts to 90 N·m (66 lb-ft).
Caution: Before tightening the rear transmission mount clamp bolt, move the engine assembly back and forth or side to side to ensure proper installation.
3. Install the tie bolt securing the rear suspension of the gearbox with the final drive assembly.
Tighten
Tighten the rear transaxle mount to bracket pinch bolt to 90 N·m (66 lb-ft).
4. Install the transfer case. See Part 5D. "Transfer case".
5. Remove the engine assembly fixture DW110-060.
6. Install the decorative engine cover. See "Decorative Engine Cover" in this section.